Defeat Ludwig and activate the Underground Corpse Pile lamp, then head up the stairs on the far side of the room and search the body to the right to obtain three Blood Vials. Continue through the doorway and up the stairs on the opposite side, and head down the hallway to the right.
There are two enemies at the end of the hallway. One wheelchair enemy with a gun and a Gravekeeper with a staff. You don’t want to fight both at once if you can avoid it. Either run past the Gravekeeper to quickly take down the wheelchair enemy, or lure the Gravekeeper away from the wheelchair enemy.
Once both enemies are down, look in the first cell to the left to find a corpse on the bed that holds a Frenzied Coldblood (9), then head down toward the end of the hall, past the gate on the left, and enter the last cell on the right and search the corpse inside to find the Fist of Gratia offhand weapon.
If you wish to talk to a prisoner, turn around and head through the gate you just passed, then down the stairs. If not, continue to the end of the hallway and up the stairs, then turn around when you reach the top to see three Rodents of Unusual Size in the small alcove. Use a pebble to lure them out separately so you don’t have to fight them all at once. They will leap at you from a distance, but otherwise they should go down with ease.
Move into the alcove and search the body on the right to find a Blood Stone Chunk. Head to the other side of the room and examine the body on the bed to the left to find a Great One’s Wisdom, then slowly move toward the end of the room. You can see one enemy directly ahead, but there’s a second enemy off to the right. The enemy directly ahead is a Wizard that will fire damaging spells in your direction. The other enemy use Ludwig’s Holy Blade and will move in to attack.
Keep your distance so you can fight them separately, but keep in mind the Wizard will continue to move toward you if you remain in the room. Move back down the stairs if you have to. This will give you enough room so that the Wizard doesn’t continuously follow and you can fight the other enemy alone. Both enemies have quite a bit of health, so it’s unlikely you’ll be able to take them down quickly.
Once both enemies have been defeated, move toward the statues on the far side of the room and insert the Eye Pendant you found near the beginning of the DLC. This triggers a cut scene that activates the elevator. When you reach the next floor up, activate the Research Hall lamp.
Research Hall
Head up the stairs and quickly look to the left to see an Imp scurrying away. Kill it to obtain two Blood Stone Chunks, then look to the right to see a create rummaging in the pool. The creature is looking for his eyes, but before you help him out, circle around the pool (don’t walk through it) to the adjacent stairs to see another Imp.
Take down the Imp to obtain two more Blood Stone Chunks, then quickly move into the pool and grab the Blue Elixir from the corpse near the middle. The pool is filled with poison, so the longer you stand in it the closer you’ll get to being poisoned. However, an antidote will quickly take care of that problem.
There’s a door on the far side of the room, but it’s locked at the moment. Head up the stairs near the entrance and take out the bad head creatures at the top. These enemies aren’t overly difficult to deal with, but they do have a few lunging attacks that cover a moderate distance. Their main attack causes them to swing five times as they run toward you, but in most cases you can stun them with a weapon such as Ludwig’s Hold Blade.
At the top of the first flight of stairs, continue up the second flight of stairs to the right and then down the hallway to the left. Near the end are two more enemies, with a few more in the adjacent room that will attack once you engage the two at the end of the hallway. Take out the enemies, then search the corpse at the end of the hallway to find two Blood Vials. Watch behind you as the enemies from the room on the far side of the hall may come up behind you.
If you want a few easy Blood Echoes, open the door to the right of the Blood Vials and take out the “enemies” on the beds. They won’t put up a fight, but you’ll get the Blood Echoes for killing them. Head out of the room and back down the hall, into the room on the left near the top of the stairs. Inside there are a plethora of bag head enemies inside and on the second floor of the room.
As you move into the room, the enemies on the second floor will throw oil at you, then come down the stairs. Back out of the room so you don’t have to fight them all at once. While these enemies aren’t difficult to take down, when there are a six or seven at once, they can be difficult to handle.
Finish off all of the enemies, then look in the corner of the bottom floor to find three Sedatives. Head up the stairs and up the ladder in the next room. There’s another enemy here who resembles the enemies you’ve been facing this whole time, but he’s much stronger and has a weapon in his hand that has deceptive range. It’s very difficult to stun this enemy with normal attacks, so use your gun to stun him for a visceral attack. If you have difficulty with that, you may want to use a hit and run strategy to play a bit safer.
Kill the enemy and collect the five Blood Vials in the corner, if you head through the doorway in the corner and climb down the ladder you’ll end up back where you just came from. Instead, head up the stairs to the left (ignore the doorway in the opposite corner for now). Open the door and continue down the hallway to the right. Collect the two Antidotes on the balcony, then watch for enemies on the stairs to the left before you head into the room at the end of the hallway on the right. You don’t need to take out the wheelchair gunmen at the top of the stairs just yet, but you don’t want to get attacked from behind by the enemies patrolling the stairs.
Head into the room at the end of the hallway and attack the enemy waiting to the left of the entry. Finish off the second enemy in the room, then collect the three Quicksilver Bullets on the corpse on the far side of the room. Continue up the stairs to the right and pick up the Dirty Damp Blood Gem (5) on the balcony.
Go back out to the large staircase you just passed and head up as you watch out for the wheelchair enemy with the Gatling Gun near the top. Quickly run past the enemy and then head down the next flight of stairs once you reach the top. This brings you down to the hallway where the Gatling Gun enemy is located so you can finish him off. Watch out for a trap on the floor by the bookshelf as you approach the enemy.
Take him down and continue around the corner and over to the far side of the room. Kill the headless enemies with visceral attacks from behind. They can’t see, but if you attack from the front they will attack relentlessly until they’re dead. Watch out for the trap as you head past the closed door on the left and to the end of the balcony and pick up the four Blue Elixirs.
Turn around and head into the door you just passed. There are four blob-like enemies here. One will drop in behind you once you enter the room so be ready for it. If it falls on your head you will take significant damage. Wait for the one to sneak up behind you and attack it before you engage the others. Once it’s down, attack the other enemies one at a time with a long range weapon such as the Hunter Axe. As long as you don’t remain in close proximity to the enemies, you won’t have much to worry about.
Pick up the Blue Elixir and Enlarged Head on the far side of the room, then head back around the balcony to the foot of the stairs. Head back up the first flight of stairs you came down when you got to this floor, then continue up the next flight of stairs to the right and take out the enemy at the top with gunshot stuns and visceral attacks. Climb up the ladder at the end to reach the beams above. Be careful here as it’s very easy to fall. There are two Rodents of Unusual Size that patrol the rafters here. Move toward the item near the middle of the area, but as you approach a crow will drop down from above.
Kill the crow, then collect the Great One’s Wisdom and continue to the far side where you find what looks to be an enemy. It won’t attack you, but as you approach a crow will drop from above. Kill the crow, then look to the right to find two more crows and a Blood Stone Chunk in the far right corner.
Head back to the large circular platform in the middle of the area and use the lever to reach the top. Make note that this changes the configuration of the entire area as all the stairs will be raised one level. Head back in the direction you came, only this time you’re on a higher platform. Look to the far left to see a brain creature that will not attack you. Kill it to obtain a Brain Fluid item, then take the ladder in the back corner down to the floor below and continue down the stairs.
When you hit the middle platform, go down the stairs to the left, take out the crows below and open the chest to find a Finestrike Damp Blood Gem (5). Go back up the first flight of stairs to the middle platform, then continue down the stairs to the left and you may find two rapidly moving enemies depending on how many enemies you killed on the way up. Make quick work of them and you’ll find yourself near the wheelchair enemy that had the Gatling Gun.
Move back around to find that the layout has now changed. A Hunter is waiting on the first set of stairs on the far side (near where the wheelchair enemy was located). Don’t worry about the blob enemy on the platform below as it won’t attack. Your best course of action against the Hunter is to simply knock it off the platform. If you attack too much it will stun you and inflict significant damage with a visceral attack. You can stun the Hunter if your timing is good, or you can attack sparingly as you dodge to avoid his attacks, which include poison knives. It’s far easier to simply knock him off the edge, just make sure you don’t fall off the edge yourself.
Kill the Hunter (who drops Sedatives), then kill the blob-like enemy to obtain another Brain Fluid item, then head back up to the balcony and go left until you reach a doorway on the right, near the end. Open the door and take the elevator down to the floor below. There are three wheelchair enemies here. Take them out, collect the six Beast Blood Pellets on the corpse at the end of the room, then pull the lever to the elevator across the room and step inside (ignore the ladder going down the hatch for now).
The person in the corner of the next room asks for Brain Fluid. Give her one of the Brain Fluids to receive the Blood of Adeline in return. You cannot receive the Blood of Adeline if you still have the blood of another Saint in your inventory. You may still have the Blood of Arianna that you picked up earlier in the main game. If you do, you’ll have to use it before you can collect the Blood of Adeline.
Head through the door to find yourself in a room that looks strangely similar to the room near the last lamp. In fact it’s the same room, but since you moved that platform upward (where the crows were), it has changed the configuration of the entire building. Kill the enemies in the area and collect the Kin Coldblood (10) and Lethal Damp Blood Gem (5) from the corpses in the poison pool in the middle.
At this point you need to leave the area (via the lamp) and come back before you can complete the area. If you still wish to explore there are a few more items you can pick up, but to continue you need the Balcony Key from the woman you just gave Brain Fluid to. You can’t get that until you give her a second Brain Fluid, which won’t happen until you’ve left and returned. In some cases you may need to leave and return twice (as well as possibly use the first Blood of Adeline) to make her give you the Balcony Key. You’ll know when she’s ready because she’ll speak as soon as you approach. The Balcony Key opens the door in the corner of the first room, up the stairs from the lamp.
If you’d still like to explore a bit, head back up the elevator, then head down the ladder in the hatch you passed earlier in the room with the wheelchair enemies. There are two enemies on the lower floor, but they’re not quite the same as the enemies you’ve been fighting. They may be crawling on the ground, but they’re far more agile than any of the other enemies. They will jump great distances to attack you and they move very quickly. Luckily, they don’t have more health than the other enemies, so you can take them out easily once you catch them.
Search the two corpses to find two Blood Vials, the Decorative Old Hunter Garb and the Decorative Old Hunter Trousers. Open the door on the far side of the room, then head left down the hallway and take out the enemy at the end. Search the corpse at the end of the hallway to find a Frenzied Coldblood (9).
If you head up the stairs on the other side of the hallway you’ll only find two Rodents of Unusual Size and a dead end waiting for you. Instead, head back up the ladder in the hatch and through the door. Kill the Gravekeeper just outside with his back is to you. This allows you to sneak up behind him for a visceral attack.
Watch out for the trap switch on the ground and search the corpse at the end of the balcony to find a Madman’s Knowledge, then go back to where you fought the Gravekeeper and drop down to the stairs below. Head left to find another enemy on the platform and a corpse that holds the Loch Shield. Head back up the stairs and continue up the stairs directly ahead (not the staircase to the left). Kill the enemies on the floor above, then collect the item to the far left to find four Quicksilver Bullets.
Make your way through the doorway at the end of the balcony and attack the enemy that attempts to ambush you from the right. Search the corpse here to find the Underground Cell Key. As a note, the Underground Cell Key opens several cells in the hallway you went through after defeating Ludwig. Coming from the boss battle, the door at the top of the stairs houses and NPC that can be killed if you so desire. The first door on the right contains a Frenzied Coldblood (9). There’s a Hunter in the cell on the left just after the gate with the stairs heading down. Defeat the Hunter to obtain the Church Pick weapon.
After collecting the Underground Cell Key, head back down the stairs to the middle platform and continue up the stairs to the right. Go left when you reach the top of the stairs, then head down the hallway near the end of the balcony and drop down into the elevator below. You’ve been here before. Head into the next room and continue into the elevator on the far side. Exit out the door to the right to get back to the room you started in.
Before you use the Balcony Key to open the door in the far corner, use the lamp to go back to Hunter’s Dream, then head to the Underground Corpse Pile lamp where you fought Ludwig. To the left of the stairs is Ludwig’s head. Examine it to obtain the Holy Moonlight Sword. Now head back to the Research Hall lamp and unlock the door in the far corner of the main room, just up the stairs from the lamp.
Drop down to the rooftop below, then drop to the balcony below that. Circle around to the far left to find a corpse that holds a Kin Coldblood (10), then head down into the area below. There are several enemies in this lower area that will all shoot magic spells at you if you get their attention. Once you finish off the enemies or sneak past them, the item on the chair on the far side of the area is a Blacksky Eye spell.
Head up the first flight of stairs and continue straight ahead to the large window. Break the window and drop to the floor below. Circle around to the left to find an Imp. Quickly kill it to obtain two Blood Stone Chunks, then circle around to the right side and jump over the gap to find a chest that holds a Pulsing Damp Blood Gem (5).
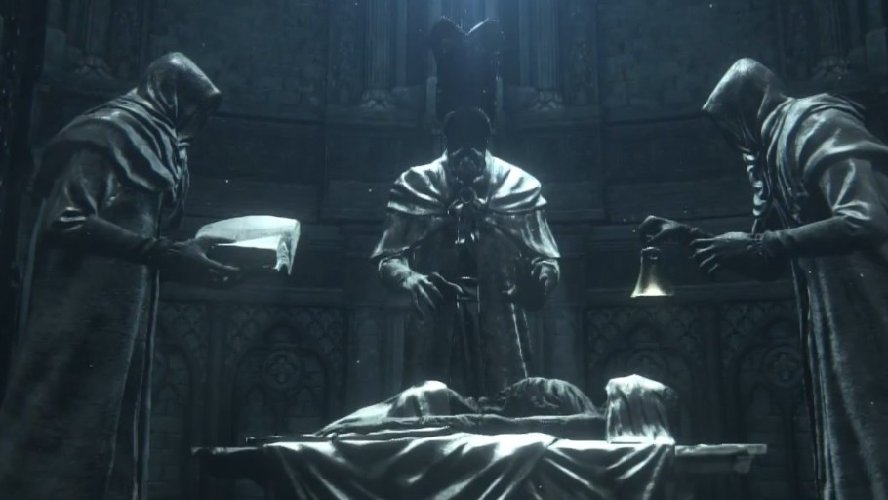
Drop down to the main floor and head over to the elevator. This is the same area where you fought the wizard and the Hunter using Ludwig’s Holy Blade, but with the elevator at the top, a new platform awaits. Collect the Laurence’s Skull key item from the altar, then pull the lever and step on the platform as it moves down. Open the chest at the bottom to find the Church Cannon weapon.
Head back up to the next floor up, then pull the lever and take the elevator to the top floor and head over to the door to the right. Continue up the elevator to the room with the three wheelchair enemies, then head through the doorway and up the stairs to the right. Open the door at the top to begin the boss battle against the Living Failures.
Boss Battle: Living Failures
- Reward: Astral Clocktower Key
The Living Failures are a collections of larger versions of the enemies you’ve been fighting up until now. Each enemy doesn’t have a ton of health, and as you defeat each one the health of the boss will deplete. While each enemy isn’t overly difficult to take down, it’s imperative that you kill then off as quickly as possible as they spawn at a constant rate and will start to overwhelm you if you’re not killing them in a timely manner.
At close range the Living Failures have a variety of attacks. Some cover the entire front of their bodies, while others can be dodged to either side. Most of their physical attacks are telegraphed aside from a head plant attack that comes out rather quickly as the Living Failures plant their heads into the ground. Try to stay behind them to avoid most of their attacks, but if you have trouble with that, attack three or four times, then dodge away preemptively.
From a distance, the Living Failures have two different spells they can cast. The first is visually telegraphed by a Living Failure creating a large magic ball. After a few seconds it’s shot in your direction and will explode on impact with you, a wall or the ground. The explosion radius isn’t large, but if you’re too close you will take significant damage.
The second spell casts multiple blasts of a projectile attack toward the player. This one is fairly easy to dodge as well, although it moves a bit faster than the large magic ball. However, if you get hit by one projectile, chances are you’ll get hit by a few move. The damage can add up quickly so it’s important to keep an eye on your surroundings so you can see when the other Living Failures are attacking.
Occasionally the sky will turn dark and all of the Living Failures will hold their hands toward the sky. This is followed by summoning a barrage of meteors from the sky. The meteors always come from the right if you’re standing in the entrance to the area and looking toward the tree. To avoid these meteors, stand on the left side of the tree (once again from the perspective of the entrance).
For the most part, all of the Living Failures will be focused on the meteor attack, meaning you have a few moments to attack them if you’re quick or behind the tree while attacking. However, any Living Failure that may happen to spawn while the meteors are being summoned will not be bound to the attack and will go after you. Once again, keep a close eye on your surroundings to make sure you don’t get caught by surprise and you shouldn’t have too much trouble with this boss battle.
If you just need a quick idea of where the key items are, check out our article on the important items in the Research Hall. Otherwise you can head back to our main Bloodborne game hub as we’ll have the rest of the Old Hunters walkthrough very soon!


