Once the game begins, you will begin a cutscene explaining the story of the game. Enjoy the scene and prepare to begin your mission. Once you have calibrated the settings to your liking, prepare for Black Ops 2.
A Mission Briefing screen will appear. Customize your loadout and begin the mission.
Pyrrhic Victory
This is a rescue mission pure and simple. The objective is to rescue Woods. It’s time for Alex Mason to go to work.
Once the game begins, prepare for a wave of enemies. Take out the ones heading towards you, and then use the moving vehicles for cover. Once the vehicles stop head to the right and open a turned over vehicle for mortars. Use the mortars to take out the targets behind the cover. Next deliver an airstrike to the designated targets. Once that is complete, prepare to attack enemies behind cover with mortars again and then prepare for another air strike. You then will mount the buffel and prepare for the final strike. Take out the enemies and then a helicopter will land. Hudson will ask where Woods is. Find out the location of woods and then board the helicopter.
Next you must secure the barge and rescue Woods. Jump onto the boat in the water. After you defeat the enemies on the boat go to the mounted turret on the right side. Use the turret take out the other boats in the water. Enemies will begin to mount the ship. Take them out as well and then refocus on the gunboats. Once all the gunboats are eliminated open the container on the ship to find Woods.
Next, you must use the Valkyrie launcher to destroy the hind. If you run out of ammo, approach the large blue case in the center of the ship to refill. With the hind gone, the boat will crash and Woods will begin to drown. Save him and then swim to shore. Next follow Hudon through the jungle while carrying Woods. You must next get to the village and radio Savimibi for extraction.
Follow Hudson through the jungle, being careful to not alert any enemy soldiers. When close to the radio, Hudson will take care of Woods while you attempt to use the radio. Slowly approach the open window and attempt to take out the guard.
After the scripted altercation you must escape enemy fire with Woods. Keep moving through the jungle and when Hudson stops take out as many enemies as you can. Once you reach the beach, an ominous helicopter approaches. Its back up. Allow the helicopter to take out all the enemies and then board it to end the mission.
A mission briefing screen will apper. Customize your loadouts and then continue.
Celerium
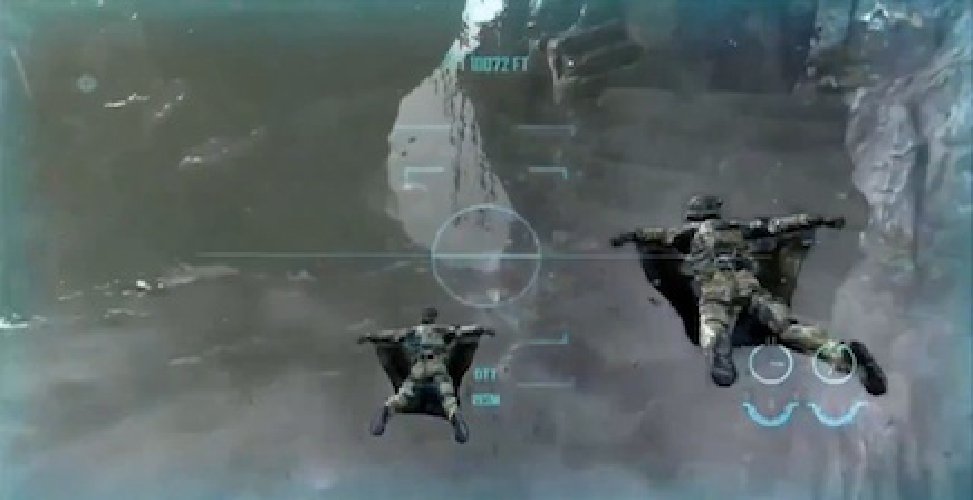
Traverse the mountain with Harper and prepare to meet the rest of your team. Once you randevouz with your squad, activate your flight suit and jump off the cliff. Be sure to avoid the trees and mountains and do not stray from the flight path. Once you reach the end, deploy your parachute. Once you land, prepare to battle.
Use EMP grenades to expose the cloaked soldiers. Reach the elevator and then activate it. Once you reach the top advance in order to investigate the base. Take out the enemies and continue to avance forward towards the destination. Once all the guards are taken out, your team will take out the temple doors. Once that happens, enter the temple and discover the research base. Infintrate the research facility.
Before entering the research facility, reload your weapons from the cache on the left. Then hack into the crate on the right to gain a optical camo suit. Put on the suit and activate the camo. Take out the robots on the floor first and then focus on the enemy. Let the squad take the higher ground while you advance on the lower end. Take out all the enemies and reach the elevator at the end of the room. Take the elevator down to infiltrate the lower labs.
Be prepared for a wave of enemies. Take out the robot first then focus on the enmies. Continue to advance forward. Take out the turrets in the ceilings and then reach and hack into the robot. Once the robot is working for Uncle Sam, continue to advance with your squad towards to the end of the room. Raid the weapons cache on the right and then take out the informant out of the locked security box. Protect the informant from the enemies. Once the enemies have been taken out, open the door with the scientist and enter the room. After he hands you the Celerium drive, prepare for another wave of enemies. Take them out and continue forward to randevouz with the extraction team. Be sure to watch out for enmeies above on the second level. Once all enemies are taken out, meet with Briggs to end the mission.
At the mission briefing, customize your loadouts and then continue.
Old Wounds
Prepate to gather intel on the Menendez Cartel.
You will now investigate Menendez’s connection to the Soviets. After watching Zhao and Woods speak, mount a hourse and follow them. After getting to a secure location you will make a deal to secure information about Menendez. After the deal is made, prepare to defend the west blocking point. Mount your horse again and follow Hudson to kill the enemy fleet. When the tanks arrive, head to the base where the weapons are. It will be marked ont eh screen. Take the Stinger and take out the tanks.
Follow Hudson away from the base but do not stray to far. You will have to take out more tanks and a few gunships. Once they are gone, continue forward. Continue following the marker on the screen and dismount the horse when told to. Take out the enemies in the area and then get back on the horse to randevouz with your swuad.
Advance towards the tanks and gunships until the game takes over for you.
Now, you will watch as Woods interrogates Kravchenko. You will soon start seeing numbers and you will ready your gun to fire. Press the indicated button repeadtley to resist. Eventually you will lose and shoot Kravchenko in the head. Once you do, you are double crossed and knocked unconscious and left in the desert to die. A mysterious figure appears to save you and end the mission.
Alter your loadouts at the mission briefing and then continue.
Time and Fate
Now, you must secure Raul Menendez.
The game now takes a drastic change and you are in charge of Menendez. You must rescue your sister Josefina while under the influence of a vile injection. Advance towards the marker on the screen and take out the enemies. Be careful of grenade throws. Keep advancing as Menendez his almost unstoppable in his blood fueled rage to locate his sister. No need to switch weapons as the machete and shotgun that he has are a perfect fit. As creepy images of his sister appear on screen, you know you are getting closer. Continue following the the indicatiors on the screen until he reaches the house.
You are now taken back to right before you took control of Menendez. Observe him and once the men enter the room, prepare clear the Cartel village. Advance forward with Hudson and make your way through the cartel village. After exiting the water, notice the word access on the screen and head to a shack on the right to find molotive cocktails. Collect those and continue moving forward. You will see Menendez which enrages Woods to go after him.
Advance towards the main house on the property taking out as many guards as possible. Once inside, watch out for the guard on the roof with the RPG. Advance towards the grounds and then down a small enclave on the left. Use this area for cover to take out the other gunners before taking on the RPG. After all enemies are defeated, continue into the Cocaine Bunker. Take out the guys inside. Once you reach the area with the furnace and flames, head towards the flames and turn right to gain a CIA document. Next continue to advance and then follow Hudson. The level will then end.
Customize your loadouts for this mission and continue.
Fallen Angel
You must now gather intel on Menendez. First you must ain access to Anthem. Follow closely behind the robot drone you have and allow it take out most of the nemeies. Continue forward and activate and electrical panel that will allow the drones to get a better vantage point. Continue through the flooded streets and take out the enemies. Soon, a bus will come rushing down the street. Go over to the left and push open a gate to get out of the way. After that is done, prepare for the MQ drones.
The MQ drones are very powerful. They are alerted by loud noises and by seeing you. You will need to sneak past the drones without them seeing or hearing you if you want to live. Head into the destroyed building on the let and wait for the Drone’s light to shine the opposite way. When it does, sneak past it. Follow Harper into th swewer system.
Once on the roof, you must take out the guards on the rooftop. Take them out silently and then proceed to identify Menendez. After he is identified you must attpemt to record his conversaion. The problem is he never stays in one place at one time so you have to keep following him from a distance to record the conversation.
Continue along the rooftops and record Menendez’s conversation. A train will arrive.When the train arrives, follow Harper into another room where Menedez will be right above you. You learn that he has known about you this whole time now you have to fight for your life. Follow Harper and get to a secure location. Then use the drones to take out the enemies. Once Brutus and Mazimus have done their jobs, follow Harper to the vehicle.
You now must control drones to clear the street for the vehicle. This is pretty standard and simple. Just use the on board weapons to make a path for the vehicle. Then drive the vehicle down the path. Next, you must control drones again. Use the drones to destroy everything in its path. Make sure to use the missles to lock on to targets for easier destruction. Once that is over, you will return to you rvehicle and navigate it to land.
Once you reach land, you will see a very familiar face from your father’s past. After speaking with him, the level ends.
Customize your loadout at the mission briefing and then continue.
Karma
Now, you must secure Karma.


