
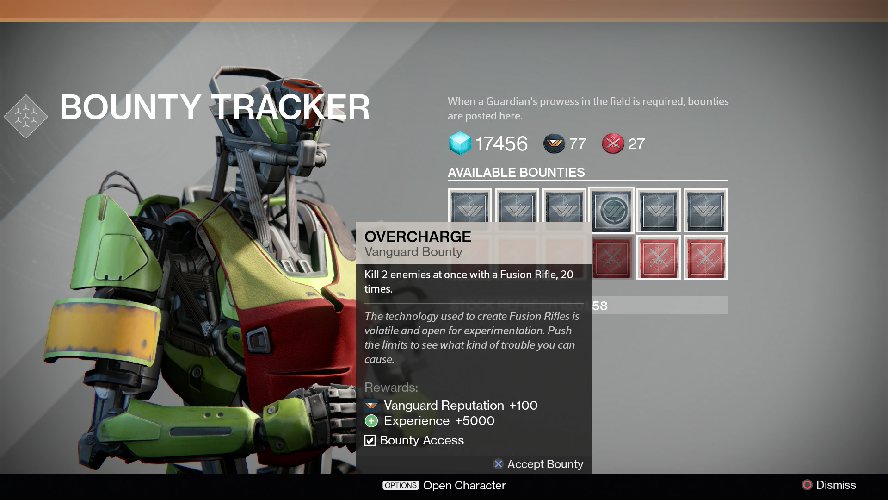
Destiny Daily Bounty Guide – Overcharge
Kill two enemies at once with a fusion rifle, 20 times.
We aren’t going to lie to you, this is one of our least favorite bounties that Xander 99-40 hands out. It’s not that it’s overly difficult, but in general it can’t be done efficiently while doing something else. Still, those Vanguard Marks are precious pieces of currency, so there will come a time when every Guardian has no choice but to grind this one out.
Of course, the chances are good that if you’re here for help with one bounty, you might be able to use a tip or two for some others. Take a look at the list below where we guide you through several other tasks that Xander likes to assign.
- Body Dropper – Kill 100 Enemies Without Dying
- One for All – Achieve Gold Tier Rating in Public Events
- Walking Tall – Complete Any Strike Without Dying
- It’s All in the Head – Kill 100 Enemies with Precision Damage
- Fallen Leaders – Kill 10 Fallen Majors or Ultras
- Blades of Crota – Hunt the Knights Who Serve as Blades of Crota
Overcharge Vanguard Bounty
Although it isn’t exactly the most difficult bounty you’ll ever have to do, this really isn’t that hard. Essentially what you want to do is go somewhere that you can find lots and lots of Thrall and Cursed Thrall, and preferably in concentrated numbers. The key here is killing them when they’re in close proximity to one another so that you stand a chance of nailing at least two with one charge.
Off the top of our heads, just about any mission on the moon is going to be a good bet, especially some of the newer ones that came with The Dark Below DLC. However, avoid trying to do this on a patrol since the enemies tend to be less active. You’re looking for situations where your foes are charging you in large groups.
Perhaps your best bet to make this happen would be by heading to a mission called The Dark Beyond that is located on the Moon. This particular adventure is infamous for your Ghost screaming We’ve woken the Hive! Actually, that’s the exact part of the mission that you’re going to want to work on this bounty.
Once the cut scene ends, make sure you have your fusion rifle ready, and we’d highly suggest using the Murmur, something that you can get by completing the Fist of Crota, Siege of the Warmind and the Wakening. When the door to the Temple of Crota opens, back up as far as you can, set your Murmur to Solar damage (just for fun), then start laying into the hoards of Thrall that come rushing out at you. The kicker here is that you’ll also be attacked by Acolytes and a single Knight, but you want to avoid killing the latter at all costs. Slaying the Knight will advance you to the following checkpoint, which you don’t want to do just yet.
Once you have killed all the Thrall, let the Acolytes and Knight kill you, causing the mission to resume from the point where you’re rushed just following the cut scene. This will allow you to rack up even more easy fusion rifle kills against the cannon fodder known as Thrall. When you have all 20, back out of the mission and move on to the next activity.