Beat Thief and unlock all safes then be sure to unlock the complete Prima Thief digital guide and become a master Thief!
Thieving Challenges
- Remain Undetected – 550 G
- Take No Damage – 325 G
- 14 Kills or Knockouts – 175 G
- Lift All Loot Items – 325 G
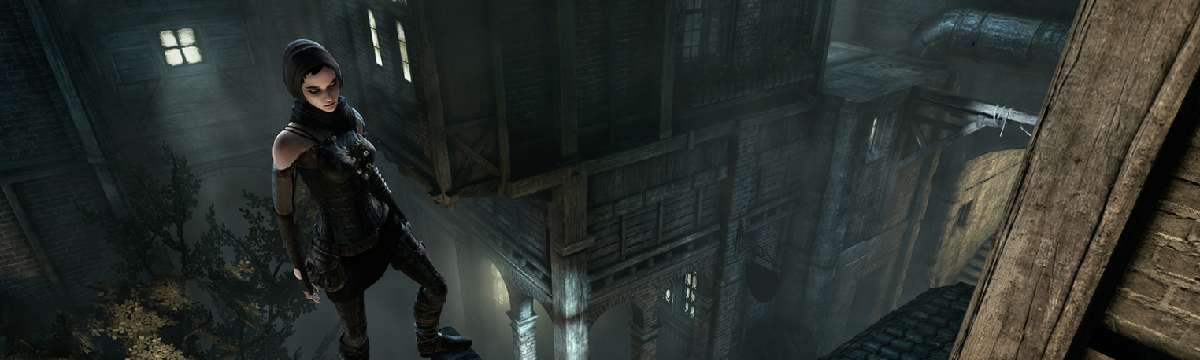
This is the final chapter of the game. The Final Boss: Primal Erin does not require any weapons, so use whatever you have to make your journey easier. Since there’s a Shady Merchant in this chapter, we took and aggressive approach. Make sure you’re stocked up on Fire Arrows, Blast Arrows and Rope Arrows. All will come in handy.
Objective 1: Discover Where Orion Has Taken Erin
The first part of the mission contains many Freaks. Remember, they can’t see you, but they are sensitive to sound. Stay crouched, avoid glass and be very quiet. From your start point, go east (not right and not up any stairs) until you hit a wall. Turn right and go through the crawl space. When you emerge, there’s a Freak waiting for you. Line it up and take him out with a headshot from a Fire Arrow.
Note: In order to kill a Freak with a Fire Arrow, you must hit them in the head and must have the Bow Strength upgrade. You can get the upgrade from the Shady Merchant. Also, do not use Focus near them or they will begin to detect you.
When the freak is down, move along the path, turning left (south) at the corner. There will be another Freak standing a short distance away. Take him out with a Fire Arrow headshot and move to where his body fell. There’s a chest where he was standing, pick the lock and claim The Pinned Castinets (6/6) – Mourning Bell. If you don’t have all of this collectible set, you can find more in the walkthroughs for the previous chapters. Also, many collectibles are found outside of the story chapters, in The City itself.
Backtrack to the north and climb the wall to your left. Be careful, a Freak patrols this walkway. When you get to the top, take him out with a Fire Arrow headshot and keep moving south, following the winding tunnel. When you reach its end, drop down and go right. Pick the lock in front of you and go through the door. If you are as paranoid as we are, close the door behind you to make sure no Freaks approach from behind.
Objective 2: Find a Way to the Boat
Drop down to your right and move through the crawl space, heading north. Take cover behind a crate as a Graven walks directly toward you. Let him pass in to the shadows and then knock him out. Backtrack to the entrance of the crawl space, turn north and crawl through a cave. When you exit, climb the pipes on the wall to your left. Hang on the last pipe for a bit, waiting for the Graven to move away. When he does, drop to the ground level and take cover in the shadows. When the Graven returns, hit him with a Broadhead Arrow to the skull, making sure he doesn’t fall into the light. There’s another Graven above you. Stick to the west side and move south. Hack the control box in the southwest corner. Climb up the stairs and when you reach the top, take out the guard near the railing. Go up some more stairs, open a door on your left and swoop to the northwest corner. Rather than mess with the Graven in the room, sneak in the crawl space in the corner and move on. No need to risk detection unless you want the loot.
Objective 3: Board the Dawn’s Light
Drop from you perch and visit the Shady Merchant on your right. Stock up on all the arrows you can. By now gold should not be an issue.
Climb the boxes to the north of the Shady Merchant and wait for a Graven to come down the path. You might want to take cover in the shadows to the west. When he turns to go back up the path, swoop and take him down. Continue up the path, easily sneaking behind another Graven to pick his pockets and knock him out. Search the area for loot and you should find some arrows nearby.
Head west along a ledge and climb the wall. Face south and look up to see an anchor beam. Put a Rope Arrow into it and jump over. Climb the rope and jump to another platform. To the south will be another rope. Jump to that, descend to the bottom and drop to the floor. Climb the pipe in front of you and like the previous pipes, just follow it until you can’t go any further.
When you drop to the stairs, climb up and move west toward your objective. Just keep moving until you reach a room with several guards. Take cover behind a crate and wait for a guard to move west (toward you). When he stops to look at some boxes, knock him out. Head toward the stairs to the south, wait for the guard to look at the desk, sneak behind him take him out.
You’re now headed up the stairs and to the northeast side of the room. Make sure to swoop when you pass light sources. When you reach the top, wait for the guard in the room to turn his back, open the door and knock him out with your Blackjack. If his body didn’t fall in a shadow, feel free to use a Water Arrow to douse the nearby wall torch.
Go back down the stairs you came up and stop on the landing. Look to the south where two guards can be seen patrolling. Taking them out while remaining undetected is tough. When you have an opening, move south and climb up on a shelf to the east, right near the alcove. Wait until the one Graven is in the area and drop him with a headshot. If the other Graven hears, you’ll have three more arrive on the scene to investigate. Just take them all out with headshots as well.
When the area is clear, move west along the walkway, taking the southeast stairs to the top level. Climb the south wall and drop into an elevator. When the elevator stops, the door will open and a Graven will be check inside. Stay in the corner and he won’t see you. When he heads back to the railing, sneak out of the elevator and swoop to the left. When the Graven returns to the elevator, swoop behind him and go for the knockout.
Go through the door to the east, knock out the lone Graven guard and loot the room. Open the south door, sneak behind another Graven and take him down. Make your way east, passing by the elevator you arrive on. Go inside the room and take your third Graven down when he’s inspecting the desk. On the east wall is The Court of Montonessi (12/12) – Compassion Foul. If you don’t have them all, check back to previous chapter walkthroughs, as well as The City itself. Many collectibles in the game are not found within the story chapters.
Now that you have all the collectible loot items this chapter has to offer, exit through the east door. Put a Rope Arrow into the anchor beam above. Jump to the ropes and then to the platform nearby. Keep on moving south, dropping through the floor and heading toward your objective.
Objective 4: Follow Erin’s Trail
All you have to do is follow the objective markers on your screen. There are many Graven, but they are all frozen in time. Just walk past them until you reach Erin.
Objective 5: Get Close to Erin
To complete this, you need to sneak up behind Erin. As long as you crouch, it should be no trouble at all. If you approach from the front she’ll move to another part of the room. Once you approach her, touch her shoulder to advance.
Objective 6: Follow Erin’s Trail
Now that you’ve upset Erin, she’s turned all the frozen Graven into Freaks. Remember, you can sneak right past them as long as you crouch and don’t make any noise. Head toward the objective. If any Freaks get in your way, take them out with a Fire Arrow to the head.
Objective 7: Steal the Primal Energy from Erin
By far the easiest objective in the chapter. Walk up to Erin and she’ll knock you backwards, kicking off the Final Boss: Primal Erin.

Final Boss: Primal Erin
This isn’t as easy as defeating the Thief-Taker General, but it’s not too hard if you play your cards right. There are three pieces of Primal Stone in the room, but Erin is looking for you and releasing massive blasts of energy. When she releases this energy, there needs to be cover between you and her. If the energy blast hits you, it will cause massive damage.
As soon as you can move, sprint to your left and take cover. The first piece of Primal Stone is to the northeast. Just after Erin releases and energy blast, move to grab it and immediately take cover. Erin will approach you after you get the first piece, wait for her to move away and head south. The second piece is on a walkway on the south side of the room. Grab the piece of stone and take cover. The last one you need is just to the northwest, below the walkway you’re on. Drop down below to collect the third piece, ending the Final Boss: Primal Erin battle.
That concludes the story aspect of the game. If you’ve been following along, you will now have all of the collectible loot items found in the game’s chapters.
By completing this chapter, players will unlock The Dawn’s Light trophy or achievement, depending on what platform you play the game on.


