Survive Sevastopol with Prima’s Alien: Isolation Walkthrough.
Step off the transit to hear some communications between Amanda and Ricardo. Your objective will soon update to Find Samuels in Seegson Synthetics, and shortly after to Take the Elevator to Seegson Synthetics.
From the transit you just stepped off of, turn to your left and go up the steps, passing under the Towerlink Transit System sign at the top and going through an unmarked door on your right. Head up the small set of steps, ignoring the elevator on your left and passing through another unmarked door in front of you. Board the nearby elevator and press the button to go To Seegson Synthetics.
Step off the elevator to see a disturbing situation involving the dead thing behind the desk. While you’re trying to absorb that sight, your objective will update to Climb the Elevator Shaft to the Upper Labs. Move behind the desk and access the Sevastolink terminal, browsing to the Personal folder and opening the file titled, Smythe Read This. It’s here that you’ll find that the four digit code for the nearby door is 8382.
From where you got off the elevator, turn to your left and choose the option to Use Plasma Torch, then input the code 8382 to open the door. Hop into the vent and move through until you have to exit, then shimmy across a ladder only to have to climb another just to the left. This will lead you to a another ladder that you must shimmy across and a scripted event will end up with you in an elevator. Climb Up through the roof of the elevator and into yet another vent. Pass through this one to finally reach a room. It would seem that Ventilation / Ladder / Elevator Simulator is over… for a moment.
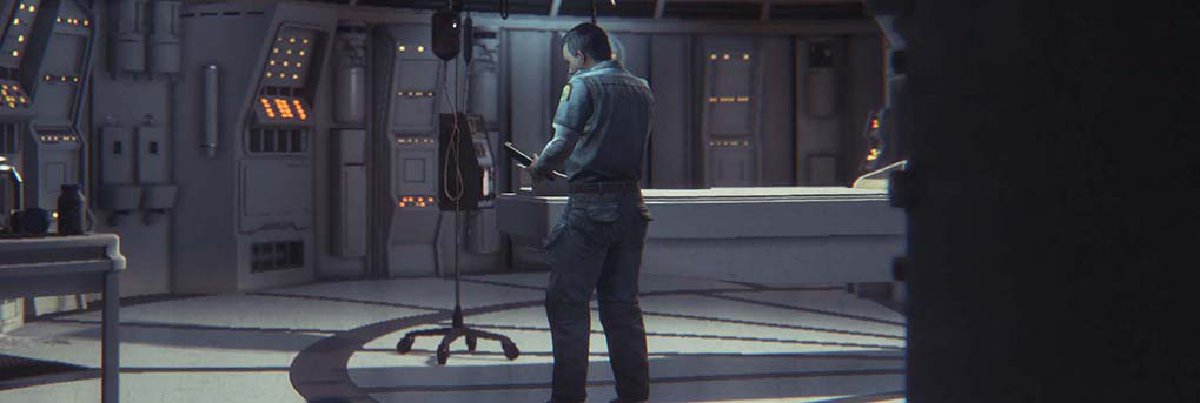
Make your way through this room in the only way that you can and save your game when the opportunity presents itself. Go through the door to your left, then follow the hallway as it curves left, taking the first door on… you guessed it, your left. From here, approach the big door with the Apollo Secure Transit sign above it, updating your objective to Find a Way Through the Electrified Door.
In order to get through the door, you’re going to have to approach and Turn Off three different devices that are scattered throughout the area. The first is a few feet behind the Apollo Secure Transit door, and the other two are across the hall from this area, both in their own rooms. To find them easily, just look at the ground and follow the wires. They will lead you exactly where you need to go. When the third one is down, return to the Apollo Secure Transit door and Turn Off the final device.
Head through the now open door and follow the corridor as it ramps up. When a door closes in front of you, hop into the nearby ventilation shaft and observe Samuels in action. Continue to follow the vents until your objective updates to Find Samuels, then exit into a small room. To leave the room, approach the door and select the Use Button option, then pass through and turn to your right. Loot the nearby desk and body for supplies, then access the Sevastolink terminal and browse to the Personal folder. Open the RE: Plans Tonight document and read up to learn that there is a lockdown button somewhere near the desk. From the Sevastolink terminal, move right to a nearby pillar where you can choose to Lift Lockdown.
The big door at the far end of the room should now be unlocked, but as we expected, the Synthetics that lead up to it are more than just display models like the file suggested. For now, just sprint past them and through the door, then make your way behind the Sales Agreements desk and use the Access Rewire to set Gas Divert to Active. This should cause a major burst of flames to cover the Synthetic Showroom door that separates you from the Androids.
Exit the Sales Agreement room and go straight, picking up the Molotov V.2 from the dead body near the small set of steps. Go into the nearby room and snatch up all the loot that you can, then craft as many Pipe Bombs, Medkits, Molotovs and EMP Mines your supplies will allow. When you’re done, save your game, reload your Shotgun and Revolver, then head back to the Synthetic Showroom door.
As you might have expected, nothing is ever as simple as using an Access Rewire, and by now the Synthetics are walking through the flames in order to try and kill you. Start off by tossing an EMP Mine at their feet to stun them, then hit them with a Pipe Bomb. If there are any survivors, approach them and melee their brains out with the Maintenance Jack. Even after that, whip out your Motion Tracker and confirm that everything is clear, then head back into the Sales Agreements booth and turn off the Gas Divert.
Now that all the Synthetics are down, search their bodies until you find a Keycard, then use it to unlock and pass through the Apollo Secure Transit door. This will lead you to an area with a Tower Link Transit sign, and just up the stairs on the left will be the booth were Samuels put the whoop on a Synthetic a few minutes ago. Head inside and Turn Off the device to recieve a new objective telling you to Follow Samuels. Exit the room and step on the nearby elevator, pushing the button to head To Android Orientation.
Your objective will once again update, this time to Find Samuels in Seegson Synthetics. Exit the elevator and move the only way you can, then Climb Up and shimmy across the ledge. When you get the option to Jump Down and shortly after to Climb Up, do it. You really don’t have much of a choice. Continue to shimmy toward the other side of the room, stopping only to let the steam subside, then jumping to the ladder and pulling yourself up.
There’s only one direction that you can go, so walk into the tunnel and follow it until you come to a narrow room with an audio file and save game location. Listen to the audio, then save your game before passing under the Implant Ward sign and choosing to Use Lever to open the door.
You’ll now find yourself in a series of rooms that are nothing but bad news. There are Synthetics laying on what look like MRI tables and motion scanners just daring you to step into their line of sight. As soon as you get into the room, crouch and duck into the nearby office, avoiding the scanner as you do. Use the Access Rewire to kill the Camera Feed, then sneak into the floor vent and follow it all the way to the end. This will have you emerging in the office adjacent to the final room. Exit the office, avoid the scanner and then approach the door. Use another Access Rewire to kill another Camera Feed, then use the Security Access Tuner to open the door. If all goes well, not one of the Androids will wake up. If things go sideways, hit them with an EMP Mine to buy yourself some additional time.
After passing through this area you’ll meet up with Samuels and chat about Apollo and Synthetics. There’s a door to the right of the glass but you can’t get through it until you Restore Power. Go to your left and through the Android Orientation door, then just sprint through the corridor in a clockwise direction. Eventually you’ll enter the same room as Samuels as he tries to connect to Apollo, and soon after your objective will update to Halt Grid Purge.
You have to locate several different devices and choose the option to Turn Off on each. If you don’t do it in the order Samuels tells you to things will go badly, so make sure you pay attention and get it right the first time. Disable the device with the red cable first, then move on and do the same with the blue. The third device is plugged into a wall socket next to an upturned gurney. Locate and disable it, then move on to the second to last device next to an open floor panel and deactivated Android. When that’s done, deactivate the final device, which is sitting directly in front of the glass that you can see Samuels through.
After an intense few minutes of action, your new objective will be to Take Private Transit to Apollo Core. Leave the room through the door you originally used to enter it, then work your way through the corridor in a counterclockwise fashion. Make your way back into the Implantation Ward, sneaking all the way back through it without disturbing the Androids. When you exit back out into the corridor with the option to save your game, do so. What could it hurt?
Continue backtracking all the way into the room where you did all the shimmying and jumping, but this time step onto the platform and choose the option to Activate Car to be delivered to the other side. Go through the Apollo Secure Transit door and onto the nearby elevator, then press the button labeled To Apollo Secure Transit.
Step off the elevator and turn to your left, approaching Towerlink 01 and pressing the button to Call Transit. When it arrives, you’ll want to head inside and choose the option to go To Apollo Core, while at the same time getting an updated objective telling you to Get to Apollo Core. It’s bit redundant, but we can roll with it. Thankfully, these events will bring this mission to a close. On to the next.
Continue to Alien: Isolation – Mission 13: Consultation


