Having trouble flying the jets in Battlefield 3? Don’t feel bad. You’re not alone. The jets take a while to get used to, and there isn’t much of an opportunity to practice. When possible, search for a server with a low player count through the in-game or Battlelog-based Server Browser. This will not only give you a better chance of getting in a pilot’s seat, but with fewer adversaries you’ll have an easier time experimenting with the controls. For the sake of this tutorial we reference controls on the Xbox 360 and PS3. If you’re playing on the PC, it’s strongly advised to use a joystick while flying. Piloting a jet with the mouse and keyboard is very difficult, putting you at a serious disadvantage against joystick-equipped adversaries.
Flight School
Once you’re in a jet, switch to the external view (click down on the right stick) and study the different control surfaces before taking off. The right stick controls the plane’s ailerons and elevators. Push the right stick up and down to move the elevators, controlling the plane’s pitch. Now move the right stick right and left to move the ailerons. This controls the roll of the aircraft. Next, move the left stick left and right to activate the rudder. The rudder controls the yaw of the aircraft, allowing you to make slight lateral adjustments to the jet’s flight path. These control inputs do nothing while the plane is on the ground, so throttle-up and get into the sky. Hold down the right trigger (or R2) to increase the jet’s speed. This will get you rolling down the runway. For a quick boost in acceleration, click down on the left control stick to activate the afterburner. But don’t leave the afterburner on for long. While it maximizes speed, it also increases your turn radius and maneuverability. So once you have enough speed (and before you run out of runway) gently pull back on the right control stick until your jet is airborne. If the afterburner is still active, click down on the left control stick to turn it off.
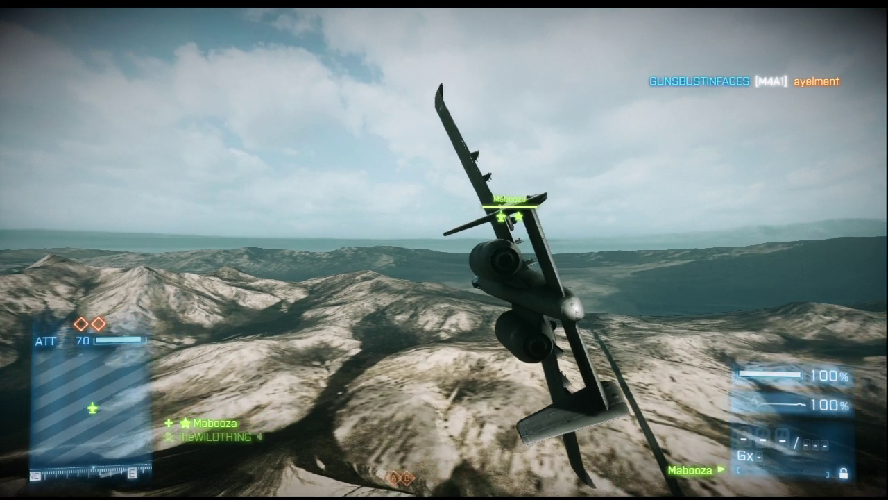
Now that your plane is in the air, experiment with the different control surfaces. Start with the elevator by pushing the right stick up and down. Controlling the pitch of the aircraft allows your jet to both gain and lose altitude. Tilt the nose up to climb, or pitch the nose down to dive. Next, level out so you’re flying straight and try a roll. Push the right stick to the right or left to begin a roll. Practice rolling the aircraft in 90-degree increments until you’re right side up. Next, give the rudders a shot. While in level flight, push the left control stick to the left and to the right. Notice how this changes the heading of your aircraft without affecting the pitch or roll. This is useful when lining up ground targets for strafing runs, allowing you to make slight lateral adjustments to your flight path. However, the rudder isn’t the fastest way to turn your aircraft around.
Basic Maneuvers
Banking turns and Immelmanns are the quickest way to aim your jet in a new direction. To perform a banked turn, roll your aircraft right or left 90-degees so the wings are perpendicular to the ground. Now, pull back on the right stick to turn. This causes your jet to rapidly change its heading. To decrease the turn radius of your jet, hold down the left trigger (or L2) during a turn to activate the speed brake. While throttling down allows you to turn faster, it also reduces your air speed, potentially leading to a stall. So once your turn is complete, level out and throttle-up to avoid stalling. Banked turns are essential during dogfights. By slowing down during a turn, you can turn within an enemy aircraft’s turn radius, allowing you to stay on their tail.
Immelmanns are the quickest and easiest way to turn around. The Immelmann is a maneuver dating back to WWI, and named after German Ace, Max Immelmann. While in level flight, simply pull back on the right stick to perform a half loop. Keep pulling back as your jet goes vertical, but stop when you see the horizon. At this point your jet is upside down, so perform a 180-degree roll to orient your aircraft right-side up in level flight. Half loops are easy but cause you to gain a lot of altitude, making it easier for you to be targeted by surface-to-air missiles. Still, when performing strafing runs against ground targets, Immelmanns are the best way to stay lined-up with your target. It’s also possible to perfrom a Split-S, which is essentially an Immelmann in reverse. To do this, roll your aircraft 180-degrees so you’re upside down, then pull back on the right stick to begin an inverted half loop. Obviously, you need plenty of altitude to successfully perform a Split-S without crashing. But if the space allows, a Split-S is a great way to lose an enemy fighter on your tail.
Air-to-Air Combat
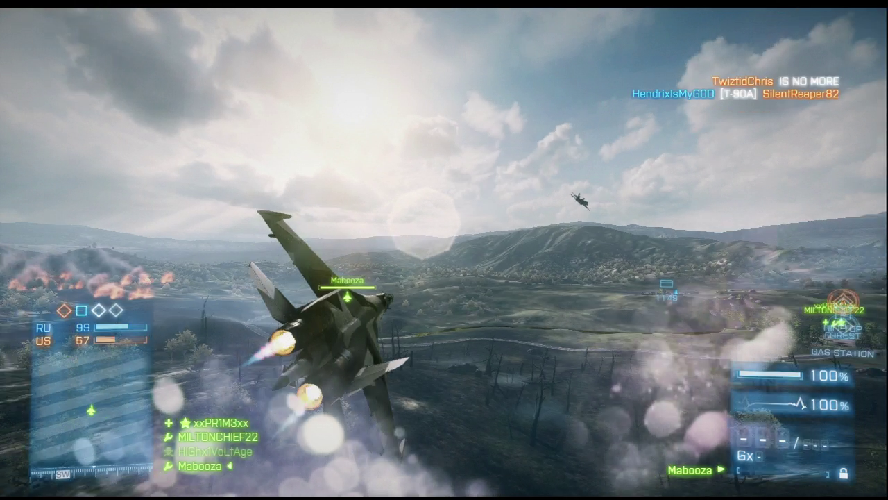
All of the jets in Battlefield are capable fighters, ideal for shooting down enemy aircraft. For beginners, the cannon is the only weapon available. But don’t let this discourage you. The cannon is by far the most effective weapon for shooting down enemy planes and helicopters. Unlike heat seeking missiles, flares or other forms of ECM cannot trick the cannon. However, you must be a very good pilot to score hits with the cannon. This requires complete mastery of all the jet’s control surfaces to keep your plane behind an enemy. The small crosshair icon in the center of the HUD is your cannon’s reticle. When the reticle is placed over an enemy plane, fire the cannon. If you score a hit, the reticle displays a small bloom animation. To prevent overheating, fire the cannon in short bursts. It doesn’t take many hits to disable an enemy jet. But even when your target erupts in flames, keep firing. Otherwise the enemy pilot may bail out or put out the flames with the Extinguisher upgrade. So it pays to be aggressive. Keep shooting until the plane explodes, scoring you more points of destroying a vehicle as well as killing the enemy pilot.
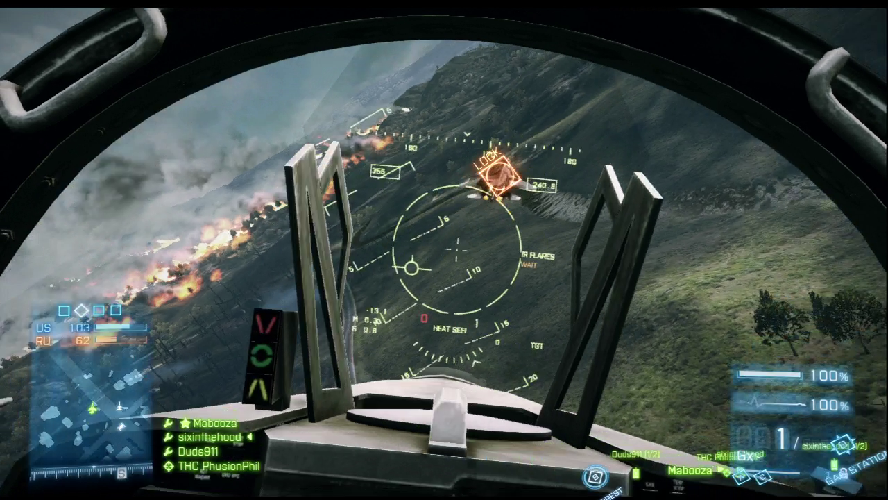
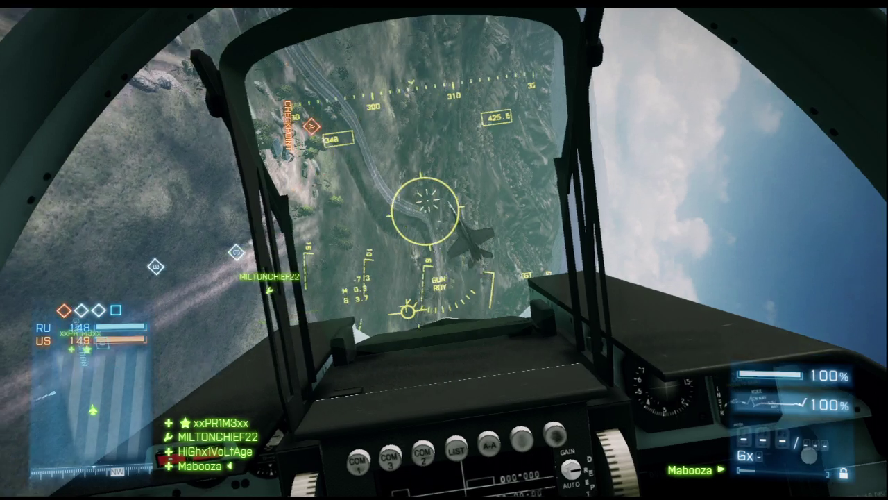
Heat Seekers are an early unlock weapon for the jets and make shooting down enemies even easier. But before you can fire one of these missiles, you must first attain a lock. It can take a few seconds to lock-on to an enemy aircraft so do your best to keep the target within the green circle on the HUD. The enemy aircraft must be within this circle for a missile to achieve a lock. Look for the red bounding box in the center of the HUD to indicate which target the missile is locking onto. The missile lock process is accompanied by a series of beeping sounds. The beeping sounds get faster and faster until finally becoming a solid tone, indicated a lock. At this point the word “LOCK” also appears within the red bouncing box. As soon as a lock is achieved, fire both missiles. You can fire two missiles in quick succession, maximizing damage upon impact. However, if your opponent deploys IR Flares, the missiles will miss. Quickly attain another lock, and fire another salvo of missiles before the enemy pilot’s flares can reload. Sometimes it’s best to let the pilot dump their flares before firing your missiles. A panicked enemy pilot might deploy flares at the first sign of a lock. In this case, just be patient and achieve a new lock. If you’re having trouble spotting enemy aircraft from the cockpit view, switch to the external view for a wider angle of your surroundings.
Defensive Flying
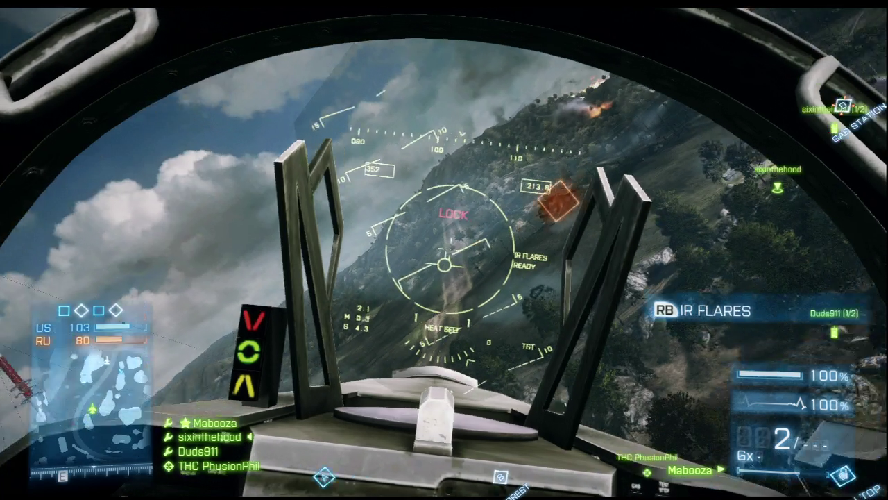
Heat seeking missiles can be your best friend, and your worst enemy. But if you learn to deal with these threats, they become little more than a nuisance. Your first line of defense are the IR Flares. Once unlocked, assign the IR Flares to your jet’s gadget slot. Pressing the right bumper button (or R1) deploys flares. But don’t drop flares at the first sign of a lock. Instead, wait until a missile is launched. When a missile is locked onto your jet, the red “LOCK” warning appears on the HUD along with a solid audible tone. If you hear a series of high-pitched beeping sounds following a lock, a missile has been launched and is heading for your aircraft. Quickly deploy flares before the missile impacts. After deploying flares, make several aggressive maneuvers to avoid getting locked onto again. It takes approximately ten seconds to replenish your flares, leaving you defenseless during this period. If an enemy aircraft is following you, reduce speed, bank, and perform half loops in an attempt to shake the enemy off your tail. But if enemies on the ground are targeting you, quickly move outside their range. All heat seeking missiles have a limited range and must maintain line-of-sight to achieve a lock. So if you throttle up and travel in a straight path, you can usually get out of the danger zone before a ground-based SAM achieves a lock. To break line-of-sight with the enemy, consider flying low, using trees, hills, and structures to mask your movement.
In addition to IR Flares, the Stealth upgrade is also a huge defensive asset. The passive upgrade increases the amount of time it takes for a heat-seeking missile to achieve a lock. This gives you more time to make evasive maneuvers in an attempt to break the lock. Using the IR Flares in combination with Stealth upgrade makes your jet increasing harder to hit with heat-seeking missiles. But don’t get cocky. Cannons can still shoot you down, so don’t forget to utilize evasive maneuvers to prevent enemy pilots from riding your tail.
Close Air Support

When you’re not shooting down enemy aircraft, give your teammates on the ground some help. The weapons deployed by the jets are very powerful and can destroy any ground unit with a single pass. Even a jet’s cannon can slice through the thick armor of a tank. However, jets travel at such high speeds that it’s difficult to identify ground targets. That’s where spotting comes in. You need your teammates on the ground to spot enemy vehicles and infantry. This temporarily marks the targets on the minimap and HUD, making it easier for pilots to perform strafing runs. Once a target is spotted, make sure you have plenty of space to setup your attack. Consider flying far away from the target before banking or performing an Immelmann to setup your strafing run. With the target in sight, use the rudder to line-up your aircraft, then slight dip the nose so the cannon’s reticle is placed over the spotted target. Unleash a steady stream of lead at the target, then pull-up as your jet nears the ground, careful not to crash into any nearby trees of structures. Even if you’re scoring hits, don’t get greedy. It’s much better to make a second or third pass on a target than it is to crash your jet.
The Rocket Pods weapon unlock offer a bit more firepower than the cannon, firing a salvo high-explosive rockets with significant splash damage. When the rockets are selected, an “I” shaped reticle appears at the center of the HUD. Rockets are unguided and must be fired much like the cannon. Simply placed the “I” reticle over your target and fire away. The splash damage of the rockets makes them much more effective against infantry, but they also can quickly reduce a tank (or any other vehicle) to a flaming wreck within seconds. You only have 14 rockets per salvo, so make your shots count. After firing 14 rockets, it takes a few seconds for a new salvo to load. You can also manually reload the rockets by pressing the reload button.
The Guided Missile offers even more firepower to jets, allowing them to fire a laser-guided missile at enemy vehicles. Before deploying one of these missiles, always make sure you’re flying level, because your eyes will be take away from the HUD view. When the Guided Missile is deployed, the view switches to a belly-mounted camera looking down. At this point you can move the camera around and scan the ground for enemy vehicles. Place an enemy vehicle in the center of the crosshair reticle until a red bounding box appear around it. Keep the reticle centered on the vehicle until the bracketed bounding box turns solid, and the word “FIRE” appears at the top of the camera view, indicating a lock. At this point fire the missile and watch it streak toward the target, inflicting heavy damage. Alternately, these missiles can be fired at any targeted designated by a friendly SOFLAM. A guided missile can disable a tank with a single hit and outright destroy lighter vehicles. But they can only lock onto and be fired at enemy ground vehicles, making them slightly less effective than the cannon and Rocket Pods.
Conclusion
Day by day, the skills of Battlefield 3 pilots are increasing making the sky a less inviting place. So it’s important to find a safe place to practice. Low population servers are your best bet. Also, don’t get frustrated. Flying jets is difficult and isn’t always the most rewarding for point-hungry players. But once you get the hang of it, piloting jets is extremely satisfying. Feel free to post any tips of your own. We’re all learning together. See you on the Battlefield!


