Meet Crew at the Van
What we thought would be a pretty tough mission turned out to be not so bad. It has some gun battles, a little stealth play and those multiple points of access that players like so much. You’ll also find a couple Suspects with Warrants, as well as some Evidence to add to the game’s Case Files. If that’s what you’re looking for, use those links, because we’re all about getting from start to finish with this guide.
It’s pretty easy stuff to start off with. Move to the van with your new criminal buddies to complete this objective.
Get to the Elevator
Start heading towards the building, moving around the right side of it and making your way to the back. There will be two guards back there, and players would be very wise to arrest them, or at least take them down without making any noise. This will give players access through the back door, which leads to the security office.
Arrest any guards you see on the way to the office, then use the cameras to spot the locations of the rest of the foes on this level. You can also change up your Tactical Gear, which would be wise since you start off with Bald Eagle pistol. When you’re ready, leave the office and turn right, following the hallway until you can disable the alarm. The elevator is nearby, but you’ll have to take out a couple guards at the front desk in order to use it. When all of this is done, it’s on to the next objective.
Give the Explosives to Tyson
There are a bunch of bad guys on the 19th floor, which is why players will head to the 20th. From here, arrest any guards on your current level, then use the Scanner to tag the ones below. Sneak down and start working through them. Remember, you can arrest up to three at a time, or you can use the shell casing distraction to pull one to a more secluded area and deal with him quietly. Either way, clear the entire area, then head to the corner office to meet up with Tyson.
Tip: Keep in mind you have the T62 CEW to take targets down quickly, while not using lethal force. It’s also worth more points towards your Expert Level.
Find the Private Elevator
Run forward from the room you’re in and up the stairs, going through the door, then a couple of more until you reach the elevator. You’ll know you’re getting close when you come across a photo of Dawes and his wife sitting on a bookshelf.
Let Tyson In
There is a console on the counter that players can interact with to let Tyson into the room.
Find the Vault
Again, this one is easy. It should be right in front of players. Interact with the statue to find the vault and complete the objective.
Survive!
This objective isn’t as bad as the last time we saw it, but it can be a pain if you don’t have the right weapons. Look for the nearby Tactical Gear and grab an assault rifle. If you finished the Internal Affairs Case File, you have access to the R0933 Carbine, a great option for this fight.
The fight itself will come in two waves, and players would be wise to use the peek and lean maneuver in order to take out the bad guys without exposing themselves to a lot of danger. The second wave is in the dark, but it’s easy enough to spot all of the foes since they have flashlights on their weapons. Just keep killing bad guys until the objective is complete.
Get to the Boat
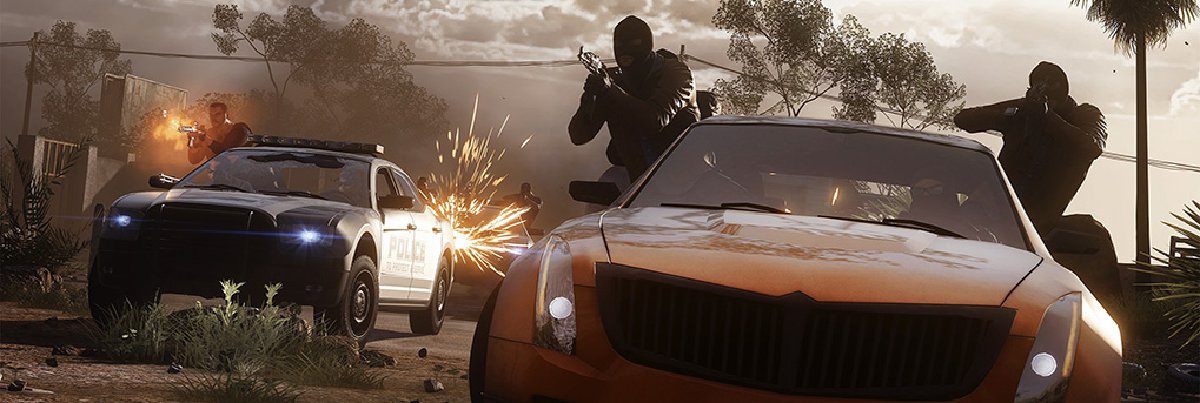
A lot of this is a cut scene, but near the end there is more fighting. First, players will need to endure the Zipline incident, and when they are on the ground they’ll have to fight through several vehicles full of bad guys. Just take cover behind a car, then kill the enemies and move up. The boat is at the opposite end of the street, and reaching it will see the episode completed.
Feel free to return to our main walkthrough for Battlefield Hardline, a place where you’ll find all of the episodes in one location, as well as guides to all of the Evidence, Case Files and Suspects with Warrants. For players eager to continue with their experience right away, continue to Episode 10: Legacy.


