Hunter’s Dream
Congratulations on killing the Blood-starved Beast! You’ll revisit Hunter’s Dream, and the elderly man inside of the workshop will divulge new information.
When ready to continue your journey, walk over to the Cathedral Ward lamp and go into the next room. You’ll see a small entrance on the right, so go through it and then up some steps.
Walk onto the lift and the heavy-looking plate will move upwards. When you gain access to the next room, be on guard because there’s a Wheelchair Blunder in here with a mini-gun. The best strategy is to edge into this room so he begins firing and then immediately duck back into the hallway. When he runs out of bullets, quickly rush into the room and kill him. While in here, inspect the chest to pick up a Communion rune that will increase the number of Blood Vials your hunter can carry.
From this area, go up the stairs on the side and you’ll see a bridge. You’ll also see a group of Henchmen, two of which carry firearms, inside of a room across from the bridge. There’s a good chance they’ll spot you and attack. See if you can trick some of them to leave the group and head to your location, where you’ll thin their numbers. Now travel across the bridge.
Take care of whatever enemies are left and search the chest for two Bloodtinge Gemstones. Welcome to the Healing Church Workshop.
Healing Church Workshop
Go outside and move right to see an Imp towards the end of the path. When you hit the Imp it will fall to the level below. Follow the creature and kill it, then take the path into the next room. Now travel along the wooden bridge.
When on the other side of this bridge, look down, line up your hunter with the bridge below and fall to reach it. Walk towards the barrels and fall yet again. You will probably take some damage, so top off your health if necessary.
Search this area for a bronze casket leaning against a wall. Walk over to it and stand near the edge to see a corpse below your hunter. Similar to the bridge, line up your character with the body and drop down, then pick up the Madman’s Knowledge.
Walk towards the wall and then look down to see another wooden bridge. Completely refill your health and drop down so you can survive the fall. Walk onto the middle of this bridge and fall to the next one. Walk to the nearest wall and fall yet again to the last bridge, and then fall to reach the floor.
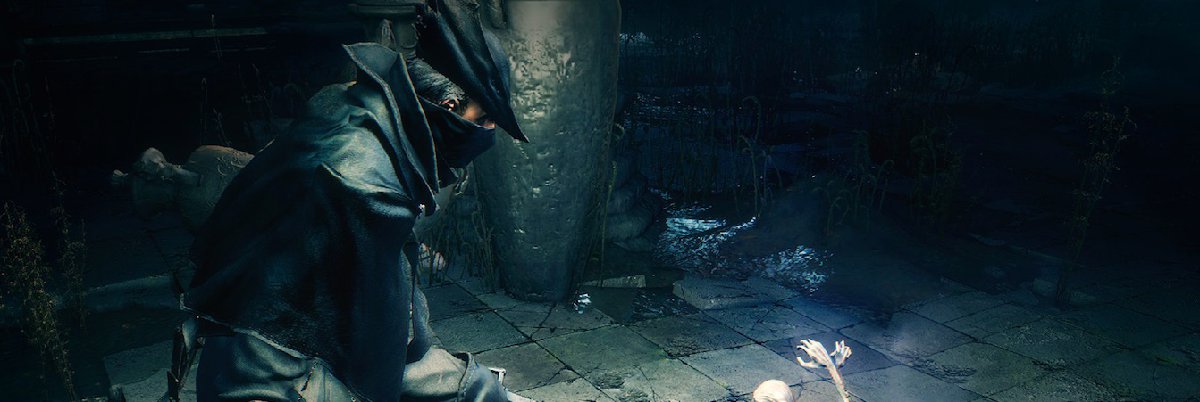
There’s a Werebeast near the doorway, but it faces away from you. Use stealth to sneak up behind this monster and hit it with a Charge Attack and critical strike. The creature leaves a Beast rune behind that will increase effects from beast transformation.
From there, open the door the Werebeast was in front of and walk along the path. Wander through the alley and you’ll see another dead body. There are two Crazed Crows nearby, so kill these enemies and take the Sweaty Clothes and Rumpled Yharnam Hat off the corpse.
Go around the corner and you’ll see some stairs and a path that curves right. Dispose of the Hound near the stairs and look right to see a Death Dealer towards the end of this path, standing on yet more stairs.
Avoid rushing in and attacking the Death Dealer head on. He has a long reach, will use a special attack to destroy your health and is a bit stronger than your hunter. If you die, you will be sent to Yahar’gul, Unseen Village, a place you should not visit until the end of Bloodborne. Should this happen, scroll down to the end of this article to learn how to escape Yahar’gul, Unseen Village and go back to Hunter’s Dream.
If you can, sneak up behind that Death Dealer and hit him with a Charge Attack and then a critical strike, taking away half of his health, give or take. If he rages continue to attack, but be mindful of the two Henchmen and Hound who are now alert to your presence. When things get nuts, go back to the place where you killed the Werebeast. Although the Henchmen and Hound will follow, the Death Dealer cannot fit through the entrance.
After slaughtering the enemies that followed you, wait for the Death Dealer to return to its initial position. Repeat the process of sneaking up on him, Charge Attack and then critical strike. There’s a good chance this will kill him, but if not, you’re close.
If you travel across this courtyard you will find a corpse with a Madman’s Knowledge. From here, kill the two Henchmen on the path and go right and down the steps to battle a Leech Warlock. These monster will attempt to stun your hunter with magic, then grab him to whittle away health and steal some Insight. Dodge the first magic attack and then dodge the projectiles they unleash. Kill Leech Warlocks by rushing these enemies, getting in some attacks and then dodging. Now repeat the process to make them dead. You can also sneak up behind one and perform a Charge Attack into a critical strike. If all else fails, escape and then wait for the Leech Warlocks to reset. When they die, look for a corpse holding three Fire Blood Gemstones to strengthen your weapons.
Go back up the steps (the same way you entered) and travel down the path onto the lift. This takes you to a new Cathedral Ward area.
Cathedral Ward
Exit the lift and rummage through the corpse to find six Thick Coldblood. From here, fall into the courtyard and battle three Gravekeepers. If fighting three of these guys seems like a daunting task, wait for one to go around the corner, then drop down and battle two of them. Make sure you kill them all.
Approach the gate and pull the lever to open it. There’s a dead body, but leave it alone and take care of the Gravekeeper. Now return to that corpse and take the Wooden Shield. There are steps ahead, and taking them puts you near a cathedral and the Cathedral Ward lamp. Instead, turn around and take the ladder up to discover another body, this one holding six Numbing Mist.
Go back down the same ladder and up some steps. This will put you left of the balcony you fell from. At the very top is a corpse with five Thick Coldblood. Pick these up and take the stairs up to a corpse with six Blood Vials. You will see an Axe Reaper by the next set of stairs. If it faces you, go back down the steps and take the path on the right so you travel around the lower half of these steps and wind up behind the Axe Reaper.
Of course, there’s more than this enemy to deal with; there’s also a Gravekeeper and Hound. Go beyond the stairs and you run into the Hound. Take the steps and you battle the Gravekeeper. Do what you wish and be sure to check the base of these steps to find two bodies, both of which have five Thick Coldblood.
Now for the Axe Reaper! He’s impervious to both Charge Attacks and blasts of your firearm. Thankfully he’s not the quickest of enemies, so wait for him to swing, dodge behind this enemy and attack. Repeat until he croaks, and make sure to remain out of reach.
Look at the gate at the bottom of the stairs and make a mental note. Pulling the lever opens the gate, but don’t do this yet. Instead, take the stairs until you’re almost at the top. You’ll see two Gravekeepers on the last set of steps above you. Hit one with a pebble and wait for it to walk down the stairs, where you can easily kill it before moving on to the next one. When they’re gone, reach the top of the stairs and walk into the door. This kicks off the boss battle.
Boss Fight with Vicar Amelia
- Beat Vicar Amelia to receive a Gold Pendant.
Vicar Amelia possesses several dangerous attacks, all of which come from the front. Remain close and attack from behind and this boss is relatively easy.
Of course, you want to avoid the front as much as possible. Her sweeping attacks cover a wide area and may hit you from the side if you’re too close to being in front of her. Vicar Amelia may also attempt to grab your hunter.
Do not move too far away because she’ll drive her fists into the ground, creating a shockwave. In addition, she may jump towards you. Stay within range and you won’t see either of these moves.
When she pauses to clutch the talisman, go on the offensive. During this time she’ll begin to glow, but if you’re behind Vicar Amelia you won’t have to worry about this. There’s a chance she may not even turn around, and if she does, quickly dodge so you’re behind her again.
After killing Vicar Amelia, walk to the end of the hall and check out the item on the pedestal. Watch the cut scene and then interact with the Grand Cathedral lamp.
Yahar’gul, Unseen Village: How to escape this Death Dealer Prison
The Death Dealer killed your hunter and now you’re in Yahar’gul, Unseen Village. No worries, we’ll help you get out.
Look right and exit through the door and into the following room, where you’ll see a corpse. Search the body and take the six Thick Coldblood, then walk down the steps on the left. Walk to the farthest side of this room and you’ll see a body with seven Frenzied Coldblood. Now speak with the woman located in the right corner of the room. She has very little to say.
Head back up the steps and walk to the left side of the room where you came from. Go up either sets of stairs and into the door. Take the next staircase and fight the two Old Hags. Although they move fast, the fact that they’re weak means you’ll have no trouble killing them.
You’ll see jailcells on the left and right. Each one contains multiple Henchmen who get up when you wander by. Slaughter these enemies and take 10 Quicksilver Bullets and six Blood Vials from the bodies nearby.
Walk into the next room and there are two Death Dealers. Avoid these enemies, return to the stairs and walk towards the top of this place to find even more Death Dealers. Thankfully there’s a lamp behind your hunter, and interacting with it sends you to Hunter’s Dream.
Go back to Prima’s free Bloodborne walkthrough. When you are ready to continue after killing Vicar Amelia, proceed to part 5, where we explore Hemwick Charnel Lane and tell you how to beat the Witch of Hemwick to unlock the Memory Altar.


