This guide offers a walkthrough of the Irithyll Dungeon area in Dark Souls 3. This area is littered with Jailers which can be difficult enemies to face. Along the way you will find the entrance to Archdragon Peak and the Profaned Capital, the NPC Karla, as well as a number of items. Of note, you’ll find the Great Magic Shield spell, Old Sorcery armor set, Bellowing Dragoncrest Ring, Xanthous Ashes, the Dragon Torso Stone and much more!
Irithyll Dungeon
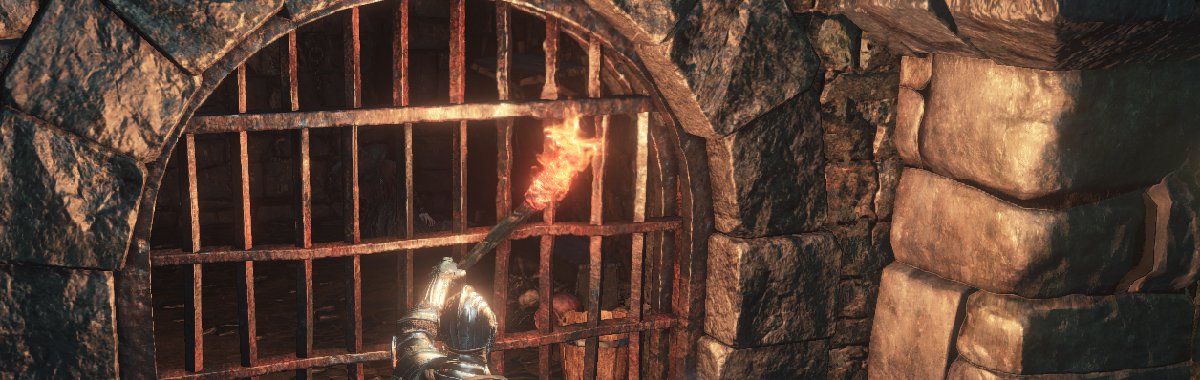
After going through the Irithyll of the Boreal Valley area, head to the Irithyll Dungeon bonfire in Irithyll Dungeon and go down the stairs directly ahead. There are cells lining the hallway here. The first cell to the right has a Peasant Hollow that can’t be targeted, but you can still attack it. Kill it now because when you head into the first cell on the left to collect the Rusted Coin from the corpse, it will screech and attack from behind you if it hasn’t been killed.
Collect the Large Titanite Shard from the corpse in the second cell on the left. The third cell on the right is locked, but you’ll find the key a bit later in this area. A Jailer patrols the hallway ahead. These enemies can be very troublesome if you allow them to be. Anytime they have a direct line of sight with you, your are cursed and your maximum health drops at a relatively fast rate. In addition, they attack with a cloud of mist that will also inflict a curse similar to the frogs from previous areas.
Your best course of action here is to use a ranged attack to draw the Jailer into the corridor with the cells you just looted and hide behind one of the stone pillars along the walls. You won’t be completely hidden, but it’s enough to break the line of sight so you don’t be cursed until the Jailer is close enough for you to properly attack.
Kill the Jailer and head down the next hall to the right. There’s an item corpse on the left, across from the first cell. Be careful as you approach the item because a Peasant Hollow awaits in the cell. Kill the enemy, then collect the Fading Soul from the corpse and continue down the corridor.
Open the door to the second cell on the right and kill the Peasant Hollow inside, then keep moving down the corridor. When you get to the next alcove on the left, a Jailer waits in the corner. When you attack, three more Peasant Hollows will also attack. Try to move into the cell just before the alcove to hit the Jailer with a ranged attack and draw him out. If you can’t get a good angle, run in and then quickly back out to draw out the two Peasant Hollows so you can take them on before you engage the Jailer.
Another Jailer patrols the hallway to the left, but it’s much easier to take down with ranged attacks once the other enemies have been taken out. Before you head down that hallway let’s finish this side of the area. Continue to the end of the corridor to find a Large Titanite Shard on the corpse. Once again you’ll hear a loud scream as you collect the item. Just beyond the corpse is a locked gate that requires the Jailbreaker’s Key, which you’ll find soon.
Turn around and head left to find stairs at the end of the hall. Below are four Cage Spiders and another Jailer. Luckily you can target all of the enemies using ranged attacks from the upper floor. Clear the enemies, then head down the stairs to find a locked cell. You need the Old Cell Key to unlock this, which you’ll find later in the dungeon. When you get it open you can collect the Prisoner Chief’s Ashes on the corpse inside. For now head out into the next hallway.
To the right is another item corpse that holds the Large Soul of a Nameless Soldier. Collect the item, then head in the opposite direction. After passing a group of dead Cage Spiders, there’s an open cell to the left. Inside you can clearly see two Peasant Hollows, but there are two more on the ground that are not yet active. Ideally you want to kill the closest Peasant Hollow with ranged attacks, then approach the two on the ground and finally the one facing the item corpse.
Be careful with these Peasant Hollows as they will mutate into leech-filled enemies if you give them the chance. If they hit you the leeches will cause bleeding, draining your health considerably. Kill all of the enemies in the cell, then search the item corpse to find an Old Sorcerer Hat, Old Sorcerer Coat, Old Sorcerer Gauntlets and Old Sorcerer Boots.
Continue down the hallway to find a Corpse-Grub in the cell on the left at the very end. Kill it to obtain a Great Magic Shield sorcery spell. You’ve now completed this side of the area, so head back up the stairs to the hallway you passed before.
To the left is a locked gate, and at the end of the hallway to the right is another Jailer. Before you venture too far to the right, use ranged attacks to clear out the Jailer, alleviating most of your troubles on this side of the area.
Head into the first cell on the left to find another Peasant Hollow in the doorway. Kill it then collect the two Pale Pine Resin on the item corpse by the hole in the wall. You can venture further into this hole, but first head into the next cell, kill the three Peasant Hollows and collect the Large Titanite Shard within.
Go back to the hole in the wall in the previous cell and kill the Wretch in the corner of the next cell (it blends into the walls). Continue into the hallway ahead and open the gate to the left. This links back to the area you were just at. Keep moving to the end of the corridor to find a cell on the right. The item corpse inside holds a Jailbreaker’s Key that opens the gate at the end of the hallway on the other side.
If you head back to the gate and drop down you won’t be able to get back up without going around. However, dropping down you find a Bellowing Dragoncrest Ring to the left, which is great for Sorcerers. It’s best to clear out the other side of the area until you find the Crystal Lizard, then head back here. That allows you to complete all of the area and collect the loot you’d otherwise miss (or have to backtrack for).
Head back down the hallway and to the left. Kill the three Jailers down the stairs at the end of the hall (one hides right below the stairs). There are Cage Spiders to the left and right of the exit, but before you take them out look in the small cell in the far left corner and kill the Wretch within. Collect the Simple Gem from the item corpse, then head out to take down the two Cage Spiders.
In the next hall there’s a door to the right that does not open from this side (it’s a shortcut you’ll find later). In the opposite direction is a Crystal Lizard toward the end of the hall, and two more Wretches trapped in cells to the left. Killing the Wretches is purely optional, but make sure you kill the Crystal Lizard to obtain Titanite Scale.
Head through the gate at the end of the hall and collect the two Homeward Bones directly ahead. To the right are three Hollows that shouldn’t be too difficult to kill. Take them out and head through the archway at the end to find a chest in the next room. This chest is a Mimic so make sure you attack instead of trying to open it. Kill the Mimic to find an Estus Shard, then continue into the next room.
A large group of Hollows patrols the next room. They shouldn’t be overly difficult to take down, but you can lure them into the previous room if you have any difficult. Around the corner to the right is another Hollow guarding a corpse that holds a Soul of a Weary Warrior. Turn around and head back to the corner to find a ladder that leads down.
Climb down the ladder and open the gate at the end to find a sleeping giant. If you’re willing to take your time you can attack the giant to wake it up, quickly dodge to avoid it’s hand as it sits upright, then attack again before it moves that hand again. At this point you can retreat through the gate and either move out to get it to attack and attack it’s hands again, use ranged attacks from the gate, or wait for it to go back to sleep and repeat the process until it’s dead.
Collect the Soul of a Crestfallen Knight where the giant was resting it’s hands. A Crystal Lizard is found here as well, but depending on how you fought the giant it may have fled by now. If that’s the case, come back after resting at a bonfire to kill it and obtain a Titanite Chunk. There’s also an item corpse above this area, but you can’t reach it just yet. Instead, move to the far side and climb down the ladder. On the far side of the bridge are several Hound-rats and a corpse that holds a Pickaxe.
Keep moving down the water way to find a hole in the right wall just before the stairs. Keep this in mind as we’ll be coming back to it. There’s a corpse up the stairs that holds the Soul of a Weary Warrior. When you get to the end the chest on the right holds an Old Cell Key (which opens the locked cell near the entrance to the dungeon with the Prisoner Chief’s Ashes on the corpse inside), while the chest on the left is actually a Mimic that holds a Dark Clutch Ring. However, as soon as you open one of the chests, a group of Basilisks (toads) attack from behind.
Run all the way back to the ladder if you don’t want to face these enemies all at once. Most of them won’t follow you all the way back, allowing you to slowly approach and fight them individually. Once they’re down you can continue onward or collect the treasures below the bridge and unlock another shortcut.
If you wish to collect the treasures, drop down from the bridge into the area below and take out the horde of Hound-rats that await you. These rats will keep coming even after you slay the initial horde, so it’s best to collect the loot as soon as the first batch of enemies goes down. On the item corpses in this area you find two Large Titanite Shards and a Profaned Flame pyromancy spell.
One exit from this room leads to a lift that takes you back to the Irithyll Dungeon bonfire, creating a shortcut. The other exit leads to a staircase. In the room above there’s a Mimic disguised as a chest in the far corner, and a ladder near the entrance. Kill the Mimic to find 10 Dragonslayer Lightning Arrows.
Climb up the ladder to reach the platforms above where the giant was located. From here you can jump across the small gap to reach the item corpse and collect the nine Lightning Bolts (crossbow ammo). Drop back down and cross the bridge again, then head through the hole you passed just before the stairs.
Two large Hound-rats wait in the next room. Defeat them and collect the four Dung Pies from the corpse in the middle of the room. Open the gate on the far side to find a group of Jailers in the large room beyond. Use ranged attacks to draw them over to you individually or sneak up behind them so you don’t have to fight them all at once.
Once the room is cleared collect the Large Titanite Shard from the corpse closest to where you entered, the Alva Helm, Alva Armor, Alva Gauntlets and Alva Leggings from the corpse behind the pots on the right side of the room, an Ember from the corpse in the middle of the room, and a second Ember from the corpse on the far right.
Head up the stairs in the far right corner to find one last Jailer in the hallway here. Just before the Jailer is a cell with an enemy and nothing more, and just past the Jailer there’s a cell on the left that’s locked. You will find the key in the Profaned Capital area coming up, so remember this cell. Inside is Karla, another NPC you can send back to the Firelink Shrine.
On the opposite side of the room, the cell at the far end holds two item corpses that give you Xanthous Ashes to give to the Shrine Handmaid, and a Dusk Crown Ring. When you pick up the item by the far wall, you’ll hear another scream from the adjacent cell, but nothing will attack so don’t worry about it too much.
The cell directly across from where you entered has five Wretches waiting inside. While these enemies aren’t overly troublesome, it’s fairly easy to engage them one at a time so you don’t get overwhelmed. Kill all of the Wretches then collect the Profaned Coal from the corpse inside to give to the blacksmith at Firelink Shrine.
Finally, a chest sits in the small hallway between the two cells on this side. Be warned, this chest is a Mimic so you should attack it instead of trying to open the chest. Kill the Mimic and collect the two Titanite Scales it drops.
At this point you have completed everything this room has to offer. You can exit the room from either end. If you head out the end on the far side from where you originally entered you will reach the Profaned Capital, but first head out through the exit near the doorway you entered through to unlock a shortcut.
Continue up the stairs to find a Dragon Torso Stone on the odd corpse to the left. This is also where you’ll enter Archdragon Peak a bit later in the game. At the end of this small area is a lift. Step off the lift halfway up to find a corpse holding a Lightning Blade miracle spell.
Drop down and take the lift to the top. Exit the lift to find a Large Soul of a Nameless Soldier on the corpse ahead, then open the gate to create a shortcut back to the cell blocks near the beginning. Now head back to the large room where you fought all of the Jailers and head out the exit on the far side of the room. Continue down the stairs to the left and collect the Large Soul of a Weary Warrior to the far left.
As you cross the nearby bridge and enter the Profaned Capital, a Headless Gargoyle drops down ahead of you. It’s best to back up to the area where you just found the Large Soul of a Weary Warrior and fight the Gargoyle there. This gives you more room to move around without fear of falling off the bridge. The Gargoyle has an array of aerial attacks and will use its wing as a shield. However, if you keep dodging or use your shield, this fight shouldn’t be too difficult.
Kill the Gargoyle and it drops the Gargoyle Flame Spear. Collect the loot and continue across the bridge. At the end of the bridge climb down the ladder to the area below and head over to the ladder near the middle of the room. Climb up this second ladder, collect the Stretch Out gesture and the Undead Bone Shard and light the Profaned Capital bonfire. Welcome to the Profaned Capital.
Continue on to the Profaned Capital or head back to find Anor Londo if you haven’t cleared that area yet. You can also head back to our Dark Souls 3 walkthrough and guide for other area walkthroughs and tips!


