This guide offers a walkthrough of the Farron Keep area in Dark Souls 3. In this area you are tasked with extinguishing three flames to open a massive door that leads to the Abyss Watchers boss. Along the way there’s a huge swamp to traverse that offers quite a bit of loot if you decide to explore the entire area. There’s also a side area where you can battle against a demon for even more loot. All in all you can join the Watchdogs of Farron covenant, find an Undead Bone Shard, Estus Shard, Sunlight Talisman, Golden Scroll, Pharis’s Hat, Black Bow of Pharis, Sage’s Coal, Sage’s Scroll, Crown of Dusk, Iron Flesh, Nameless Knight armor set, Lingering Dragoncrest Ring, Large Titanite Shards, Lightning Spear spell, Dragon Crest shield, Great Magic Weapon, Atonement spell, a Hollow Gem and much more.
To kick things off, head to the Farron Keep bonfire and move out into the watery area ahead and kill the four slug enemies to the left. The water here is toxic, so be careful not to stay in it too long or you’ll be poisoned and slowly take damage. To the far left is another group of slugs guarding an item. Kill the slugs and collect the Ragged Mask they were guarding, then move to the right from platform to platform without lingering in the toxic waters.
There are several more slugs to the left near an item in the middle of the water. The item is a Titanite Shard. If you want it, kill the slugs first, then run to the item and immediately back to the small patch of land. There’s a partially submerged bridge ahead, with an item on the far side and more slugs. The item is an Estus Shard, so make sure you collect it before moving on.
On the next small patch of land is a fire, with another item corpse on the far side that holds a Titanite Shard. Eventually you want to head up the stairs to the left here, but there are more items to the left in the swamp, as well as more slugs to face. The items to the left include 10 Prism Stones, four Rotten Pine Resin (which help prevent the poison build-up), and a Stone Parma shield that absorbs 100 percent physical damage.
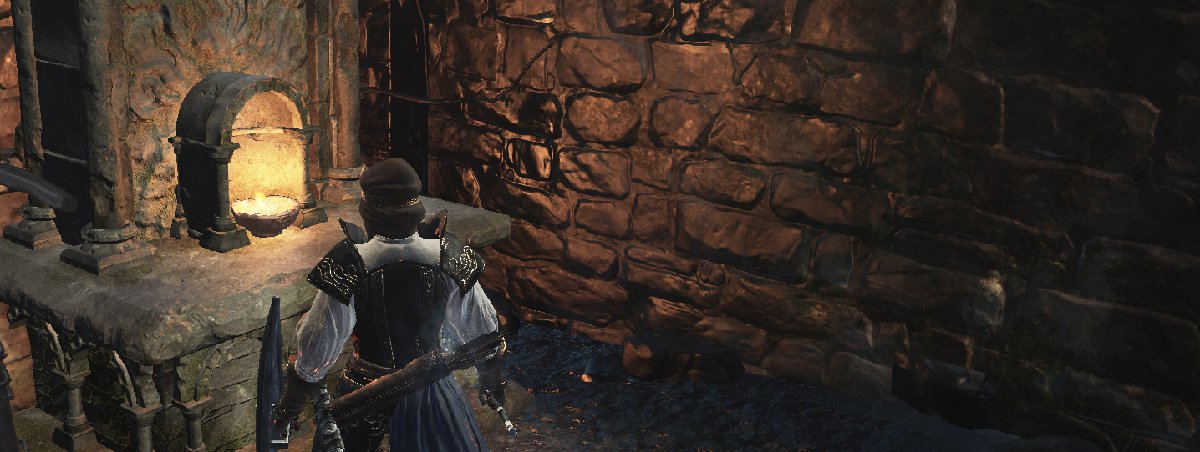
Collect the items or not, then head up the stairs and kill the two enemies at the top. Be careful of the enemy that is not wearing the cloak as it will attempt to jump on your head, inflicting considerable damage. It’s best to use a ranged attack to lure one of the two enemies away so you can fight them separately. Kill the enemies then extinguish the flame here to begin the process of opening a door that blocks your path ahead.
If you head through the archway ahead there’s an enemy waiting to ambush you to the right. You can head around to the right instead of going through the archway to attack him first. Either way, kill the enemy, then search the corpse ahead to find two Rotten Pine Resins. Continue down the hill and look to the left to see another enemy. This enemy is even more aggressive than the last and will constantly attempt to jump as well as grab you and inflict significant damage. Stay on the move as you fight this enemy to avoid the attacks.
On the plot of land where the enemy was standing, there are items in the swamp to the right and left, along with hound-like creatures near the closest item. Use ranged attacks to draw the hounds in, then collect the two Titanite Shards and head up the next flight of stairs near one of the items (the one farthest from the hounds). Kill the enemy at the top of the stairs, search the nearby corpse to find two Purple Moss Clumps, then extinguish the flame here.
Across the bridge to the left are three enemies guarding a bonfire. The enemy standing in the middle will create a poison cloud, so it’s best to use ranged attacks to lure in the other two, then take on the middle enemy alone. Light the Keep Ruins bonfire ahead, then continue out the far side. Directly ahead is the door that you’re trying to open by extinguishing fire.
Look to the left to see a hound below and to the right to see a small dome with several slugs inside. It’s in your best interests to take down the hound first so it doesn’t sneak up behind you. Clear the slugs inside the dome and the one hanging on the outer wall, then collect the Undead Bone Shard they were guarding.
Move through the dome and clear the slugs at the bottom of the ladder just ahead and to the right. The ladder leads to the Old Wolf of Farron bonfire, and a battle against a demon, which we’ll get to just before the boss battle, so don’t worry about exploring the area at the top just yet. To the left of the ladder is an item corpse that holds a Titanite Shard. Be careful here as some of the swamp water is deeper, meaning you can’t move through it quickly. You can roll to move a bit faster, but that also uses up your stamina so be on the lookout for slugs in the water and other enemies nearby.
To the left of the ladder is a corpse holding a Wolf’s Blood Swordgress item. Collect the loot and move onto the patch of land just beyond to find a Sunlight Talisman item and an Estus Soup cauldron that essentially serves as an Estus Flask. Don’t use the cauldron until you need it.
There are five hounds in the area to the right of the cauldron. If you have ranged attacks available you can lure each one in separately from the land mass where the cauldron is located. In one direction you’ll see the hounds, while in the opposite direction you’ll see a few slugs and two large tree-like creatures. If you haven’t guessed by now, you want to go in the direction of the treants.
Your best course of action is to lure the treants to solid ground and fight them there one at a time. Every time the treants plant their tree in the ground or motion it toward you, red spirits spawn and fly toward you inflicting magic damage. You can dodge to avoid them, but keep a close eye on the treant because it will use the tree as a weapon with considerable range. If the treant plants its tree in the ground and has trouble pulling it out, back away immediately to avoid the explosion that follows.
Once the first treant is down, look in the direction of the second to see stairs to the left of its position. With careful maneuvering it is possible to make it to the stairs without getting the treant’s attention, but you’ll need to hug the left wall and that might get you poisoned depending your poison resistance. Once you get to the stairs, head to the top to find the final area where you need to extinguish the flame.
Head through the archway to the left of the flame and collect the two Homeward Bones on the corpse. At this point you can head back to the large door near the Keep Ruins bonfire and battle the stray demon up the ladder you passed before, or you can finish exploring the swamp and collect more loot. If you wish to jump straight to the boss, skip the next 12 paragraphs (after the last screen shot) and head back to the Keep Ruins bonfire.
Clear the wooden obstacles in front of the stairs and head up to take down the enemy above. Continue down the stairs to find more of the swamp and several toads below. These toads use multiple gas attacks that will inflict curse upon you if the meter fills completely. When this happens you will die instantly. To engage these enemies, wait until they jump toward you then immediately dodge toward them, effectively moving under the enemy, and attack from behind. Whatever happens, do not stand in the gas very long or you will die.
There are four item corpses in this small area. Two hold a Large Soul of a Nameless Soldier, while a third holds four Repair Powders. The final corpse is hidden in a cave surrounded by toads and holds a Golden Scroll that will allow you to learn new spells. There’s also a chest nearby that contains an Antiquated Dress, Antiquated Gloves, and an Antiquated Skirt.
If you go back to the bridge near the Keep Ruins bonfire, there are three treants far to one side. Defeating them earns you a Pharis’s Hat head piece and a Black Bow of Pharis weapon. Scattered throughout the swamp you’ll find a Sage’s Coal, Sage’s Scroll, Poison Gem, Crown of Dusk, Iron Flesh, Nameless Knight Helm, Nameless Knight Armor, Nameless Knight Gauntlets, Nameless Knight Leggings and Twinkling Dragon Head Stone. In addition, if you kill the giant crab and you’ll earn a Lingering Dragoncrest Ring.
Battle Against the Stray Demon
To battle against the demon, head back to the ladder you passed before, to the right of the Keep Ruins bonfire when you head in the direction opposite the three enemies, climb up the ladder and light the Old Wolf of Farron bonfire in the room at the top. Go back outside and circle around the right side of the structure (right from the point of view facing the bonfire room). Head up the stairs to find a Crystal Bug along the back side of the structure. Take it down to earn yourself a Twinkling Titanite, then swing back around to the stairs you just came up. Before you head down the stairs, attack the wall to the right of the stairs where there’s an archway. This reveals a hidden passage with a corpse at the ending holding Dreamcasher’s Ashes. Give this item to the Shrine Handmaid at Firelink Shrine to add new items to her inventory, including the ability to buy Titanite Shards.
Drop down to find yourself near the bonfire again. This time approach the wolf seemingly sleeping here. Pray to it and you will be awarded with the Legion Etiquette gesture. If you ask to join the covenant you receive the Watchdogs of Farron item. Head up the nearby stairs and take the lift to the top.
When you reach the top, head up the stairs to the right to find a demon waiting on top of the wall. While this demon isn’t officially a boss battle, you should treat it like one. The demon has a large weapon with deceptive range, so it’s best to fight at close range from behind the monster. As you approach it will likely attack with its weapon, so be ready to dodge. Even if you have a shield that absorbs 100 percent physical damage, it’s best to dodge these attacks so you don’t drain all of your stamina.
If you fight from a distance, not only will you have to worry about various attacks from the demon’s weapon, the demon will pause and spit a coal-like projectile attack from its mouth that will slowly track your position and can be difficult to avoid if you don’t move out of the way as the demon is preparing the attack. If you see it stop attacking and start drawing in air, move closer to the demon or to either side to quickly escape the attack.
At close range you still have to stay on your toes, but it’s a little easier than fighting from a distance. If you stay behind the demon it will have difficulty hitting you with its weapon. Watch out for the demon’s short hops into the air as it will come back down and inflict significant damage if you’re still under it. When you see it jump, move away quickly to avoid this. Once it lands, immediately move back in and start attacking again.
The biggest concern you should have when fighting the demon at close range is watching out for its grab. As soon as you see the demon pause and start moving its arm, dodge repeatedly to avoid the grab. Once you have the timing of the grab down, you can dodge once to avoid it, but until you’re used to the attack, dodge multiple times in rapid succession. If you get caught by the grab mashing buttons as quickly as possible to escape with minimal damage. If you do not escape in time the demon will throw you, and more often than not you’ll be thrown off the high wall to your immediate death (at which point your souls can be found near the demon).
Defeat the demon to obtain the Soul of a Stray Demon, then loot the nearby corpses to find two Embers and a Greataxe. If you look toward the corner there’s a pile of rubble that leads to a break in the wall. You can drop down here and follow the narrow path to the other side of the gate. There are a few enemies in this area (mainly in the upper portion of the area), so don’t assume you’re alone.
You’ll find three Crystal Lizards with the first two giving you a Large Titanite Shard each. The third gives you a Heavy Gem and is located in the upper section of this area. When you go after the third Crystal Lizard, chances are it will run you right into the enemies found here. They’re fairly basic enemies that should go down in a few swings, but be careful as you chase down the Crystal Lizard.
Near the dead dragon there are corpses that hold a Lightning Spear sorcery spell and Dragon Crest Shield. Collect all of the loot, then head to the upper area where you can drop down to the other side of the gate and make your way back to the lift.
To head to the Abyss Watchers boss battle, go to the Keep Ruins bonfire, then head down the stairs opposite the three enemies on the bridge and through the now open double doors at the end. While you can see an item directly ahead along the lower path, take the path to the left to engage the enemy at the top. Try to take it down before it can call on its friends along the path below.
Clear out the enemies on the lower path, then collect the Shriving Stone on the corpse and continue to follow the path. As you approach the top of the hill, slow down and let the enemies fighting above take each other out. Only the two wraiths will remain, which you can separate and take out individually. Be careful of their grab technique, which inflicts significant damage. In addition, they can be difficult to stun, especially with a one-handed weapon, so don’t stand in front of them swinging away expecting to interrupt their attacks. Attack once or twice (depending on your weapon), then dodge away to regroup.
Once the enemies are down the boss awaits through the double doors ahead, but there’s some loot to be had first. To the right of the boss entrance is a corpse that holds an Ember. For now, head right from where you entered the area to find another archway. Head into the archway and light the Farron Keep Perimeter bonfire, then continue past it to take down the three enemies beyond.
In addition to the these enemies, if you continue to follow the path you’ll run into another Crystalline Beast that drops two Titanite Scales if you defeat it. At the very end of the path is a corpse holding a Great Magic Weapon sorcery spell. Collect the loot and open the gate at the end of the path to create a shortcut back to the Road of Sacrifices area.
Between the two stairs, in the midst of all these enemies, there’s an opening to the right that allows you to drop down onto a path that runs above the swamp. If you drop down you can collect an Atonement spell and a Hollow Gem. At this point you’re ready to battle against the boss as there shouldn’t be much left to do here.
Use a Homeward Bone to easily get back then from Farron Keep Perimeter bonfire head in the direction opposite the respawned enemies nearby and let the wraiths take out the other enemies before you take them out. If you wish to summon Black Hand Gotthard (who gives you the By My Sword gesture), make sure you have an Ember active and access his summon point near the boss battle entry ahead. When you’re ready, head inside to battle against the Abyss Watchers.
Continue on to face off against the Abyss Watchers, or head back to our Dark Souls 3 walkthrough and guide!


