This guide offers a walkthrough of the Undead Settlement in Dark Souls 3, including the numerous side areas. You will add Cornyx the Pyromancer, Irina of Carim and Yoel of Londor to your collection of NPCs at Firelink Shrine, plus find the Mortician’s Ashes and Grave Key, and stop the giant from throwing spears at you!
To get you started light the Foot of the High Wall bonfire at the beginning of the Undead Settlement area, then head down the first flight of stairs and to the left. Collect the Large Soul of a Deserted Corpse from the top of the rubble, then head back to the stairs and continue down to the bottom. As you approach the gate on the far side three undead hounds attack the helpless undead.
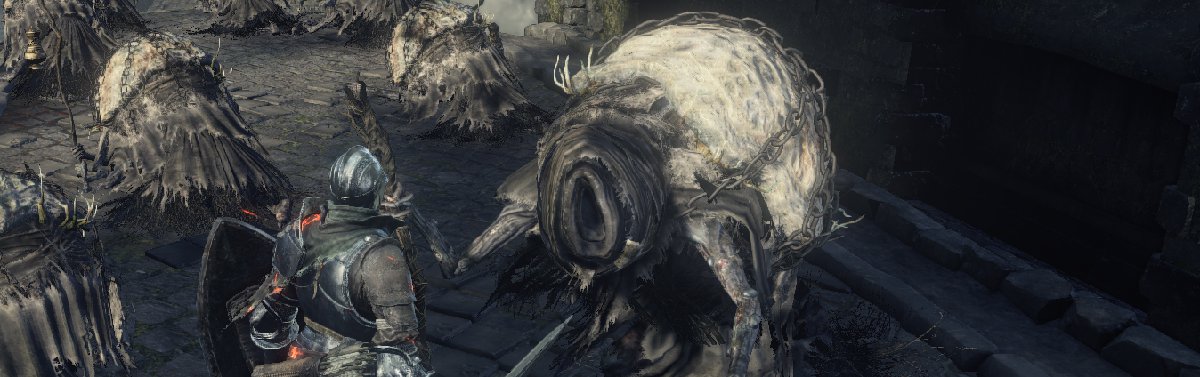
Clear out the hounds then in the opposite direction, away from the gate, to find two more hounds and an item corpse behind the fallen carriage on the left. Kill the hounds then collect the two Alluring Skulls from the corpse and continue toward the end of the path.
As you approach the dead hunchbacks, Yoel of Londor will speak to you. He’s the only hunchback moving on the right side of the area. Approach Yoel and speak with him. If you accept his service he will vanish, making his way back to the Firelink Shrine and appear down the stairs behind the gentleman who you earned the collapse gesture from. He sells magic weaponry and sorcery spells, and will level up your character up to five times without requiring souls. If you speak to him in Firelink Shrine you will learn the Beckon gesture. In the opposite corner from where you meet Yoel there’s a corpse holding two Homeward Bones.
Collect the items then head back to the gate and pull the lever to the left to open it. There’s an enemy patrolling the path right behind the gate. Clear him out then light the Undead Settlement bonfire in the house to the right.
Two more enemies walk toward you from the house on the far left. Take them out then head inside the house and roll into the hanging body on the right to knock it down. Collect the Small Leather Shield on the body, then roll through the crates blocking the stairs so you can continue to the far side of the room.
There’s an enemy waiting in the shadows to on the left side of the room. Hit it with ranged attacks if you have any available, otherwise be ready to take it down if it rushes you as you approach. It won’t be difficult to defeat, but if you went down the stairs on the left side of the room it would have dropped down to ambush you.
Drop down to the lower floor and collect the two Charcoal Pine Bundles on the corpse. On the far right wall on the other side of the room there’s another enemy clinging to the wall in the shadows. You can use a ranged attack to bring it down, or drop to the lower area and approach to make it attack. Before you drop down, head outside through the opening to the left and take out the patrolling enemy. Cut down the hanging item corpse so you can collect the loot later, then move around the corner to find two Repair Powders on the corpse at the end of the walkway.
Head back inside and defeat the enemy on the far side, then move down the stairs and look right to see another enemy waiting right next to the stairs and near the wall on the far right side. Be cautious of the enemies and take them down before collecting the two Charcoal Pine Bundles in the corner.
Go down the stairs and head outside. In the open area to the left you’ll find Loretta’s Bone on the item corpse you cut down earlier and a group of enemies. Once you have Loretta’s Bone you can go back and speak with Greirat at Firelink Shrine and hand him the bone to complete his story.
To deal with the enemies in this area you can rush in and take them all at once if you’re brave, or you can draw them in one by one with a ranged weapon. However you decide to take them out, clear the enemies then target the larger enemy sitting down near the fire.
Unlike most of the enemies you’ve fought up to this point, this larger enemy is not easily stunned. You can attack two or three times, but then you’ll need to dodge away to avoid her attacks. In addition she has a long weapon with good reach and she can cast multiple magic spells that will follow you for a short time before dissipating. If you stay too close to her she engulfs herself in flames and grabs you, inflicting significant damage. It’s best to attack once or twice, then dodge away to avoid her attacks before moving back in.
Defeat the woman and loot her body to obtain an Evangelist Robe (if you get a drop this is usually it), then loot the corpses by the fire to find a Estus Shard and an Ember. If you look up, one of the corpses hanging from the tree has an item. Use a ranged attack to bring it down to the ground and collect nine Kukri ranged weapons.
Before you proceed through the area, move to the far right side by the closed gate to find another item corpse that holds a Soul of an Unknown Traveler. Collect the item then you have a choice to make. There are two routes you can take to the Curse-rotted Greatwood boss battle. We’ve labeled these Route A and Route B. Both routes have a decent amount of loot that’s listed below, and taking Route B does open a shortcut to the Dilapidated Bridge (bonfire) along Route A giving you a must easier path back to the boss should you die during the fight.
It’s best to explore both routes, but if you’re in a hurry Route A is faster, or you can take Route B to the shortcut that leads to the Dilapidated Bridge bonfire, then head right to go directly to the boss (start reading Route A from the bonfire to navigate to the boss).
Route A Loot
- Titanite Shards (2)
- Charcoal Pine Resin (2)
- Large Soul of a Deserted Corpse (2)
- Soul of an Unknown Traveler
- Whip (weapon)
- Rusted Coins (2)
- Sharp Gem
- Ember
- Young White Branches (3)
- Reinforced Club (weapon)
- Great Scythe (weapon)
- Bridge (bonfire)
Route B Loot
- Fading Soul
- Firebombs (6)
- Plank Shield
- Homeward Bones (2)
- Caduceus Round Shield
- Titanite Shard
- Cliff Underside (bonfire)
- Partizan (weapon)
- Cornyx of the Great Swamp (NPC)
- Hand Axe (weapon)
- Soul of an Unknown Traveler
- Fire Clutch Ring
- Large Soul of a Deserted Corpse
- Caestus (weapon)
- Bloodbite Ring
Route A
Head down the stone steps behind the fire and the tree. There’s an enemy on the front porch of the house to the right, and another enemy that’s harder to see standing near the right wall. Take out both enemies then loot the corpse on the far side of the porch to find a Titanite Shard.
From here drop down and head through the tunnel to the left to kill two of the smaller enemies and avoid an ambush later. Once they’re down, turn around and head out of the tunnel (do not drop down the hole here) and head to the right until it curves around to a house.
Open the door and head inside the house. There’s a hole in the floor to the right of the entrance, covered by some crates. Watch out for the hole as you move through the hanging bodies toward the item corpse on the far right wall. Next to the corpse there are several cages with what seems to be dead bodies. The cage to the immediate right of the item will come alive and attack when you approach. You can tell which cages are alive because the bodies inside move slightly and they are colored slightly different.
Defeat the enemy then collect the two Charcoal Pine Resin on the corpse and cut down the corpse hanging over the stairs. Collect the Large Soul of a Deserted Corpse from the hanging corpse, then continue into the basement.
There’s another living cage to the left when you get to the bottom of the stairs. There’s a door to the right, but it does not open from this side. Instead, head down the main hallway. There’s a possessed enemy at the end of the hallway and both cages at the end on the right and left are alive. In addition, two of the smaller enemies that attacked in the previous house are waiting in ambush in the roof near the first window on the left.
If you have ranged attacks you should take out as many enemies as you can from the bottom of the stairs, then slowly move up to the window to engage the smaller enemies. Once all of the enemies are down head through the opening on the far end and down the stairs. To the right there’s a narrow alley filled with debris. Roll through the rubbish to clear the path, then head around the corner to the left to find a corpse near the end that holds the Soul of an Unknown Traveler.
Head back to the main path and continue to the right. There are two enemies along the path ahead with another larger sorceress across the way that will try to hit you with magic spells if she spots you. Take down the two closer enemies, then continue down the path, watching out for magic attacks from the sorceress.
There’s another enemy at the bottom of the hill, but before you reach him there’s a boarded up door on the left that an enemy breaks through as you get close. Move close enough to trigger the enemy, then take him down and move into the building he just came out of. Another smaller enemy tries to jump you once you enter the building. Kill him then collect the Whip weapon on the corpse and proceed down the hill to the other enemy.
You should now be close enough to the sorceress to take her out with ranged attacks. Finish her off then continue down the path until you reach the stones steps on the left and a small grassy area to right. Move into the grassy area first and onto the rooftop at the end. Look down and to the left to see an item corpse on the balcony below. Move to the edge of the rooftop and drop down onto the balcony to collect two Rusted Coins from the corpse.
Drop down to the area below to find a Bug along this path that will run as soon as it sees you. Catch it and kill the Bug to obtain a Sharp Gem. Try not at draw the attention of the enemy ahead with the saw, and loop around to the left and into the house, then move up the stairs so you can get back to where you were. Head up the stone steps (now on your right) stairs and then climb up the ladder to find a corpse at the end that holds a Titanite Shard.
Head back down and continue through the doorway at the bottom of the hill. Continue down the stairs and through the doorway at the bottom. The enemy ahead uses a saw as a weapon and is difficult to stun. Let him rush you, then dodge out of the way and attack him from behind. Defeat him then turn around and follow the lower path to the Dilapidated Bridge bonfire ahead.
Turn around and continue down the main path until you pass under and archway with impaled bodies surrounding it. Stop under the archway and soon you’ll hear a massive spear flying toward the enemies just ahead. If you don’t care to explore the area, let the spear take down the first batch of enemies, then prepare to run to the doorway ahead to avoid getting speared yourself.
If you want the easy way out, there are more enemies ahead that can be killed by the spears. Run to the tree before the doorway, then turn around and run back to the archway. The enemies will run toward you and get impaled by the spears. To make the spears stop targeting you, move down to the “Siegward of Catarina, The Giant Spear-Thrower and The Balrog” section of this article. It’s much easier to collect all of the loot here when you don’t have to worry about dodging giant spears, but you can still get the items if you look up to see the spears coming and dodge when they’re about to hit.
The item corpses near the tree hold an Ember, a Large Soul of a Deserted Corpse, three Young White Branches and a Reinforced Club. There’s also a small circular area that’s broken off to the right of the tree. You have to jump over to the area, which is why it’s difficult to reach when you’re dealing with the spears (although still possible). In this area you’ll find an Undead Bone Shard. When used at the bonfire at Firelink Shrine it will increase the effectiveness of your Estus Flasks.
If you go into the slightly elevated area to the left, there’s a corpse need a large tree that holds Mortician’s Ashes, an important item if you want to complete the side areas in the Undead Settlement. To the right of this corpse is a small hut where another enemy will attack from above. Defeat the enemy, then search the corpse on the porch to find a Blue Wooden Shield, Cleric Hat, Cleric Blue Robe, Cleric Gloves and Cleric Trousers.
Once you’ve collected all of the items, head into the building and finish off any enemies that remain then head up the stairs. At the top of the stairs move right and drop down onto the upper plank. From here you can move to the other side of the house (on the second level) and collect the Great Scythe weapon on the corpse. Drop back down to the first floor and leave the house heading toward the next structure. Once you get inside open to the door to the right to create a shortcut to the end of Route B, then turn around and head in the opposite direction to enter the boss area.
Skip to the boss battle section unless you want to go back to the big fire and go through Route B to collect all of the loot (recommended).
Route B
Head across the bridge to the right and take out the two enemies across the way. There’s a building directly ahead, but make note of the path you can take down the right side of the outer wall as you’ll need to come back in a moment.
To avoid any unwanted enemies attacking you from behind, first enter the building ahead and kill the two enemies sitting down in the stables to the right, then collect the Large Soul of a Deserted Corpse in the far corner. Continue down the stairs and into the adjacent building but watch out for another smaller creature to attack from above. This one is a little more difficult than the previous ones but you should still be able to deal with it.
Turn around and take that small path along the outside of the house we mentioned before. From this route you can see two enemies on the rooftops of the building ahead and a third enemy waiting to ambush anyone who exits the houses you were just in.
Take out the enemies then continue down the path to find two more enemies and a Fading Soul on the corpse ahead. Head onto the rooftops to the left to find another item corpse on the far rooftop. Collect the six Firebombs, then head back to where you got onto the roof. From here you can climb up the ladder or circle around to the left side of the house.
Circle around to the left side to find a corpse holding a Plank Shield. To the right is a walking cage enemy. Take it down then head back to the ladder and climb up to the roof. On the far side of the rooftop is another corpse that holds two Homeward Bones. Collect the items then look over the right side of the roof to see an axe enemy below. If you have any ranged weaponry you can attack from the safety of the rooftop to save time later.
You’re now done with this small detour so head back down the ladder and all the way back to the main path before you ventured to the side of the house. Go back through the house and open the doors on the far end. If you didn’t kill all of the enemies around the outside of the house there may be one waiting just outside the door, so be ready.
Head to the far right to find a corpse with a Caduceus Round Shield, then turn around and head across the next bridge. Before you cross all the way, stop and look up toward the building ahead. There are three enemies standing near the rooftop. If you have ranged attacks use them to take down these three enemies before you proceed. If you run into the courtyard ahead while they’re still alive they will use firebombs from above.
With the enemies down, move to the far side of the bridge and look down and to the right. There’s a path below with a few enemies patrolling. Drop down and be mindful of your surroundings as there could easily be an enemy behind you. Backtrack on the path to find an item corpse behind you that holds a Titanite Shard.
Head down to the other end of the path and into the building ahead to find a bonfire. Light the Cliff Underside bonfire then head out the far side of the building and make your way to the right. Continue up the stairs, then circle around to the right and head up the next staircase toward the building. Go through the building to find yourself on the bridge where the enemies with the firebombs were attacking from. If you did not kill them before you will need to now. Turn around to see an item corpse hanging to the right of the building.
Shoot it down and head back around to collect the Partizan weapon from the body. Continue back through the building and across the bridge, then circle around to the far side of the building to find Cornyx of the Great Swamp locked in a cage ahead. To the left of the cage is corpse holding a Hand Axe weapon. Ask to learn pyromancy and he will relocate to Firelink Shrine, down the stairs to the right of the blacksmith. Speak with him there to obtain the Pyromancy Flame weapon, then speak with him again to learn the Welcome gesture.
Head back around and drop into the courtyard below as another larger enemy comes up from the other side of the building ahead. Take him out then collect the Soul of an Unknown Traveler from the corpse on the platform. Roll through the crates to the left of the platform to clear a path, then move down the bridge behind the platform to find an undead (who won’t attack) sitting on top of an item corpse. Kill the undead then collect the Fire Clutch Ring and head back up to the platform.
Move through the archway to the other side of the buildings. Circle around to the left of the house to find a corpse hidden on the far side. Be careful as you approach the corpse because an enemy will climb over the edge of the cliff to attack.
Collect the Large Soul of a Deserted Corpse, then head down the stairs to find another sorceress enemy ahead. Once you move down the stairs you can head straight or circle around to the right. The boss is directly ahead, but the next area you need to go to after the boss battle is down the other path, as well as a shortcut back to Route A and the Dilapidated Bridge bonfire so keep this location in mind.
If you want to open up the shortcut, head down the stairs and circle around to the right, avoiding the enemies. There are a group of enemies to the left across the next bridge, but before you engage them head into the archway directly ahead. Defeat the undead hound waiting at the entrance and climb down the ladder inside.
Kill the three rats that attack and collect the Caestus weapon down the waterway. More rats await in the fog ahead, but if you have a ranged attack you can surprise them with an attack before they surprise you. The large rat in the ground drops a Bloodbite Ring when you kill it.
There’s a cell door on the left that’s locked and requires the Grave Key. Remember this location for later. For now, head through the fog and climb up the ladder on the right. Open the gate to the left to create a shortcut to Route A, with the Dilapidated Bridge bonfire directly ahead. With this shortcut open, if you die to the upcoming boss you can travel to the Dilapidated Bridge bonfire then head across the bridge to the gate you just opened, continue through the sewer and back up the ladder, then just run up the hill to the boss.
Climb back down the ladder and make your way out of the sewer, then head back up the hill. There are two undead hounds, a fairly normal enemy and a sorceress on the stairs ahead. If you have ranged weapons you can lure them in one by one so you don’t have to deal with all four at once. Defeat the enemies, then look behind the tree one of the hounds was waiting at to find an Ember. head up the hill and into the shrine at the top. Open the door to the left to connect the shortcut to Route A, then head in the other direction and take out a few of the enemies in the large open area until the boss battle against the Curse-rotted Greatwood begins.
Continue on to the boss battle against the Curse-rotted Greatwood or head back to our Dark Souls 3 walkthrough and guide.


