Continue your journey with Prima’s free Crown of the Sunken King walkthrough and complete Dark Souls 2 guide.
To access the Crown of the Sunken King content, first check your inventory to make sure you have the Dragon Talon item. You receive the item upon purchasing the DLC, so if you don’t have it, make sure the transaction went through. Once you have the item, head to The Black Gulch and make your way to the room where you fought The Rotten.
Enter the boss room and head toward the back. On the wall to the right there’s an opening that leads to the Primal Bonfire. If you’re not right next to the opening it can be difficult to see, so hug the wall between fire pits as you look for the opening (if you can’t find it). Continue down the hallway into the Primal Bonfire room and access the serpentine obelisk in the back. This transports you to the beginning of the DLC area.
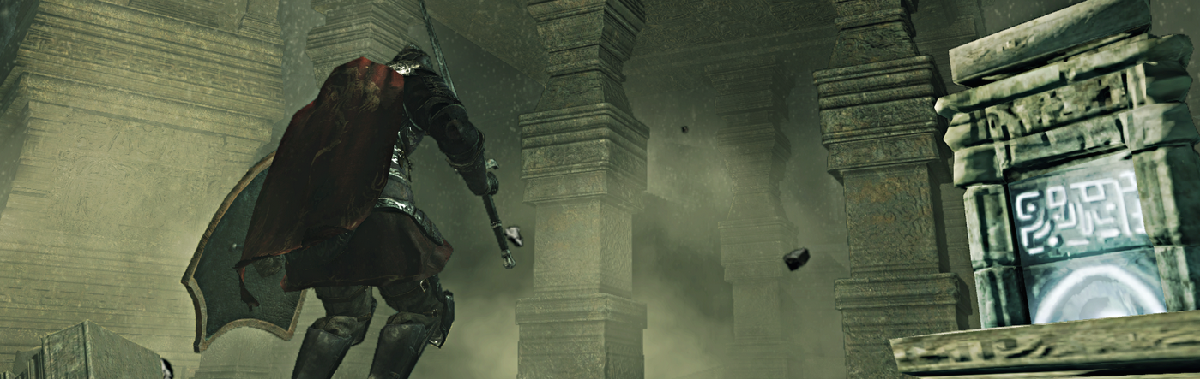
Once you enter the DLC area, head down the stairs and beyond the fire. Open the door at the far end and head down the hall to enter Shulva, Sanctum City.
Shulva, Sanctum City
Before you enter Sanctum City, it’s important to have a good amount of ranged attacks ready to use. There are numerous instances in which ranged attacks are extremely helpful, both in combat and completing puzzles. If you do not have ranged attacks available, this content is considerably more challenging.
Of note, there are glowing pillars throughout the area that can be attacked. When you attack them, the pillars trigger environmental changes. These changes are usually structures being raised or lowered, or pathways being created so you can access items or new locations. Occasionally there are enemies attached to these new locations, so be on your guard.
Continue down the path (ignoring the huge dragon above) until you reach the Sanctum Walk bonfire. Just beyond the bonfire is the first enemy encounter. Take down the single enemy near the building and continue up the small hill.
Hit the glowing pillar to the left (just beyond the first enemy) to raise a structure on the hill and inflict severe damage to the enemies surrounding it. As you clear the building, there are structures to the left that you can’t reach yet. Continue forward, and as you approach the top of the hill, two more enemies attack. There’s also a third enemy on the far side of the structure. Be sure to take all three out before you continue onward.
Four more enemies await as you approach the next hilltop. All of them have ranged attacks, so make sure you take them out with your own ranged attacks, or get close enough to make them use melee weapons. You can draw them back to engage them individually if you don’t feel up to the task of taking them on at the same time. There are five Lifegems in the corner of the second hilltop. If you hit the glowing pillar in this area, it raises a structure where there’s currently a large hole in the ground.
Attack the pillar, then quickly move over to the hole so you can jump on top of the structure as it rises. Once the structure is in place, jump over to the top of the smaller structure ahead to find a Dark Quartz Ring +3 (increases Dark defense). Use the structure to reach the lower area and another set of enemies.
Take down the enemies and pick up the Poison Stone item nearby, then head up the stairs on the far side. Straight ahead is a room filled with red objects. If you have a ranged attack, take out the objects to prevent equipment damage later. Head into the room, pick up the three Goldenfruit Balms in the corner and dispose of the two insect enemies that attack. Go out the door to the right and used ranged attacks to take out the enemies ahead and to the right (if you didn’t already get their attention). If they make a mad dash toward you, they’ll come through the door to the right, so be ready.
Finish off the enemies, the head through the other doorway. There are three Old Growth Balms (increased strength) down below. If you wish to get them, take the ledge to the right of the doorway. Keep in mind, you need to time your jump careful to get back to your current location if you continue farther. Walk around the corner, drop down to the ledge below when you reach the end, then move to the edge to find the items. Turn around and carefully jump over to the stairs to make your way back up to the room.
You’re now at the location you passed as you entered the area (where you encountered the first enemy). There’s a pillar next to the white crystal formation here that raises a structure so you have easy access to the first bonfire you encountered, as well as another structure to the right. There’s also another insect on the wall between the building with the red objects and this new structure. Use ranged attacks to take down the insect. If you don’t have ranged attacks, you’ll encounter it at close range later.
Head into the structure to find a single enemy. Take it down, then head upstairs to find a Poisonbite Ring +1. At this point, the insect from before will attack if you didn’t take it down previously. Head back downstairs, then make your way through the room with the red objects and back to the stairs that lead to the left or the pots directly ahead.
At this point, you can go left (1A) to take down the remaining enemy, or break the pots and continue forward. You can also drop down into the narrow area to the right to find five Lightning Urns. If you choose to break the pots and continue forward, go back in the direction of the room with the red objects and make your way around to the right to the structure above the pots. Hit the glowing pillars to create a walkway, then hit the glowing pillar in the corner to raise the structure ahead. This creates a platform for you to stand on just beyond the pots below.
Head back to the pots , destroy them and drop down to the newly created ledge below. Inside the next room are more of the insect enemies, but they’re all waiting on the second floor. If you have ranged attacks, take down the poison formations inside the room, then head up the stairs to engage the insects. There are four of them here, so it’s best to get their attention, then move back down to the first floor to spread them out and take them down one at a time.
With all of the insects dead, head back upstairs to find an Elizabeth Mushroom on the ledge parallel to the stairs. Drop down through the other opening to find yourself at 1A.
1A
Head down the stairs and engage the walking poison statue near the wall. You have to attack its feet to inflict damage (the lizard-like enemy at the base of the statue). This is easiest to do with a ranged attack that can be properly aimed. Once the enemy is down, pick up the 20 Throwing Knives and 5 Cracked Red Eye Orbs that were next to the enemy’s initial position, then continue around the corner to the left to find one last enemy. Defeat him, then continue in the other direction (right) to proceed down the next set of stairs.
There’s a ramp to the left, just beyond the stairs (it’s easy to miss), which leads to Dragon’s Sanctum and the Cave of the Dead. You can also proceed forward to find a small set of stairs leading into the building on the left. Take down the enemy just inside and continue through the doorway. Exit the way you came in and head down the path to the right to find a Sanctum Mace at the end.
Head back down the stairs and continue forward to engage four more enemies and find three Twinkling Titanite on the ground around the corner. Take out the poison stone enemy in the room to the right, then climb up the ladder inside. Make your way across the rooftops to reach a room with a bonfire at the end. Light the bonfire and head through the doorway to find a Dried Root. If you drop down here, you’ll find yourself back near the beginning of the area.
Go down the stairs, then head right until you reach the next set of stairs. Continue down the ramp to the right, just before the stairs (this is easy to miss) and engage two more enemies in the room ahead. Take them out and head through the adjacent doorway and across the bridge to the right, then continue down the stairs.
At this point, you can enter the room ahead to reach either the Dragon’s Sanctum or the Cave of the Dead. For now, take the stairs to the left (just before the room) and head across the next bridge. There are two enemies on the bridge ahead that will be attacked and killed by a dragon. However, if this isn’t your first time here (if you died) and you have a ranged attack, you can engage them before you reach the narrow confines of the bridge. Just before the bridge are a series of pots. Break the pots (roll into them) and walk along the ledge behind them to find one Focus Souls at the end.
Take down the enemies on the bridge (unless the dragon already did that for you) and continue across the bridge to enter Dragon’s Sanctum. Going this way, the door to the left will be locked, preventing access to the room of chests, but you can still proceed through the rest of the area.
Continue your journey with Prima’s free Crown of the Sunken King walkthrough and complete Dark Souls 2 guide.


