
Dead or Alive 6 E3 Build Breakdown
We took the E3 2018 build of DOA6 for a spin and came up with some findings that competitive players may be interested in.
Dead or Alive 6 is the latest installment in the long-running fighting game (and volleyball) franchise from Team Ninja and Koei Tecmo. While the DOA6 reveal trailer looked impressive, it didn’t offer a lot of insight on the more intricate aspects of gameplay. We took a former competitive player, and the author of the official Prima Games DOA4 and DOA5 guides, and had him play through the E3 build, testing new gameplay mechanics to determine what’s changed and what will still seem very familiar to fans of the series. So sit back and take a look at our DOA6 hands-on with in-depth preview impressions from a competitive perspective.
RPS Reigns Supreme
If there’s one big staple of the Dead or Alive series, it’s the rock, paper, scissors element of the triangle system; attacks beat throws, throws beat holds, and holds beat attacks. It’s the basis of modern DOA, and that continues to be the case in DOA6. More often than not you can still use a counterhold while stunned, but like DOA5, there are a few limited instances in which you cannot use a counterhold while stunned.
Throws are still virtually identical to how they were in DOA5, including the ability to only break out of a neutral throw (command throws remain unbreakable), but there is one minor change. Throws no longer track when an opponent uses the new Sidestep Attack. In DOA5 if an opponent executed a throw while you tried to sidestep, the throw would beat the sidestep. Now, a throw will lose to the Sidestep Attack every time.
Special Button
Most of the flashy attacks you’ve seen in the DOA6 E3 trailer come from the new Special button that has been added to the game. As a shortcut macro for Hold + Punch + Kick (HPK), the Special button controls all of the new meter-based attacks, as well as the Fatal Rush attack combo and the Sidestep Attack. All of this is done by pressing the Special button and a direction, but it can also be done by pressing HPK and a direction.
Fatal Rush and Fatal Stun
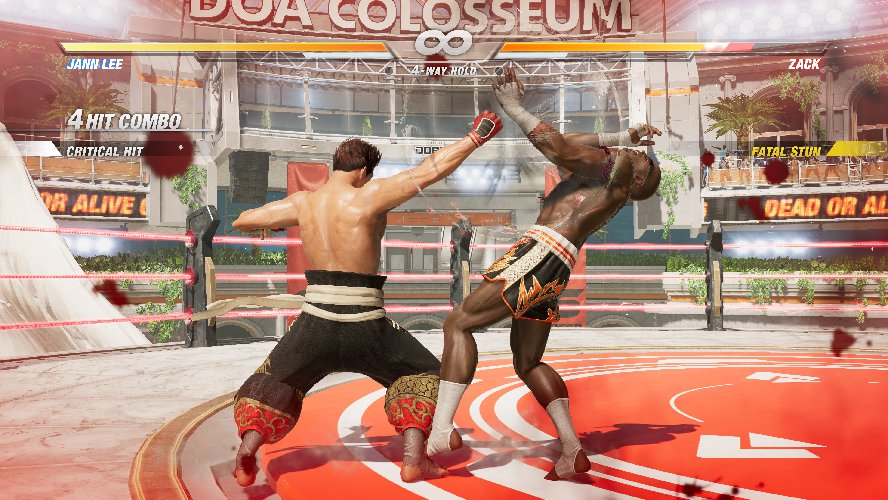
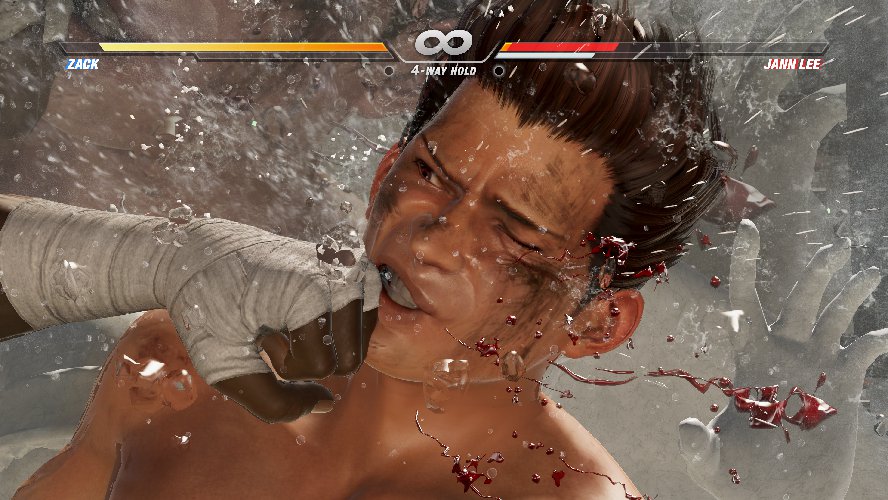
One of the big new additions to DOA6 is the Fatal Rush. This four-hit combo string is performed by pressing the Special button four times (S, S, S, S), and does not require any meter. If you miss the first hit, or the opponent blocks, you cannot continue the combo, and you can be punished. However, if the first hit in the Fatal Rush connects, it results in a Fatal Stun. This is an inescapable stun that you cannot counter out of unless you use a Break Hold, which requires meter.
At first, many players will likely perform the full Fatal Rush combo. It’s flashy and inflicts moderate damage. However, once competitive players spend some time with the game, it’s very likely that only the first one or two hits of a Fatal Rush will ever be used. The first hit (and all hits) of a Fatal Rush lead to a Fatal stun that you can’t counter out of. That means that almost any attack you use to follow the first hit of a Fatal Rush is guaranteed to connect so long as you don’t wait too long. If you hit an opponent with the first attack in a Fatal Rush, they slowly fall to the ground, similar to the Critical Burst stun from Dead or Alive 5. You have plenty of time to attack with something else, but the opponent will eventually fall to the ground if you wait too long.
Each attack in a Fatal Rush combo offers a slightly different stun length. While all grounded stuns are the same Fatal Stun as the first hit in the string, the length of that Fatal Stun varies depending the Fatal Rush attack and even from character to character since all Fatal Rush combos are different. That means the third hit in Kasumi’s Fatal Rush may result in a 30-frame Fatal Stun, but the first hit may only give you a 15-frame Fatal Stun. Meanwhile, Jann Lee’s Fatal Rush may give him a 20-frame Fatal Stun on the first hit, and a 25-frame Fatal Stun on the second hit. Frame data wasn’t available for the E3 build, but you get the idea.
To help balance use of the Fatal Rush and Fatal Stun, the first attack is always a high attack, and it executes somewhat slowly. Our best guess places the first hit of a Fatal Rush somewhere around 20-25 frames. You can connect a Fatal Rush after initially stunning an opponent with something else, but it will have to be a deep enough stun to land the somewhat slow first hit of the Fatal Rush. While lengthy Sit-Down Stuns return in DOA6, if you try to follow one with the high-hitting Fatal Rush, it will likely miss due to the position of the character.
Once we have proper frame data and a final game to work with, we can take a closer look at the Fatal Rush system to see how it can be exploited for competitive play. For now, it seems best to find a way to get the opponent into a deep stun, then go for a mix-up between a Fatal Rush and something else. If the Fatal Rush lands, you can launch the opponent. If you try to extend the stun with anything else, it will transition back to a normal stun and the opponent will be able to counter again. It’s basically the new version of Critical Burst, but you don’t have to extend your stun before you can use it.
Break Gauge
The new meter in DOA6 is called the Break Gauge. It’s located just below the health bars at the top of the screen, and quickly builds as you hit an opponent, the opponent blocks your attack, you defend against an attack or you take damage. That’s right, if you do just about anything, you will build meter. The offensive player builds meter slightly faster than the defensive player. You gain more meter for landing an attack than you do for getting hit, and you build more meter for getting an attack blocked compared to blocking an attack.
Meter in the E3 build of DOA6 builds very fast. A simple four or five hit combo will usually net you almost half a Break Gauge. Land a couple of combos and you’ll likely have a full Break Gauge, ready to utilize a Break Hold or Break Blow (see below). By our best estimates, most players should be able to build two full Break Gauges during a round if they spend their Break Gauge as soon as it’s full, so they can start building a second one immediately. In theory, if the round came down to the last hit for both players, and you used your Break Gauge as soon as it was available, you might be able to build as many as four full Break Gauges in a single round. This is only a theory, but given how fast meter builds, it seems likely.
The Break Gauge carries over from round to round, which means if you don’t feel the need to burn your Break Gauge during one round, you’ll have it ready to go at the start of the next round. Meter management doesn’t seem to be as intricate as some other games, but you’ll still want to keep an eye on your meter, and what you’re using it for.
Break Hold and Break Blow
The two new abilities that use the meter in DOA6 are the Break Hold and Break Blow. The Break Blow is essentially the new Power Blow that will go through an opponent’s high or mid attack, similar to armored moves in other fighting games (although the character will not take damage, despite going through an attack). However, low attacks will still beat out a Break Blow. Once you have a full Break Gauge you can press Forward + Special to perform a Break Blow. It can be blocked and punished, tagged on at the end of a combo string, or just used whenever you feel like it, but whether it hits, misses or is blocked, all of your Break Gauge will be depleted.
Break Holds are counterholds executed by pressing Back + Special, that counter all heights at once. Normally you have to counter at the specific height of an attack, such as using a low counter against a low attack. However, if you’re willing to burn the meter you can use a Break Hold to counter all high, mid and low attacks simultaneously. If you connect with a Break Hold, you inflict a very small amount of damage, switch positions with the opponent, and stun them long enough for most characters to land at least a jab to extend the stun.
Like most other counterholds, you can be thrown out of a Break Hold. You won’t be able to just use it as a get out of jail free card, but toward the end of a match it can make the difference between winning and losing, and slightly reduces the amount of guessing you have to do when countering (you still have to guess if the opponent will use an attack or throw).
Sidestep Attack
Dead or Alive 5 was the first game in the series with a universal command sidestep ability, but it wasn’t the first game in the series to offer the ability to sidestep and attack. There were several attacks in Dead or Alive 3.1 (the Japanese release) that involved a character using an evasive sidestep before unleashing an attack. A similar type of sidestep system returns for Dead or Alive 6 (executed by pressing Up or Down and Special), with the old command sidestep from DOA5 now removed.
The new Sidestep Attack is far more evasive than the sidestep ability in DOA5, but you can no longer choose between two or more canned attacks after the sidestep (or no attack if you just wanted to sidestep). Instead, all Sidestep Attacks in DOA6 execute an attack immediately following the sidestep. In the E3 build there was no way to cancel the attack portion of the maneuver.
On the bright side, the sidestep portion of the ability is extremely evasive. It avoids all linear attacks, including throws. However, if an opponent uses an attack that tracks, such as a wake-up kick or most attacks that move horizontally from left to right (or vice versa), your Sidestep Attack will be interrupted. The Sidestep Attack is fast enough to connect on the third hit of Jann Lee’s Punch, Punch, Punch, Punch string if you started the Sidestep Attack as soon as the first punch is executed.
Unfortunately, the canned Sidestep Attack was essentially the same for all characters in the E3 build, meaning they all hit mid, cause a standard knockback (no stun or launch), and were extremely unsafe if blocked. The risk vs. reward is skewed, but this is the first build of the game, so there’s still a chance things will change. Right now, it’s possible to anticipate a Sidestep Attack, Free Cancel out of your combo string, block the Sidestep Attack, and punish accordingly (or use a counterhold).
Sidestep Attacks will still be useful, but in open space the damage not be enough to make the risk worth the reward. You can get a Close Hit modifier to increase the damage of a Sidestep attack, and if you’re near a wall, the Sidestep Attack will cause a wall bounce so you can follow with a combo, but it’s still far more limited than sidesteps in almost any other 3D fighting games, including Dead or Alive 5.
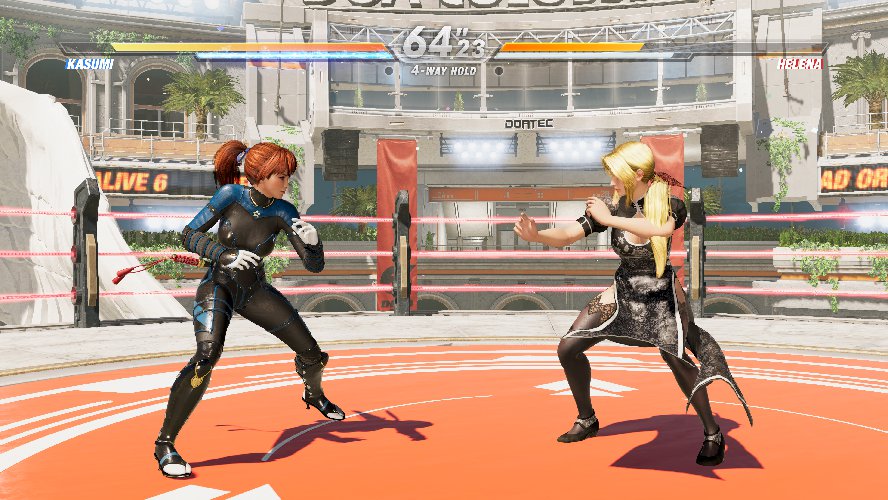
4-Way Holds vs. 3-Way Holds
You may have noticed text near the top of the screen that reads, “4-Way Hold” during DOA6 matches. This is similar to DOA2 when you could choose the hold system in the game. In the options screen of DOA6 where you would normally select round time, the size of the health gauge and more, you can also adjust the hold system to use either the 3-way hold or 4-way hold.
For those new to DOA within the last two entries in the series, the 3-way hold system means you have to use a high hold to counter a high attack, a mid hold to counter a mid attack, and a low hold to counter a low attack. In a 4-way hold system, there are two mid holds, one to counter mid kicks and another to counter mid punches. In DOA6, you can change between these two hold systems.
We do not know how this will impact online play, but it’s very likely the competitive scene will use the 4-way hold system. Hopefully, online play either limits ranked mode to 4-way holds only, or only allows you to play with people who are using the same hold type, outside of casual matches. A 3-way hold is a considerably easier way to use holds, so having one player using 3-way holds and the other with 4-way holds would give an advantage to the player using 3-way holds.
TL;DR
New or Changed in DOA6
- Sidestep Attacks are extremely evasive.
- Throws no longer track.
- Slow Escape is gone or drastically toned down.
- Movement seems slightly improved.
- Meter gain is very fast, favoring the offensive player.
- Meter carries over from round to round.
- Break Blows replace Power Blows.
- Fatal Stun replaces the Critical Burst mechanic.
- Fatal Rush starts with a moderately slow high attack and leads into an unholdable Fatal Stun.
- You can switch between a 3-way hold system and a 4-way hold system.
Still the Same or Similar to DOA5
- Most attacks are still negative when blocked.
- The main form of punishment is throws, not attacks.
- Only neutral throws can be broken.
- Power Blow and Critical Burst are gone.
- Ground game.
- Wake-up options.
- Countering out of stun.
- Buffer window for attacks and blocking.
Dead or Alive 6 will be playable at Evo 2018, and is planned to release in early 2019. Stay tuned to Prima Games as we offer more insight into the game over the coming weeks and months, as well as keep a running list of confirmed characters in the game.