Dying Light takes place in Harran, a fictional Middle Eastern city plagued by an infectious disease that transforms people into undead monsters. In a desperate attempt to curb the zombie apocalypse, those in charge seal off the place and leave survivors to fend for themselves.
You play as Kyle Crane, a GRE operative sent into Harran to track down missing military officer Kadir Suleiman, who may be in possession of an important file. How you make use of the environment will determine whether you reach this person or become another statistic.
We don’t want you to die, so use these beginner’s tips to navigate through Harran, pick up the best weapons and upgrade Kyle’s abilities. What you learn will become useful at night when the more aggressive zombies come out to play.
Tip: Search refrigerators, cabinets, chests and lockers to find different objects. An item’s color indicates rarity. White is common, green is uncommon, blue items are rare, violet items are exceptionally rare and orange things are legendary. Remember, you may need lockpicks to open certain containers.
Use the environment to your advantage, and think vertically

Tip: Pick up and eat food to replenish Kyle’s energy.
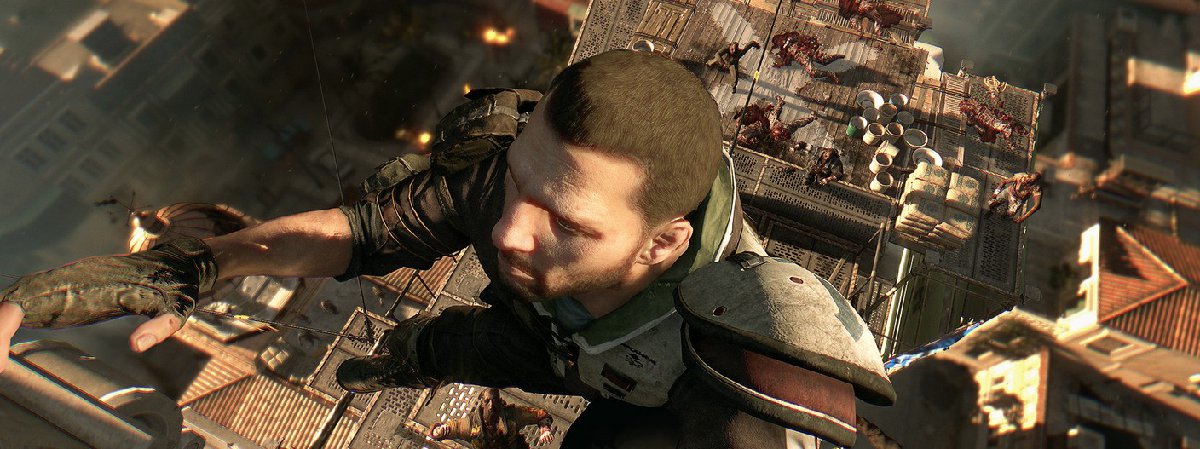
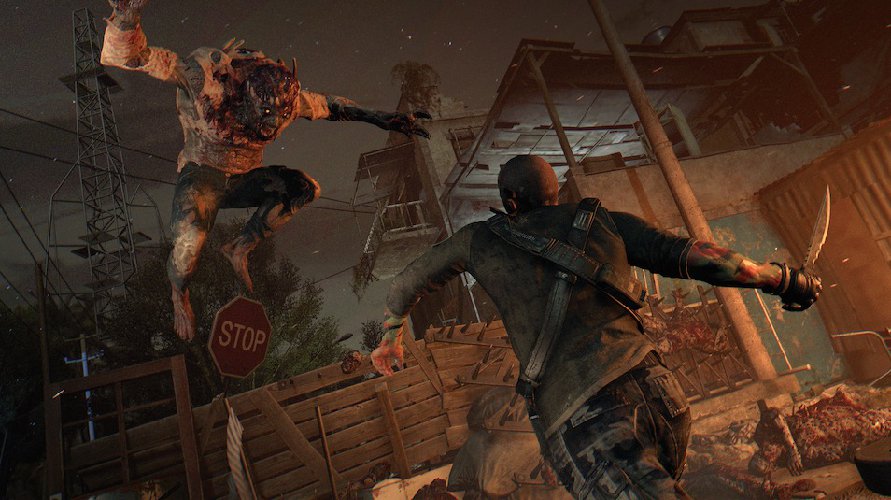
You’re free to remain on the ground as long as you’d like, but don’t expect Kyle to remain alive for long. With the zombie horde in pursuit, especially at night, it’s easy to get overwhelmed and meet a gruesome death. Since we prefer you remain among the living, always make note of the surrounding environment. Kyle has expert parkour skills that let him jump and climb better than the average human. When things get crazy, look at something you want to grab and press the jump button to latch onto it. In addition, leap between rooftops to throw off your pursuers. It’s important that you look directly at the object you intend to grab and then jump.
We strongly suggest learning the basics of free running at the beginning of Dying Light, since this is the best time to see what Kyle can and cannot grab onto. Yes, there’s a mandatory tutorial with Rahim, a character you meet early on in the game.
Tip: Agility and Stamina are two different things. Agility pertains to free running and parkour maneuvers, whereas stamina refers to how long Kyle can fight. You can stop running if your agility is low and still fight with full stamina, or vice versa.
Unlock all of the different perks
Tip: Afraid to jump off a building? Look for piles of garbage, cars and awnings, which are relative safe to land on.
The more you play Dying Light – completing missions and running amok – the more experience Kyle earns. You can then take these experience points and cash them in to learn a variety of perks split into Survivor, Agility and Power categories; each one features perks divided into Novice, Adept and Expert difficulties.
How you play will determine the type of XP Kyle receives. Kill zombies and you’ll score lots of Power. Help NPCs in need and you’ll be able to unlock more from the Survivor category. Agility forces you to use parkour as much as possible, and becomes easier to level up as you make use of moves like Dropkick, Tackle and Vault.
Simply put, perks make Dying Light fun and easier to play. Consider the Survivor category. Backpacker grants Kyle four additional weapon slots, while Camouflage lets Kyle use dead body parts to hide from zombies. Meanwhile, the Exploding Cars perk is exactly as it sounds. Use it to lure zombies to a rigged vehicle and then detonate the car to dispose of several enemies at once. You can also figure out how to use Electric Fences to give zombies a jolt.
Agility on the other hand is all about parkour, with a plethora of moves designed to transform Kyle into the ultimate athlete. Tic Tac sends Kyle running up walls. Vault Stun leaves a zombie incapacitated for five seconds and Ultimate Runner means he won’t get fatigued from climbing, running and jumping.
Finally, you have Power perks. Something like the Ground Pound gives Kyle the chance to slam a weapon onto the ground and send zombies flying so he has a better chance to flee. Stomp, meanwhile, allows him to crush infected heads beneath his shoe; this never gets old. As for Conserve Weapons, this perk gives Kyle’s weapons superior durability; you don’t want something to break at the worst possible time.
Bottom line, you need perks in this game. Use them!
Tip: See a plane overhead? Check to see if it drops supplies and get on the move, but be careful. You may encounter armed men or zombies near this precious loot.
Use and discard weapons
Tip: Infected become stronger over time and learn new behaviors. Even the odds with more powerful weaponry.
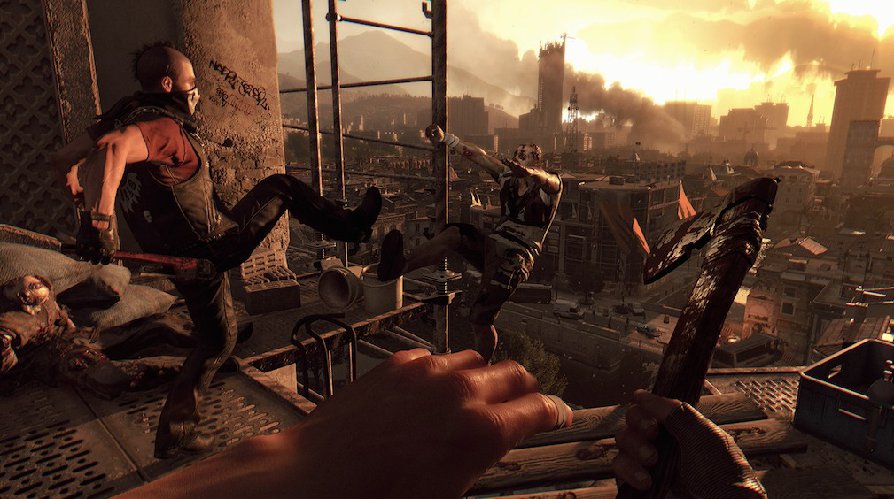
Part of what makes Dying Light so enjoyable are the 100 plus weapons you’ll find in the world. Blunt Weapons – think hammers, pipes and bats – let you cave in zombie skulls. Edged Weapons make things messier, with Kyle using knives, axes and machetes to slice off heads. If you prefer to strike from a distance, Throwing Weapons like Molotov cocktails and shurikens let you deal damage from a relatively safe distance, and of course, sometimes nothing beats a good firearm, the Military Rifle in particular.
Here’s the problem. All of these weapons except firearms degrade over time and eventually break. Metal Parts let you make repairs and there are skills to increase durability, but eventually your favorite Claw Hammer will become useless, forcing you to find a quick substitute. In addition, weapons that require two hands to wield (think Sledgehammer) produce more damage but are slower to swing and drain Stamina.
Each weapon includes different values for three unique categories: Damage, Durability and Handling. The higher the number, the more effective it is. A weapon with 85 Handling, a Military Machete for example, is faster to swing than a Military Shovel with 68 Handling. More swings means more potential damage.
Tip: Dismantle broken weapons and harvest Metal Parts.
As for firearms like pistols and shotguns, they won’t degrade but you may have trouble finding ammo. Most importantly, the resulting noise attracts unwanted attention.
Tip: Wait until a weapon’s Durability is low before repairing. The idea is to achieve the maximum amount of attacks and damage before fixing something. Since a Cleaver can only be repaired so many times, wasting Metal Parts to repair it at half strength prevents you from utilizing its full potential.
Find blueprints to craft special items
Dying Light’s crafting system lets you take run-of-the-mill components like batteries, tin cans and string and combine these things into useful items and instruments of death. Some you’re free to craft any time. Others require tracking down specific blueprints scattered throughout the city. After finding one or receiving it from beating a side quest, you’ll then need to gather the necessary ingredients. Pause the game, access the Blueprints section and highlight the one you wish the craft. You’ll see which items you need, and in what quantities. The game will inform you when an item can be crafted as soon as you collect enough ingredients.
Case in point, Airport Security, a cool upgrade for the base Crowbar, Police Baton and Military Shovel that adds electricity. Pick up the blueprint and then collect Metal Parts, Duct Tape, Plastic, Batteries and a Power Cable.
Freezing Grenades temporarily prevent the target from moving. All you need is one Common Plant, one Tin Can and one Fluorescent Mushroom. There’s also a Grappling Hook that makes getting around easier, providing you find Metal Parts and String.
Tip: Use weapons to smash through wooden planks and gain access to certain buildings. You can also crash through loose boards upon impact, so be careful since there’s no telling what’s on the floor beneath you.
Know the different zombie types
You’ll encounter several different forms of infected throughout Dying Light, and your approach will change considerably depending on the creatures you come across.
Biters are standard low-level monsters. They’re slow and fairly easy to kill, even later on in the game. You’re free to basically run circles around these guys and mess with them; think target practice.
Bombers are a whole other matter. Get too close to one and it explodes. You’ll want to dodge before one bursts or attack from range, since killing it from a good distance away lets you blow up zombies unlucky enough to be in the blast radius.
Virals, conversely, can run, and you don’t want these nasty things on your tail. Instead, throw firecrackers for a brief distraction and get the heck out of there.
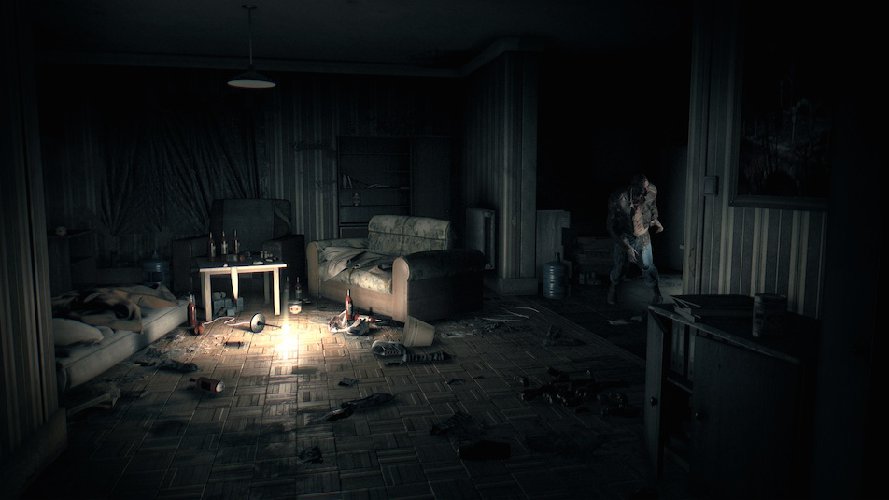
Taking into account all of the different zombies (and we scratched the surface), Volatiles are among the most dangerous. They mostly come out at night and hide underground and in tunnels. Their fear of bright light works to your advantage since you can use UV Light and Flares to temporarily blind these enemies. Otherwise you want to make sure Kyle remains outside their field of vision, as Volatiles not only climb but also sprint, making them extremely difficult to lose. Kyle stands to gain more experience at night, but we’d forgive you for hiding until daybreak; make it through the night and Kyle earns bonus XP.
Aside from zombies, you’ll meet fellow humans in Harran. Some, unfortunately, won’t be too happy to see Kyle and will open fire. Don’t take these guys lightly. A person carrying a machine gun is almost as dangerous as a Volatile.
Tip: Secure Safe Zones as early and often as possible. These areas are marked as red houses on your map when unsecure. Clear out the zombies and restore power to secure them, turning the map icon green. This will allow Kyle to use these locations as a place to safely sleep at night if the Tower is too far away. In addition, Safe Zones act as spawn points should Kyle die.
For more tips, read Prima’s free Dying Light walkthrough, and go in-depth with the official guide, which shows all Blueprint locations.
Get your copy of the official Dying Light Guide now!
- A spoiler-free walkthrough of the entire main story, including myriad side quests
- Our exclusive maps from the game developers chart the locations for all 200 Collectible Items in Old Town and the Slums—Antennas, Zombie Statues, and more!
- A Skill-by-Skill Breakdown for Survivor, Agility, and Power abilities. Play to your strengths as a runner or a fighter.
- All Blueprints—explained Locations, Recipes, and Effects. Find out how to make anything in the game.
- Learn about the Infection and the monsters it has created. Master their weaknesses.
- How to scavenge during the day, and then take your life into your own hands and risk deadly Pursuits in the evening hours. Tips for survival under all conditions.
- Get every Achievement/Trophy.
- Free Mobile-Friendly eGuide. Unlock the enhanced eGuide for access to updated content, all optimized for a second-screen experience.