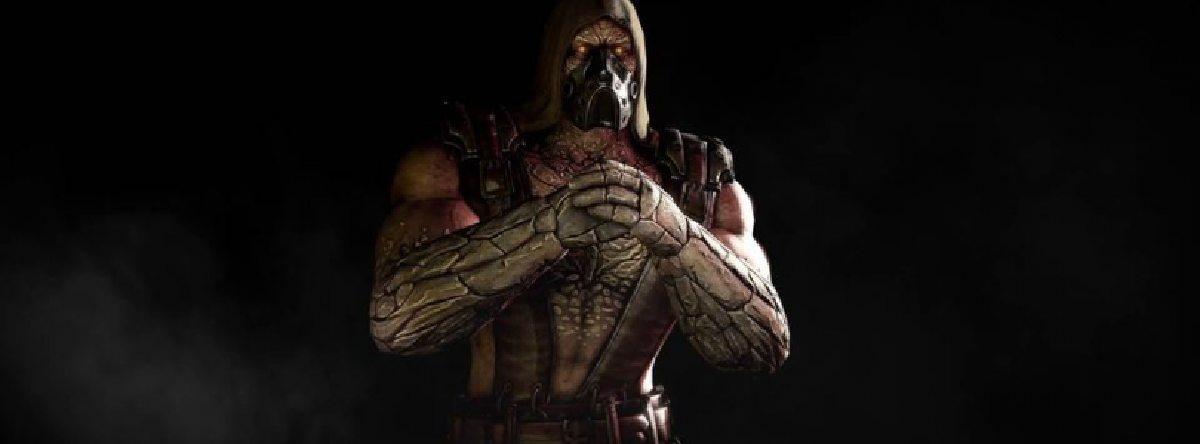
Tremor is an interesting character that is very heavy when it comes to setting up his attacks. His variations do more to change the properties of his special moves than add new ones, although some of his unique special moves in each variation add quite a bit to Tremor’s overall strategy. If you’re looking for a more defensive character, Tremor’s Crystalline variation fits that well, otherwise, the remaining two variations are going to be offense-heavy (Metallic) or setup-based (Aftershock).
Notation Key
PlayStation/Xbox
1 – Square/X
2 – Triangle/Y
3 – X/A
4 – Circle/B
Rock Drop
Notation: Down, Back+3
Enhanced: Yes, but no armor.
Tremor’s Rock Drop is an overhead attack that falls in one of three locations around the opponent. The default notation drops a rock on top of the opponent in their location at the time the notation was input. If you hold Forward it places the rock just behind the opponent, and holding Back places it just in front of the opponent. The enhanced version (Rock Shower) does not have armor, but it inflicts slightly more damage and causes a longer stun when it hits.
If Tremor gets hit during the attack, as long as the rocks shoot up into the air, they will fall down. This can help keep Tremor safe if an opponent is applying pressure. However, it’s best used as an overhead/low mix-up. After knocking an opponent down, use Rock Drop, then quickly attack with a low to force the opponent to block the low and the overhead nearly simultaneously. As long as the two attacks do not connect at exactly the same time, it’s very difficult for an opponent to figure out which to block first. It also works well against characters trying to zone from across the screen.
Ground Pulse
Notation: Down, Down+4
Enhanced: Yes, but no armor.
The Ground Pulse is an unblockable attack that connects from a full screen-length away. It can be avoided by jumping, but if an opponent is touching the ground, it will hit them. The enhanced version (Ground Quake) hits three times and inflicts considerably more damage. In addition, it will hit opponents that have been knocked to the ground. Against Tremor a lot of opponents will used a delayed wake-up to avoid overhead/low setups with the Rock Drop. If you anticipate this, use the Ground Quake to punish them for it. This also works well after a hard knockdown in which the opponent can’t tech roll away.
Rock Toss
Notation: Back, Forward+2
Enhanced: Yes, but no armor.
Tremor’s Rock Toss changes slightly depending on the variation he’s in (mainly in terms of physical appearance). It’s a fairly straightforward projectile attack that hits high and can be ducked under. It covers the full length of the screen, but moves a little slower than most other projectiles. The enhanced version (Boulder Throw) hits mid and cannot be ducked under. While the normal version is safe if the opponent blocks, the enhanced version actually gives Tremor slight advantage. Unfortunately, neither version will naturally combo. An opponent can not only block the attack during a combo, they can even interrupt it in some cases if they’re looking for it. Be careful when and how you use it, but if the opponent isn’t expecting it, you can keep offensive pressure going by canceling a blocked combo into the enhanced Rock Throw.
Rolling Stone
Notation: Back, Forward+4
Enhanced: Yes, but no armor.
The Rolling Stone is a projectile attack that rolls along the ground and hits an opponent low. It covers the entire length of the screen and while it may look a little slow, you can combo into it like most other special moves. If the opponent blocks a combo and you end it with the Rolling Stone, they can jump away from it or use an armored attack to interrupt, so be careful how you use it. The normal Rolling Stone is not safe if the opponent blocks at close range, but the enhanced version (Rolling Kutter) gives Tremor a slight advantage if it’s blocked. Like the Rock Toss, this special move changes slightly depending on the variation you’re using.
Stone Punch
Notation: Down, Back+2
Enhanced: Yes, with armor.
The Stone Punch changes a bit depending on which variation you’re using, but it essentially gives Tremor three different attack options to choose from. The default notation is a straight punch that’s relatively safe if the opponent blocks and knocks them down if it connects. You can use this as a potentially Rock Drop setup in some situations. If you press Up after the initial notation (Stone Strike)) it knocks the opponent into the air so you can follow with a juggle combo. Pressing Down (Stone Smash) results in an overhead attack that bounces the opponent off the ground for a juggle combo.
The normal version is relatively safe if most characters block it, but the other two variants can be punished by most characters. When Tremor is attempting to get up off the ground, the enhanced normal version (Stone Slam) gives you a safe attack with armor. However, if you anticipate the attack will connect you can be risky and use one of the juggle options in hopes it will connect.
Stone Shatter
Notation: Down, Back+1
Enhanced: Yes, with armor.
Like the previous three attacks, the variation you’re using will change this special move slightly. In most cases it reaches just shy of half a screen-length in front of Tremor. You can hold 1 to delay the attack and even press Up or Down to angle the attack into the air or turn it into a low attack. Whiling holding 1 you can press Down, Down to cancel the attack. Only the anti-air version is safe, but it will hit most characters if they’re standing close to Tremor, so you can use it to end blocked combos and remain safe from punishment. The enhanced version (Rock Blast) inflicts a bit more damage and has armor. It also works well if you’re trying to get up after an opponent knocks Tremor to the ground.
Rock Bottom (X-Ray)
Tremor’s X-Ray hits low, which is rare to find in Mortal Kombat X. You can combo into it like most other X-Ray attacks, and it connects from a full screen-length away, popping up below the opponent at the time the X-Ray notation is used. It’s not difficult to land 40 percent combos with Tremor’s X-Ray, but like most other characters, it’s best to save your meter for enhanced special moves and Breakers, unless you can win a game with an X-Ray or X-Ray combo.
Basic Strategy
Most of Tremor’s general strategy is to go for a Rock Drop setup of some sort. He has plenty of attacks and combos that work well with the Rock Drop, but you have to be able to keep the opponent guessing for these to work. In many cases you will need to train the opponent to respect Tremor’s combos so that you can cancel them into the Rock Drop without the opponent thinking a cancel is coming (and instead preparing to block the full combo).
The Rock Slam (Forward+2) is an overhead attack, but it’s relatively slow and not safe if the opponent blocks. Meanwhile, Tremor’s Low Stomp (Back+3) is a low attack that leads into the Landslide (Back+3,2) and Shock Wave (Back+3,2,2) combos, but it has very limited range. If you’re not right next to the opponent you won’t be able to connect with it. In addition, both combos can be punished if the opponent blocks. However, you can cancel the first or second hit of the Shock Wave combo into a Rock Drop to start some mix-up opportunities. It’s all about getting into your opponent’s head so they don’t know when you’ll finish the combo and when you’ll go for a Rock Drop setup.
The Low Kick (Down+3) is Tremor’s fastest low attack, but it’s still not particularly fast compared to most other characters. If it’s blocked Tremor does have a slight advantage so you can follow with a Palm Strike (Forward+1) or Low Punch (Down+1) to beat out most of your opponent’s attack options. The Low Shake (Down+4) is also a decent low attack with good range that can catch an opponent off guard.
The Low Rumble combo (1,2, Down+3) ends with a low attack that knocks the opponent into the air so you can follow with a juggle combo. While the low isn’t safe if the opponent blocks, it opens up some opportunities for Tremor.
Instead of ending with the Down+3 low attack, cancel the second hit of the combo into the Rock Drop. While the Rock Drop won’t combo and the opponent can block, if the opponent isn’t expecting it you can essentially continue your pressure. The hit box of the Rock Drop has decent range, and in most cases you’ll have time to execute the Rock Drop before the opponent realizes what’s going on. That means the Rock Drop will come down even if the opponent reacts in time to hit you before you can continue your offense. This effectively stops most attacks, and allows Tremor to combo if it connects. If it’s blocked, Tremor has the advantage and can continue pressuring or even go for an overhead/low mix-up with the Shock Wave combo.
Tremor’s Igneous Strike (Back+1, Down+4, Up+4) and Mountainous Pain (2,1, Down+4, Up+4) combos have a low as the second hit (another chance for a Rock Drop setup) and ends with an attack that launches the opponent into the air. It’s safe if the opponent blocks, and while it can be difficult to follow with an attack (you have to Run Cancel), it becomes much easier in the corner.
You can use the Hard Knockback combo (1,2,3), then follow with the Rock Drop to make it difficult for the opponent to avoid an overhead/low setup with the Rock Drop and Shock Wave combo. Don’t cancel the combo into the Rock Drop or else it will miss because the opponent will still be on the ground. Instead, wait a brief moment after the combo, then use the Rock Drop and run in for a low mix-up. You can also follow the combo with the enhanced Ground Quake which is very difficult to avoid if the opponent isn’t expecting it.
The Not For Granite combo (Back+2,4) serves a similar purpose. If it’s blocked it leaves Tremor at a slight advantage, and if it hits you can follow with an enhanced Ground Quake that’s difficult to avoid if the opponent isn’t expecting it. This is a good way to end the round as a safe tool that can lead to a decent amount of damage.
The Body Quake combo (Forward+1,2,1) leaves Tremor with advantage if it’s blocked and knocks the opponent away if it connects. While you can run after the opponent for a juggle combo if it hits (much easier to do in the corner), you can also cancel the last hit into a Rock Drop which will connect just as the opponent is standing up (unless they use delayed wake-up). This is yet another good setup for the Rock Drop.
Aftershock Variant
Tremor gains the Earth Shake (Down, Down+1) special move in the Aftershock variation. It can be done in the ground or in the air, resulting in what is essentially two different attacks. The ground version is basically a delayed Ground Pulse. Tremor pounds the ground, then after a few audio pulses a low attack covers the entire length of the stage. If Tremor is hit or even blocks an attack before the Earth Shake is complete, it will cancel the attack.
You can use the grounded version to cover your approach to an enemy. Use it at a distance, then more toward the opponent. If you can avoid hitting hit or blocking an attack, you can use almost any attack you want and the opponent will have to respect the fact that the Earth Shake is coming. This works even better if you take to the air and combine it with the aerial Earth Shake.
The aerial version is also a low attack but if can be done close to Tremor by press Back after the initial notation, at mid-screen with the default notation, or almost full screen if you press Forward. You can use it immediately after a jumping attack to perform an overhead (jump attack) low (aerial Earth Shock) combination that can be hard to deal with. The enhanced version (Air Earthquake) launches the opponent into the air so you can follow with a juggle combo if you’re close enough.
Metallic Variant
The Metallic variation gives Tremor the ability to switch between Lava Skin and Gold Skin. He starts the match with Gold Skin active which essentially gives Tremor a zoning variation. Using Gold Skin, the Stone Shatter (Down, Back+1) changes into the Gold Punch projectile. You can still hold 1 to delay the attack, and change the trajectory up or down. However, instead of an attack that reaches just shy of half a screen-length, you get projectile attacks. The upward version is lobbed high into the air as it comes down in an arc, while the low version quickly bounces along the ground. The default version hits mid and cannot be ducked under, plus it’s much faster than Tremor’s normal projectile attack which makes it much better for zoning.
With Lava Skin active, the Rolling Stone (Back, Forward+4) becomes the Rolling Magma. The important change here is that if it connects it launches the opponent into the air so you can follow with a juggle combo. It’s still just as slow to execute, which means a skilled player can still avoid it you don’t combo into the attack, but it gives Tremor much better combo opportunities, especially if you have meter to use the enhanced version (Lava Kutter) which inflicts more damage and gives Tremor a slight advantage if it’s blocked.
If you like Tremor’s base move set, the Metallic variation may be the one for you. It essentially enhancing what Tremor already has instead of adding to it like the other variations. With the Gold and Lava Skin options you have a lot of variety without losing anything of real significance.
Crystalline Variant
In the Crystalline variation, Tremor gains the ability to use Krystallization (Down, Down+1) which temporarily increases his defense so he takes less damage. The enhanced version (Dark Krystal) activates a little faster making it harder to punish.
Tremor also gains the special move Summon Krystal (Down, Forward+3) which calls forth a krystal that appears just in front of Tremor. This can be used like a stage interaction in which Tremor can jump to the far side of the screen (Down+Interact), or throw it like a projectile (Forward+Interact). The enhanced versions give Tremor armor during these actions.
The other change in the Crystalline variation is that the Stone Shatter (Down, Back+1) becomes the Krystal Shatter. It doesn’t reach as far forward, but it does have extended vertical range.
The Crystalline variation is more about defense and mobility than the other two variations. If you like to play more defensively and almost always have an escape option, this is probably the variation for you.
Sample Combos
Universal
28 percent – Forward+1,2, Stone Smash, Neutral Jump Punch, Back+2, Forward+1,2,1, Stone Punch
Note: For the 28 percent combo, if you’re having issues, the Neutral Jump Punch must be perform on the way up, not after you have reached the peak of the jump. In addition, you can run forward slightly after the Back+2 to make the last portion of the combo easier to connect.
Aftershock
32 percent – Back+3,2, Stone Smash, Neutral Jump Punch, Jump Forward, 3, Forward+1,2,1, Stone Punch
Metallic
32 percent – With Lava Skin Active, Back+3,2, Stone Smash, Neutral Jump Punch, Back+2, Rolling Magma, 2,1,2
Fatalities
Stone Tomb – Down, Back, Forward, Back 3 (Mid-Screen)
Stalag-Might – Down, Forward, Back, Forward 1 (Mid-Screen)
Brutalities
Blood Rock – End the match with the Rock Bottom X-Ray and hold Down during the animation.
Rumble Trouble – During the match, connect all three hits of the Ground Quake (Down, Down+4+Block), then finish the match with the Ground Quake.
Rock Head – In the Aftershock variation, from one jump distance away from the opponent, end the match with the Rock Toss (Back, Forward+2) or Boulder Throw (Back, Forward+2+Block).
It’s Me Tremor – In the Metallic variation with Gold Skin active, from one jump distance away from the opponent end the match with the Gold Punch (Down, Back+1) or Gold Launch (Down, Back+1+Block).
Krystal Khaos – In the Crystalline variation, use Summon Krystal (Down, Forward+3) during the final round, then end that round with the Flying Krystal (Forward+Interact) or Flying Boulder (Forward+Interact+Block).
For more on Mortal Kombat X head over to Prima’s free guide or directly to our Tanya, Jason or Predator guides!


