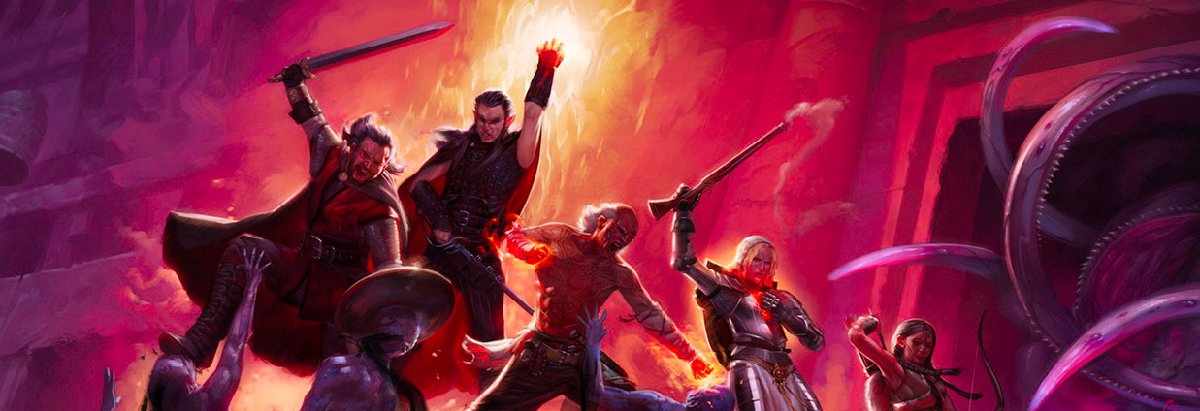
There’s so much to explore and find in Pillars of Eternity that it will take you hours to see everything. By all means stick to the main quest, which features plenty of exciting battles and locations filled with interesting non-player characters. Should you choose to go off the proverbial beaten path, we have complete walkthroughs for every side quest in Gilded Vale, starting with the first, A Mother’s Plea.
When you beat all of these missions, finish the Act 2 side quests in Copperlane, Brackenbury and other locations.
Act I Side Quests
A Mother’s Plea
- Starting Location: Gilded Vale
- Receive Quest From: Aufra
Part 1: Fear of the Hollowborn
Mothers who give birth to Hollowborn children get kicked out of Gilded Vale by order of Lord Raedric. You meet Aufra, an expectant mom who fears she will meet his depressing fate.
First head over to Aufra’s home and speak to her about the possibility of her kid being Hollowborn. During this conversation, you will also tell her about her sister Calisca (she’s missing) and the news about the dead caravanners.
Turns out she wants you to find a midwife, and asks you to go to Anslog’s Compass to find Mother Ranga. Who is Ranga? She’s a healer who may know how to make sure Aufra’s baby gets to keep his or her soul. For your trouble, she offers 20 cp up front.
Part 2: Snake Oil on the Seashore
When ready, leave Gilded Vale and go to Magran’s Fork. Leave this forest from the south and you’ll enter Anslog’s Compass. You’ll need to battle some Xaurips in the southeast, close to where Mother Ranga and her assistant Tana live. When you speak to her, Ranga tells you to kill the Xaurips.
Thankfully you just slaughtered some Xaurips so the quest is partially complete. Go to the northeast and kill more, then even more near the Sea Cave. If you feel especially murderous, take out the five Guls to the southeast; you’ll find some items on the peninsula.
Return to Ranga and she gives you another mission. Go into the aforementioned Sea Cave and kill the Dank Spore and Sporeling inside.
When you get inside of the Sea Cave, attempt to lure the Sporelings away from the immovable Dank Spore so its attacks cannot reach you. Collect the spores left behind and bring them back to Ranga. She hands over a potion that is in fact a placebo; if you want, talk to her about it. Now you can buy or trade things with Mother Ranga, or camp for free if you wish. From here, head back to Gilded Vale.
Part 3: Conclusion – Placating with a Placebo
When you reach Gilded Vale, go to Aufra’s place. Give her Mother Ranga’s potion and graciously accept the reward. The amount depends on what you tell Aufra about the potion.
If you tell Aufra the potion is fake, you receive an additional 10 cp. Ranga, meanwhile, gives you a Potion of Minor Recover, a Potion of Minor Regen and a Potion of Minor Stamina.
Tell her the elixir’s real and you’ll also get 10 cp. When you go back to Ranga, you’ll get a Cloak of Minor Protection.
The Smith’s Shipment
- Starting Location: Gilded Vale – Black Hammer Smithery
- Receive Quest From: Tuatara
Part 1: Tuatanu’s Goods Gone Missing
Tip: Never attempt to steal something from the smithery. Rummaging through containers will draw the attention of other blacksmiths and you’ll wind up in battle. In fact, stealing something may prevent you from even doing this side quest.
Moving on…
Gilded Vale’s blacksmith, Tuatara, continues to wait for supplies that should’ve arrived by now. He thinks something bad happened to the wagon carrying his precious goods, somewhere on the eastern road.
From here, travel east and a bit to the south of the hanging tree and enter the Black Hammer Smithery. Have a chat with Tuatanu, who says the goods went missing somewhere in Black Meadow. Tell him you’ll keep that in mind during your adventure.
Part 2: The Black Meadow Marauders
Exit Gilded Vale and go to Magran’s Fork. Leave and then head towards the east until you come to Black Meadow. Explore to the north and east a bit and you make a sad discovery, an abandoned cart riddled with arrows.
Keep traveling north, disposing of the Forest Trolls and Wood Beetles that get in the way. Walk to the northwest of this area (you can slip past the two Trolls if you want) until you happen upon a Bandit camp to the east. These guys are in possession of the missing shipment, so engage them in battle.
Part 3: Conclusion – What’s in Store for You?
Inspect the dead bandits, crates and barrels to find a bunch of items. The supplies are inside a crate with a barrel on top.
With everything collected, go back to Gilded Vale and inside the smithery. Hand over the goods to Tuatara and take your well-deserved 100 cp and Larder Door.
Buried Secrets
- Starting Location: Gilded Vale
- Receive Quest From: A child standing outside of the Temple of Eothas
Part 1: Under the Hanging Tree
Lord Raedric decided to dedicate Gilded Vale’s Temple of Eothas to a different god. Although it was abandoned for quite some time, the entrance to this place is now clear.
Walk towards the temple and go inside. You’ll find the entrance to the southeast of the hanging tree, with a child nearby. When you enter the stone chamber, you’ll see Wirtan. He invites you to learn as much info about this place as you want. In addition, he asks you to search for some dead Eothasian priests and bring the bones to him.
Part 2: Temple of Eothas (Level 1)
Explore the temple chambers while killing Will-O-Wisps, Ivory Spiderlings and Ivory Spinners. Now go northeast into the Main Altar chamber. Kill the enemies standing in the way, walk up the stairs and chat with the ghost. When you reach the top of these stairs, pick up the Scouting item.
Now go into the scriptorium, then walk northwest into Rectrix’s room. There are two items you should be aware of here.
First, approach and inspect the bookcases to find a Book of Verses. This will help you open the Ritual Bells chamber. We suggest accessing your inventory and then highlighting this book to read it.
Second, use your character’s Scouting ability to find a Hollow Book, which should show up in purple on the map. If you still can’t find it, the book is laying on the floor near a desk. Also grab the Engraved Silver Key for the Ritual Bells chamber.
Leave this place and walk through a chamber crawling with spiders; you can also go into the Dormitory room. Move southwest until you see an archway with three Skuldr nearby. Deal with these enemies and head to the Reflection Pool Ritual Chamber. When you get there, three Skuldrs appear, along with a ghost that offers some clues to unlock the Ritual Bells chamber. You may need to check the Quest menu for a hint if you forgot.
Go to the Ritual Bells Room and ring the bells in the following order:
Right, Middle, Left and Right.
Do this correctly and you’ll be able to pass through the door to the lower area of this dungeon.
Part 3: Temple of Eothas (Level 2)
You should enter the Stairwell Chamber. Kill the Shadow as you make your way southeast, then open the door to unlock the main corridor.
Now you’re in the Water Lever Chamber. Take care of the three Shadows and enter the main corridor. Go northeast and you’ll find a locked door. This leads to the southern corridor.
To open this door, you’ll need 4 Mechanics, +5 Lockpicks or 5 Mechanics. That said, ignore this door and instead open the one on the opposite side of this hallway. Now you’re in the Water Lever Chamber. Slaughter the three Shadows and walk up to the giant stone bird’s head. Turn the wooden valve to drain water from the chamber to the south of your location.
Go down the stairs and you’ll step into some water. Battle the Lesser Black Ooze creatures and check the robe near the fountain. Pick up the Gleaming Silver Key and now go back to the corridor. Use that Gleaming Silver Key to unlock the northwest corridor door. If you can’t find the door, it is on the opposite side of the entrance to the Water Lever Chamber.
Walk down the corridor into the Sanctuary. Kill the Lesser Black Ooze and Shadow, then walk southeast until you come to a dead-end passageway. The door won’t open, but you can find a hidden lever using your Scouting ability. When the lever is revealed, pull it and the door opens.
Upon entering the vault, walk over to the glowing corpse and pick up the remains. With the bones in your inventory, go back to Wirtan. You can reach Wirtan by going back the way you came or walking up the steps leading to the Eothasian Altar chamber. If you take the stairs, you will battle three Skuldr.
Part 4: Conclusion – Wirtan’s Fate
Head back to level 1 and approach Wirtan inside the chamber entrance. Turns out Wirtan betrayed the priests. In fact, you can finish this side quest one of several ways. Save right before talking to Wirtan in case you prefer one outcome over the other.
Give Wirtan the bones and send this traitor into exile.
- No reward.
- Wirtan will join Gramrfel’s party at Magran’s Fork. You’ll see him there when you reach Copperlane.
Give Wirtan the bones and then advise him to redeem himself.
- No reward.
- You will receive a Reputation boost at Gilded Vale.
Ignore Wirtan, leave the temple and then give him to the magistrate.
- No reward.
- You receive an average Reputation boost at Gilded Vale.
Kill Wirtan because he deserves it.
- No reward.
- You’ll lose Reputation at Gilded Vale.
Give the bones to Wirtan.
- 200 cp reward.
Kill Wirtan for being a creep and give the bones to Magistrate Urgeat in Gilded Vale.
- 300 cp reward.
- You receive an average Reputation boost at Gilded Vale.
Lord of a Barren Land
- Starting Location: Gilded Vale, outside Aufra’s house after finishing A Mother’s Plea
- Receive Quest From: Kolsc
Note: This quest will unlock if you finish two of the following side quests: Against the Grain (side with Tremble instead of Sweynur), A Mother’s Plea and The Smith’s Shipment.
Part 1: A Raid on Raedric’s Keep
You’re free to go on this side quest after completing A Mother’s Plea. Travel to Aufra’s place in Gilded Vale if you’re not already there and speak to a man named Kolsc, who has nothing but bad things to say about Lord Raedric. He asks you to help him put a stop to this tyrant once and for all, and you’ll journey east of Esternwood to presumably find Raedric’s fortress. Kolsc knows that attacking Raedric’s keep head-on is suicide, but he knows a guy there named Nedmar, who may provide assistance.
Go to the eastern part of Gilded Vale and exit this place so you’re on the World Map, then travel to the Esternwood area. You’ll encounter Skeletons and Wichts roaming around a cemetery in the northwest, so be on guard.
You’ll see a cobblestone road heading in this direction. Take it and you’ll wind up at a Gothic keep. Continue following the path northeast, go to the World Map and then select Raedric’s Hold.
Part 2: Storming the Fortress – Initial Planning
You wind up in the southwest area of Raedric’s Hold. Push onward and you’ll meet Nudwin and Cletlan near a drawbridge. If you talk to these guys they’ll inform you that your character cannot enter. Should you wish to attack, enemies in the Hold won’t react to you kindly.
There are three ways to sneak inside Raedric’s Hold: climb the vines, travel up the middle or enter the dungeon. Thankfully we have tips for each path.
Go up the vines
Walk along the moat to the north and you’ll see vines along the bell tower. Use these to climb up and access the battlements, then travel east killing at least six of Raedric’s goons as you go. Open the arched door leading into the north tower and you’ll access storage, which takes you to Raedric’s Sanctuary, just above his throne room.
Should you choose the vines, also keep an eye out for an armory located on the bottom level, just before entering the fortress. In order to take the items from the locked chests, you’ll need 3 Mechanics +4 Lockpicks or 4 Mechanics. In addition, you’ll find a Scroll of Fire inside of a Scouting container outside of this armory. With that out of the way, now you can go to Part 4: To Find a Priest. This allows you to meet up with Nedmar and you won’t kill everyone in the Hold.
Traveling up the middle
After killing Nudwin and Cletlan, walk across the bridge and get ready to fight nine guards. Go up the central stairs and dispose of six additional solders; among them, two Paladins of Berath.
You have two options:
- Open the primary archway door and walk to Keep Hall. This route allows you to skip to Part 6: Assault on the Throne Room.
- Instead, check out the upper battlements. Go through the Lower Ramparts door on the main floor in the northeast. Wander through the north battlements while battling eight bad guys by the crenellations beyond the bell tower. If you wish to go back to the courtyard, use the door. Should you go to the north tower and open the door, enter Temple Storage and then jump to Part 4: To Find a Priest.
Enter the Dungeon
Take the moat east and you’ll come upon a grate leading into the sewer by the outside wall. Walk over the rocks by the pillars and have a look through the bars.
Ideally you need to select a member of the party who can bend these bars. When that happens you’ll pass through some nasty-looking water and wind up in the southeastern area of Raedric’s Hold Dungeons. From here you start Part 3: Dungeon Drawl and Osrya’s Offer. There’s plenty of treasure to find in the sewers, but again, you need someone strong enough to bend the bars. If you don’t have that, a pry bar from the Gilded Vale blacksmith should do the trick.
Part 3: Dungeon Crawl and Osrya’s Offer
Tip: Scout while exploring the dungeon to detect and possibly disarm traps.
Travel up the drainage pipe and into the drain room. Go northwest into a pool chamber and deal with the Human Skeletons, Guls and Revenants. If you still feel like killing, go west to more chambers with six Black Oozes, but also treasure you’ll gather while en route.
Go to the southwest corner of this place and climb the ladder so you reach a trapdoor that takes you back to the Hold’s exterior lower ramparts. Turns out it’s the only way to access this part of the fortress. Go there if you want to kill whoever stands in your way and pick up loot.
Walk to the middle of this dungeon and you’ll come upon four jail cells. Kill the four undead and open the locked cell door, but you need 4 Mechanics + 5 Lockpicks or 5 Mechanics to do this. If you don’t have that, pick up the Rusted Iron Cell Key off Osrya’s corpse, though we’re getting a bit ahead of ourselves with that option.
Go inside the cell and have a chat with a guy named Giacco. He speaks of Osrya, a woman who transforms men into creatures.
You have one of two choices to make:
- After slaughtering every monster in the dungeon, tell Giacco to escape.
- Tell Giacco to stay put, since you need him alive so Nedmar helps you find the secret path which leads to Raedric.
It’s time to pay Osrya a visit. Continue walking to the middle of this dungeon. Go through a locked door using Mechanics 1, or the one that is open to the north. Kill the six undead monsters, go northeast and open the door. Now walk into Osrya’s Chamber. There she is, along with some undead minions.
Converse with Osrya (she has nothing but nice things to say about Raedric… shocker) and talks smack about Nedmar.
Again, you have two options.
- Pledge allegiance to Raedric and Osrya, then agree to kill Nedmar. She’ll provide you with a route to Raedric’s throne room, which allows you to bypass his soldiers. From here, jump to Part 4: To Find a Priest.
- Lack the smackdown on Osrya, thereby looking for another way to get into Raedric’s crib. Kill her to get the Rusted Iron Cell Key. You’ll also lean towards siding with Kolsc instead of the evil Raedric, but you can always switch your allegiance later.
With Osrya out of the way, take the corridor up until you see some steps. This takes you the kitchen. Readric is on this floor, and you can kill his guards while traveling to the throne room, or go up the adjacent steps to kick off Part 4.
Part 4: To Find a Priest and Nedmar’s Offer
You begin in the northeast in Temple Storage, where you gained access to this room via the kitchen or the vines from before.
Rummage through the two chests to find Berathian Priest Robes for your entire party. Ignore these entirely, or have everyone put them on and you’ll be able to wander though the keep unharmed until much later, when combat is the only option.
Travel east and then southeast, going through a door leading to a long hallway with a stone floor. Go inside the final door using 4 Mechanics +5 Lockpicks or 5 Mechanics. Walk northeast and you’ll enter Nedmar’s chamber. NPCs will get in your way, but it’s possible to bypass these characters without fighting.
Talk to Nedmar. Given the options from before…
- Kill Nedmar to make Osrya happy.
- Join forces, but only if you assist a prisoner before Osrya gets ahold of him. This is in fact Giacco from the dungeon. You may have already freed him, and if so, Nedmar hands over a master key.
If you need to rest the party, do so in Nedmar’s chamber. When you’re fully recovered, tell Nedmar that Kolsc should become leader of Raedric’s Hold. You will then acquire the Burnished Steel Key. It unlocks most of the doors in this place, including the Scriptorium.
Part 5: Completing Osrya’s or Nedmar’s Task
Osrya’s Task
If you killed Nedmar on behalf of Osrya, go back to the Temple Storage room (where you picked up the robes). Go into the kitchen and then the dungeon. Reach Osrya’s chamber and tell her you did the deed. She will open a secret wall southeast of her place. Take it to Raedric’s Keep.
Nedmar’s Task
Similarly, return to the Temple Storage and into the kitchen so you’re in the dungeon. Kill Osrya, free Giacco and revisit Nedmar. You will receive the Burnished Steel key that unlocks the Scriptorium. This will take you to the Keep Chapel, and Part 6 now begins.
Part 6: Assault on the Throne Room
Feel free to wander all over Raedric’s Keep. Everyone here basically wants you dead, and how you reach the throne room depends on the following:
- If you chose to align with Osrya, use the Chancery to enter the throne room.
- If you partnered with Nedmar, take the Scriptorium to the Chapel and then the throne room.
- If you slaughtered whoever was unlucky enough to get in your way, fight from one of two areas:
Main Hallway: Kill Raedric’s soldiers outside the Keep and then walk into Keep Hall. Slaughter seven more baddies and unlock the double doors using 7 Mechanics +8 Lockpicks or 8 Mechanics. Go into the Fountain Room to dispose of six foes, then access the Throne Room with 7 Mechanics +8 Lockpicks or 8 Mechanics. If you don’t have that, reach the banquet room to the northeast, kill the three enemies and wander into the hallway. Take out the one soldier and go right so you enter the Fountain Room. Now kill six enemies and go southeast into the library. Approach the middle bookshelf and use Scouting to find a book highlighted in purple. This unlocks a secret door leading into a hallway. Go inside and then unlock the bedroom door. Raedric’s wife is dead for some reason, but no matter. Pick up all the items and unlock the door to enter the Throne Room.
Kitchens: You can get here from the Dungeons or Hold Sanctuary. Fight across the corridor. Head southeast along the cobblestone path, where you will eventually see the door leading to the Fountain Room. From here, use the Main Hallway option above to reach the Throne Room.
Part 7: Conclusion – Killing Cousins
Go into the throne room but don’t worry about the Champions of Berath, Bodyguard and other enemies here. Instead, speak with Raedric to learn that he and Kolsc are related. Cousins, in fact. Proceed one of two ways: Agree to locate and then slaughter Kolsc, or stick with the original plan and end Raedric’s rule.
If you choose the latter you have quite the battle on your hands against Raedric and his loyal followers. Afterwards Kolsc appears, thanks and rewards you.
To side with Raedric, you must avoid being negative while speaking to him. Tell Raedric, “Gilded Vale has suffered under your rule. It deserves a better leader.” When he responds, say, “I’m willing to listen. What did you have in mind?” From there, say, “I’ll find Kolsc and put an end to him.”
With the conversation over, return to Magran’s Fork and go north to the Crumbling House near the damaged tower. Enter this place to kind Kolsc and his buddies. Speak with him and…
- Decide Kolsc is better off alive and go back to kill Raedric. You will score a Very Major Reputation boost at Gilded Vale and a loss at Defiance Bay; this affects the end of the game. Dead Raedric will also reappear later on, this time as a Deathguard for The Champion of Berath side quest; kill him again. You also gain access to this side quest for slaughtering both Raedric and Kolsc.
- Send Kolsc to the afterlife and pay Raedric a visit to score some loot. You will suffer from a Very Major Reputation loss in Gilded Vale and a boost at Defiance Bay. In addition, this affects the end of the game.
Speaking of rewards, this should amount to 500 cp and a Justice Find Great Sword.
Task: Late for Dinner
Part 1: The Problem with Porridge
While in Gilded Vale, you learn that the cook for The Black Hound Inn, Tenfrith, went missing. Head inside towards the bar and speak to Hilde, the innkeeper. Guide the discussion towards the porridge menu. It seems the cook traveled north towards Valewood to grab supplies and never returned.
Part 2: Tenfrith’s Bandit Camp Kidnap
Go to Valewood and travel northeast until you come upon a bandit camp. You’ll see Tenfrith as well as three bandits. No need to hesitate. Go after the bandits and make them dead. There is a chance Tenfrith will somehow die during the fight, so be mindful of that.
If he’s still alive, converse with Tenfrith and he goes back to Gilded Vale.
Part 3: Conclusion – A Delicious Piece of Pie
With justice served, travel to Gilded Vale and re-enter the Black Hound Inn. Talk to innkeeper Hilde and bring up the rescue mission. If you want, go into the kitchen and speak to Tenfrith.
Your reward? The Savory Pie crafting recipe.
Task: Vengeance from the Grave
Part 1: A Bear-Faced Liar
Go to the Valewood forest and search for a tiny cave to find a bear inside. You’ll also discover a partially devoured body and a ghost that provides info on this poor fellow’s life.
With at least two party members in tow (makes killing the bear much easier), go to Valewood and then travel northwest to a cave. Go inside and dispose of the bear, then examine the mauled body to learn the victim’s name, Perly. His ghost appears and asks you to avenge his death by slaying Norton, who left Perly to meet this grisly fate.
There’s a good chance you already met Norton in Valewood to the south. He tells you a bear attacked his buddy, and you may have thought nothing of it at the time.
In addition, you could have met Norton in Gilded Vale at Ingroed’s place, right before killing the bear. Seems these two want to leave town, and fast.
Part 2: Conclusion – Norton’s Fate to Flee or Fall
Now that you know about Norton’s betrayal, go back to Ingroed’s home, speak to both of them and choose from the following scenarios:
- Kill both Norton and Ingroed. Go about your business or travel to the cave to inform Perly’s ghost that revenge is now his.
- Take Norton and Ingroed’s bribe, then let them escape.
If you kill them both, feel free to pick up the items they leave behind. The reward for this task, though, is 50 cp and then a Minor Ring of Deflection should you refuse to take the money.
Task: Against the Grain
Part 1: Breaking Bread
While in Gilded Vale, you’ll run into some farmers accusing Trumbel of hoarding grain. Hungry and ticked off, it seems these guys may snap at any moment. You’ll know the task is available after heading north from the hanging tree to the Windmill. Once there, you’ll get involved in a heated discussion between Tremble and a dwarf named Sweynur.
Part 2: Conclusion – Touting Trumbel or Siding with Sweynur
You have two options:
- Go to the Black Hound Inn and speak with Sweynur.
- Go to that Windmill and chat with Trumbel.
Regardless of who you speak to first, the characters complain about bad times. You’re free to take whichever side you want, then slaughter the other person if the mood strikes.
Part 3: Conclusion – Bloodless or Bloody Negotiations
There are multiple outcomes for this task depending on the choices you make.
If you persuade Sweynur to chill out, then tell Trumbel about it at the Windmill…
- You receive 20 cp and then another 20 cp if you insist on more.
- You also receive an average Reputation increase at Gilded Vale.
Go to the inn, kill Sweynur, visit the Windmill and inform Trumbel that he’s dead.
- You receive 20 cp.
- You also benefit from an average Reputation increase at Gilded Vale.
Tell Trumbel to take it easy on those farmers, then tell Sweynur about this at the inn.
- You receive 10 cp.
- Hilde will give you better prices at the Black Hound Inn.
Slaughter Trumbel at the Windmill, then head to the inn and tell Sweynur he’s dead.
- No reward.
- You receive an average Reputation increase at Gilded Vale, and high prices exchanging items with Hilde at the Black Hound Inn.
Don’t miss out…only one printing!
This 512-page high quality Collector’s Edition book is a limited one-time printing. It’s meant to be a keepsake for the truest and most loyal fans whose names are printed in each book. The Pillars of Eternity Official Game Guide provides comprehensive training and character development strategies, complete walkthroughs, and detailed maps so that you can see and do everything! Reserve yours now, before they’re sold out!