Lara Croft finally makes her way to the Soviet Installation, which is one of the largest areas in Rise of the Tomb Raider. There are several optional side missions in this area with varying rewards if you have the time to complete them. If not, you can skip the optional missions and continue with the main story missions to speed through the area.
Soviet Installation
Among the Enemy
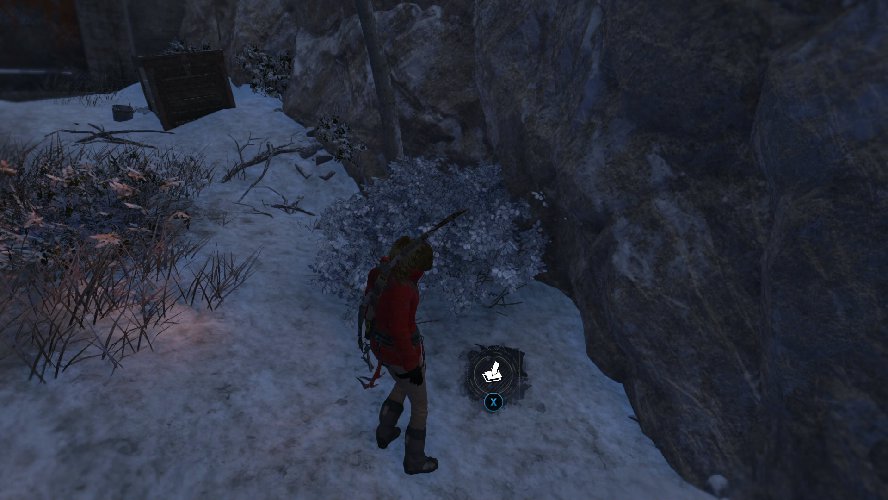
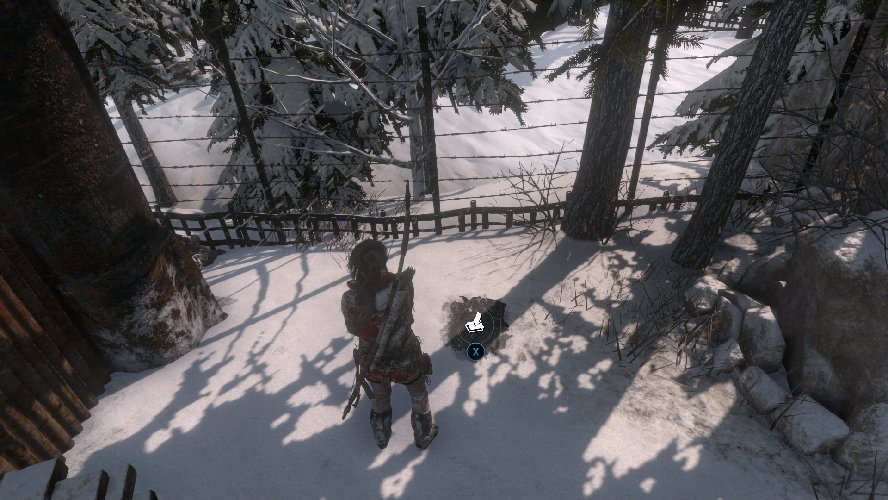
Access the zip line by the fire, then turn around when you land to find another object hidden in the snow.
Continue down the path to the dead man laying against a tree stump. Examine the object on the stump, then watch for the Trinity enemy ahead as you continue down the path. There are two more enemies ahead. You can either use the bottle in front of their position to distract them, or use your bow to take out one and get the attention of the other (while you hide in a bush). When the other soldier comes to investigate, take him down as well.
Keep moving until you get to the structure on the left. In front of the building is another salvage box with some loot. Move through the middle of the structure to find another salvage box to the right as soon as you pass through.
Scramble up the rusted structure dead ahead, then drop down into the next area. Scramble over to the closest bush, then move from bush to bush as you get closer to the enemies ahead. If you don’t already have a bottle in-hand, scramble up the platform to the right (before you get to the area with the enemies) and pick up the bottle at the top.
Use the bottle to distract the enemies ahead if need be. However, you can wait in the closest bush and the first enemy will walk toward you. This is a good chance to silently take him out. You can ten wait for the two enemies in this area to walk away from each other so you can use your arrows to take them out as well. Use Survival Instinct to determine when they can’t see each other (yellow mean they can’t be seen by the others, red indicates they can be seen).
With the three enemies in the immediate area down, take out the enemy patrolling the second floor of the structure ahead. There’s also one last enemy bending over on the first floor of the structure. He can be a bit more difficult to see, but trust that he’s there.
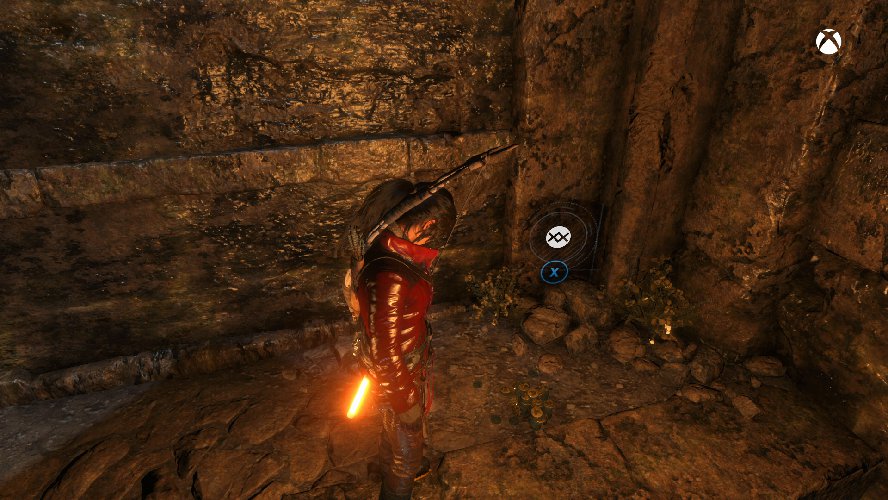
Once all of the enemies are down, head up the stairs and loot the salvage box to the far left. Continue into the next room, past the high tech monitors and up the stairs just beyond. When you reach the top of the stairs, refill your arrows using the quiver on the wall, then examine the large bronze star on the wall to the right. Head left to find an item basket and continue to the far left is another salvage box next to a recorder on one of the cargo boxes.
Examine the recorder and collect the loot, then head into the next room (straight ahead from the top of the stairs). Before you cross the bridge, hack open the loot crate to the left to find another piece of a semi-auto weapon.
Cross the bridge and continue up the series of ladders. When you have to jump over the gap in the walkway the adjacent platform breaks loose and you’ll need to press X to reassure your grip before you can jump to the left, then scramble up the rusted steel on the wall.
Inch your way to the left, then climb up onto the platform and walk across the narrow beam to the zip line. Slide down the zip line then head toward the torn cloth and broken wood ahead. Before you reach the cloth, look to the right to see another salvage box between the two large steel cylinders.
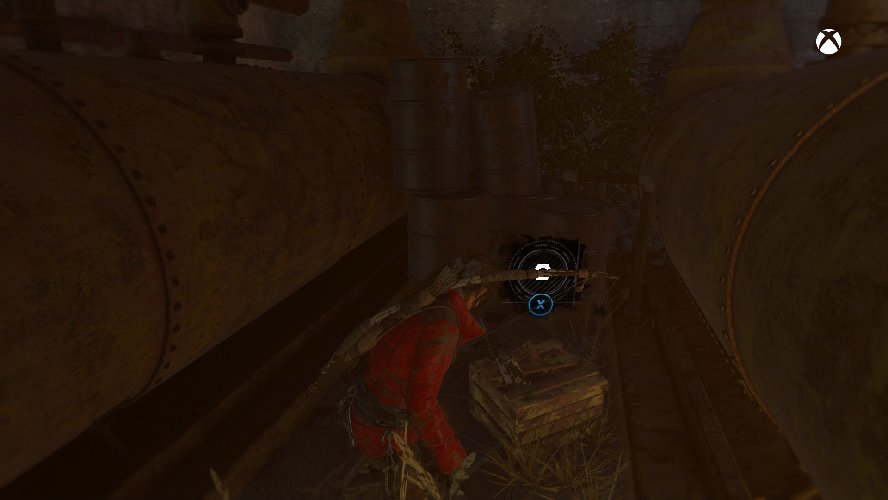
Collect the loot then pick up the nearby lantern and throw it at the pile of cloth and broken wood to ignite the junk and clear a path into a small hole. Head through the hole to find a gun, then examine the papers on the table in the far right corner of the room.
Shoot your newfound gun through the glass at the two men in the next room. You can shoot one without any opposition, but the other will fire on you once you shoot the first one. Shoot from the cover to either side of the window to avoid taking damage, then you’ll have to time your second shot between the enemy’s gun shots.
Jump into the next room and collect the loot from the salvage box next to the dying prisoner. The door on the far right corner is locked and requires a lock pick that you don’t yet have. However, you can go through the door behind the prisoner.
Loot the salvage box to the right when you first enter the next room, then refill your arrows and pick up the other object in the corner, which is an ammo crate. Scramble up to reach the small window above to watch another cut scene.
Unexpected Discovery
Take cover behind the closest cargo, switch to your bow and arrow, and wait for the patrolling guard to move out of sight of the other guards. Kill the patrolling guard, then take out the guard on the second floor patrolling to the left of your present position. This leaves the two men in the far corner and the injured man on the ground. You don’t have to worry about the injured man, but you’ll need to pick up one of the nearby bottles to distract one of the other two and get him to investigate. That’s when you can take him out leaving only the final enemy in the room.
Finish off all of the guards, then loot the ammo crate in the far right corner (from your starting position), and the item basket on the right, near the wall. Use the lantern near the back wall to ignite the fuel and cloth in the far left corner. This blows a hole in the wall, but there are two other guards outside. Take cover and shoot the last two guards, then make your way through the brand new door you just created.
When you get outside, look to the right to see another bronze star on the wall. Examine it to increase your Russian reading comprehension, then head up the stairs in the far right corner and climb up and through the small opening.
Move around the corner to the right, then climb up the ladder and into the tower in the far corner. At this point there’s an ally nearby who offers an optional mission for you. If you choose to take the mission, you’ll receive a lock pick for your troubles. Speak to him to accept the Communications Breakdown mission.
Whether you accept the optional mission or not, look in the house behind you to find ammunition on the floor, and another manuscript on the table. Head over to the back side of the wooden tower ahead to find stairs that lead to a ladder. Up the stairs is another salvage box, with a second salvage box and a loot crate up the first ladder. Head up the second ladder, then move left until you can scramble up the wooden side panel. Continue to the left and keep working your way to the top. Once you reach the top, drop down inside the tower to find another loot basket. Climb up the wooden panel to find a bird’s nest (loot this) and a zip line at the top.
Communications Breakdown (Optional)
Reward: Lock Pick
Note: For this optional mission you must destroy the five communications towers. This portion of the guide will walk you through the next part of the Soviet Installation main mission, while sidetracking to cover the Communications Breakdown portions as well.
Slide down the zip line and head inside the building to the left to find more ammunition on the floor and yet another manuscript on the desk. There’s also a locked locker here, but until you have the lock pick from the side mission you can’t do much with it. Head out the back door to find a salvage box on the back patio.
Leave the house and head up the hill to the left, working your way toward the large crane. There are salvage boxes on either side of the truck here, as well as more ammo to the right of the truck (near the salvage box). Collect the loot, then climb up the ladder to the right of the truck to take on the first part of the optional side mission.
Destroy the panel at the top of the ladder, then continue onward and climb up the large steel container to the left. From here you jump up to the ladder hanging above to find an item box at the top that holds a Compound Bow part.
Turn around, jump over the gap and grab the feathers from the bird’s nest to the right. There’s another bird’s nest in the far right corner, and a mural on the opposite side of the right wall, but you want to drop down to the right of this bird’s nest to reach the platform just below. Head out through the opening to the left (facing the ladder you just went up) and look in the cell here to find a Family Photo.
Once you’ve looted the area, climb back up the ladder that above the steel container, then climb up to the left to find a zip line above. If you go left instead of taking the zip line, you’ll reach a ladder. Turn around and you can drop down to where the wall mural is located. When you’re done, make note of the zip line and head to the north side of the structure to find a log that is working as a makeshift bridge.
Cross the log bridge to find another communications tower to the right. Destroy this then scramble up the tree to the left and jump up to the branch above. Jump over into the window of the adjacent building and open the item crate to find a Semi-Auto Pistol part. On the far side of the table is a salvage box and some ammo. Just outside the door and down the stairs is another salvage box.
Circle back around to the tree you just climbed up and head up the ladder on the tower to the left of it. At the top of the tower is an item box that holds a Wish Maker Toy. Head back down and move toward the log bridge, but instead of crossing the bridge, head left following the frozen stream.
Climb up near the log at the end of the frozen stream, then continue down the path until you see a tree you can climb up on the left (before you reach the cave on the right). Climb up the tree and jump over to the ledge at the top to find another camp fire. To the left of the camp fire is another communications tower.
From here head back to the first structure where the truck was and take the zip line across to the adjacent mountain, then drop down so you’re hanging from the ledge. Move right until you can climb down the rough terrain, then head into the cave here. You can also head directly to the cave if you remember the location.

As soon as you move into the cave, wolves will attack. Use poison club arrows to fend them off (head out of the cave and into the open if you need to), then loot the cave. There’s some ore on the walls, mushrooms on the ground, and a map in the far left corner.
If you head across the bridge on the other side of the structure you were just one (where you disabled the communications tower), you’ll end up at another cave. However, your next main objective is to the right of the cave entrance (if you’re facing the cave). There’s also an optional tomb to the left of the cave entrance. If you wish to skip the optional tomb, jump down to the continuation of the Unexpected Discovery section. If you’re up for the optional tomb, look left of the large crane and shoot down the log hanging from it in order to gain access to an underground shaft.
Slide down the wood to the left, then move to the far side of the ledge to find more ore on the cave wall. This cave has several areas where you can find ore, so use Survival Instinct to find them. There’s also another mural on the far right wall when you reach the bottom of the cave.
When you’ve looted the cave, head through the opening on the bottom floor to reach the Cistern Cavern, an optional challenge tomb.
Cistern Cavern Tomb (Optional)
Head down the path, dropping to the lower areas as you go. When you reach the bottom, move all the way to the end to find an item box that holds A Coin of the Realm. Collect the loot then move over to the nearby opening and just to the rock wall. Latch on, move to the right, then climb down until you can’t move down any further. Move to the right again and jump over to the adjacent rock wall, then climb down once more.
Collect the two salvage boxes here, then slide down the rock formation to the left. When you reach the bottom, open the item box to the left to find a Golden Icon. Head up the stairs, then jump over to the wooden beam hanging nearby.
As the beam lowers you’ll see two blades rotating below. Move slightly to the left and time your drop so that you fall between the two large gaps in the blades. When you reach the pool at the bottom you’ll find Ancient Coins on one side.
Grab the Ancient Coins, then head to the other side of the pool, loot the item basket and head around the corner. Replenish your arrows at the quiver on the right, then shoot an arrow at the red object in the far right corner to lower the water.
Head through the opening and climb up to find a camp fire to the left. Continue to the right of the fire and head down into the Ancient Cistern.
Ancient Cistern (Optional)
Run across the narrow bridge, then jump up to the path above at the end. Head to the right to find a platform that looks like you can jump over to and then climb up. Unfortunately, once you jump the platform you’re jumping to breaks and you’ll fall into the water. You can try this yourself or save some time and dive into the water below.
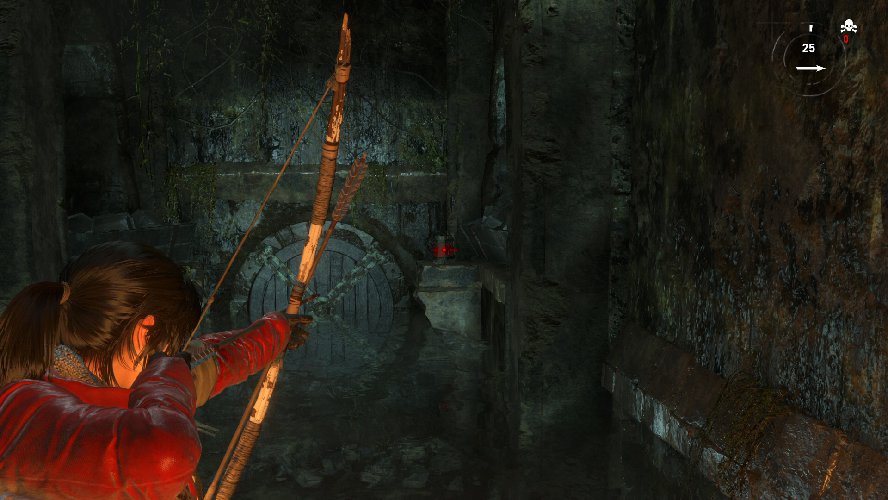
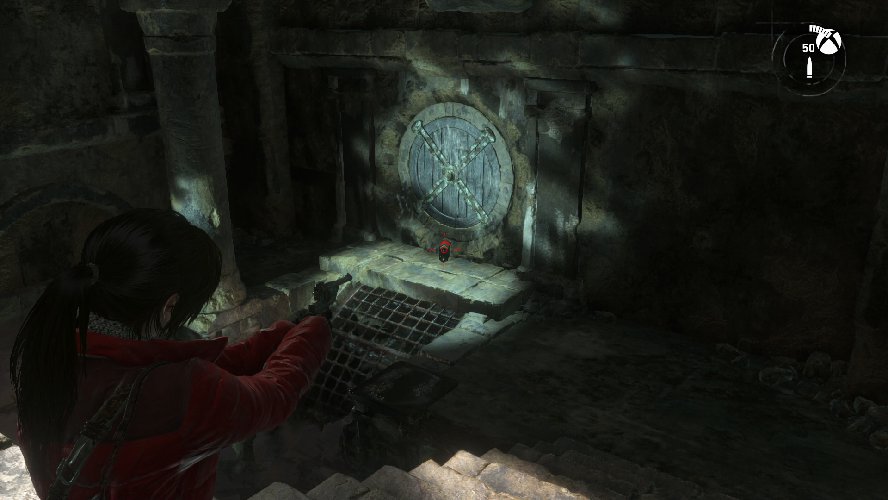
Head to the left, past the water mill and under the archway. Climb up next to the circular wooden door, then head up the stairs and pick up the red oil can near the gate at the top. Place the oil can in front of the wooden door, then head back up to the top of the stairs and shoot it to blow up the door and release the water.
Swim through the newly created doorway to get back into the previous room, then continue up the stairs to the left of the water mill. At the top of the first flight of stairs, to find three oil cans ahead and to the right, but for now run straight ahead and climb up into the small alcove above. Open the item box here to find more crafting resources, then pick up an oil can and throw it onto the wooden platform that’s floating in the water.
Head up the second flight of stairs and jump over to the wooden beam to release more water. Drop down and wait for the wooden platform where the oil can resides to reach the circular wooden door (exactly like the one you just blew up). As soon as it’s near, shoot it to blow up the oil can and the door along with it.
Once again, swim through the newly created hole, climb up onto the ledge when you reach the far side, then move over to the stairs and jump across to the other side. Climb up onto the slightly elevated ledge to find that there’s another salvage box to the left, along with a portion of the wall that can be cleared with your climbing tool (activate Survival Instinct to see it clearly).
Before you clear the wall, move around to the opposite side of the ledge and climb up into the small alcove to find another scroll. You can see the scroll glowing if you activate Survival Instinct. Jump above the stairs you can jump up into another alcove to find an item box that holds more crafting resources.
Now that you’ve looted the room, clear away the weak wall and drop down into the previous area. Once again you need to grab an oil can and throw it onto the wooden platform that’s floating in the water. Jump onto the wooden beam to release the water again, but this time drop down and quickly swim over to the floating wooden platform. Climb up and pick up the oil can, then throw it into the hole you created when you broke down the weaken portion of the wall.
You can now climb up to the opening you previously dropped down through, pick up the oil can and run over to the far side of the room. Throw the oil can over to the circular wooden door, then shoot it to blow the door away and release more water.
Swim through the newly created doorway, then head right and follow the tunnel into the main room. Head straight for the pedestal in the middle to access the Ancient Manuscript on Natural Instincts. This effectively completes the Ancient Cistern, but don’t forget to loot the salvage box and item basket on either side of the pedestal before you leave. To save time you can fast travel back to base camp so you don’t have to climb all the way back up the well.
Unexpected Discovery (cont.)
Head back over to the first cave you encountered and climb up the rock wall to the right of the entrance. Jump up to the cliff edge above and scramble to the right until you can climb up again. Collect the salvage box here, then squeeze through the crack in the rocks and climb up the rock wall on the other side. Move all the way to the left and drop down to the snowy ground, then scramble up the wooden plank on the side of the cliff.
Circle around and jump over the gap, then climb up the next wooden plank and the rock wall above it. From here you can disable the communications tower and collect more feathers from the bird’s nest sitting on top of it.
Slide down the nearby zip line, then drop down to the ground and look to the left to see a snowy cliff ledge that you can climb up to. Climb up to the ledge, then jump up to the higher ledge above to find the last communications tower. You can now go back to the person who gave you the side mission and retrieve the Lock Pick. Open the locked chest nearby the quest giver to find the last piece for the Semi-Auto Pistol.
You’ve now done all of the side objectives you can complete at this point, so use the camp fire to travel to the camp closest to the main objective (the one near the cave you haven’t been in yet). Scramble up the nearby wall as you head toward the main objective on the map.
Jump across the gap and latch on to the rock wall, then climb down to get the mushrooms. Climb up the next rock wall near the mushrooms. When you reach the top, continue to follow the path until you reach the next gap. If you’re looking for as much loot as possible, do not climb up the next rock wall. Instead jump on the wooden platform ahead, but quickly jump across to the far side as the wooden platform crumbles under your weight. Continue up the winding path, collecting loot, until you reach the top. If you don’t care about loot, you can just climb up the rock wall as a short cut.
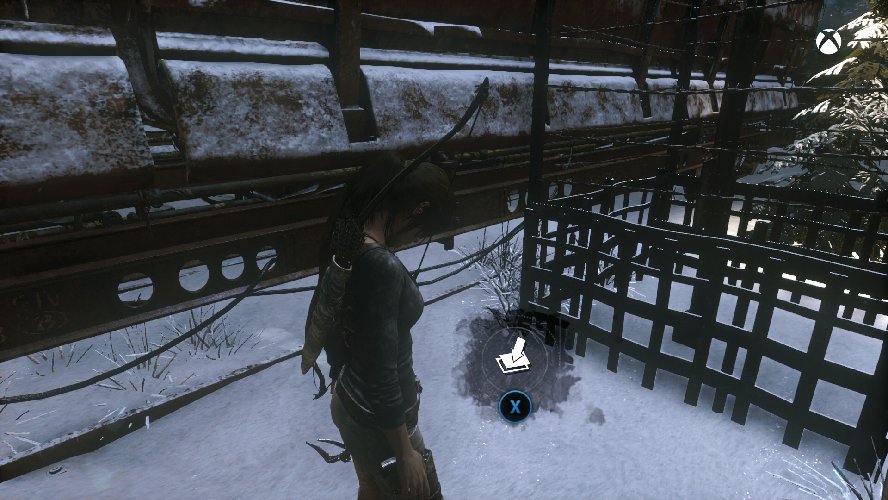
There are several guards at the top of the hill near the building. Clear them out then move around to the back side of the structure to find some loot hidden in the snow.
Circle around the porch to find a mural on the wall, then pry open the door so you can head inside the building and into your first supply shack. You don’t have enough coins to buy anything yet, but remember the location of the supply shack.
Go through the other exit and climb up the ladder. Circle around to the left and zip line down to the ground and watch a cut scene.
Prison Break
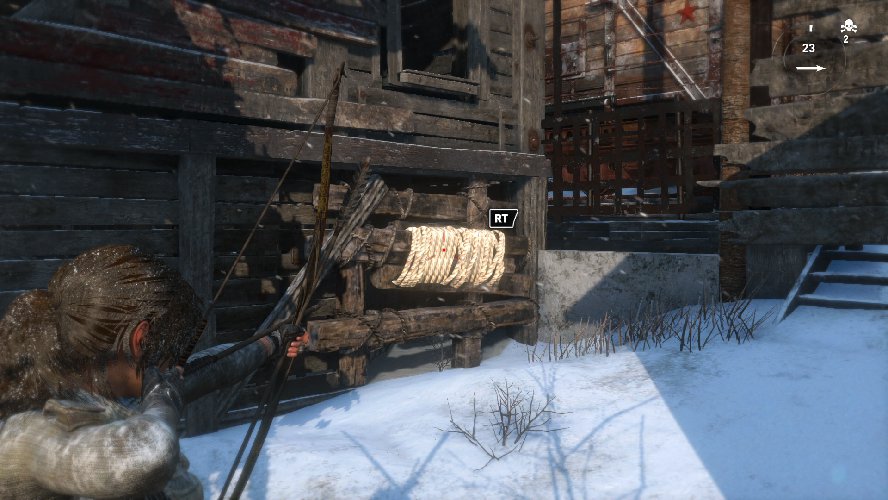
After the cut scene, pull off the pipe in the corner, then break the weak wall to the left. Walk over to your bow to obtain the Recurve Bow and Rope. Head back through the crack in the wall then aim your newfound rope at the wrapped rope above the cell door. Pull down the grate at the top and crawl through the opening.
Examine the recorder on the desk, then access the item box around the corner to the right to find a Cigarette Case. Follow the fellow prisoner into the room with the projector. Loot the room to find a Compound Bow part, then examine the projector and go through the slides. Head out the door in the far left corner, collect the salvage to the left of the stairs, then head up the stairs and climb the ladder at the top and out the window.
The Way Out
After another cut scene, collect the wood at your feet, craft some arrows and prepare to take on the soldiers in this area. Move over to the far right to find some bottles by the ladder. Take cover here and kill the soldier patrolling the far wall. Make sure to use Survival Instinct and avoid killing soldiers who can be seen by the other guards (highlighted in red).
Move over near the truck and take out the two guards in the watch towers and the guard repairing something on top of the roof. From here you can use bottles to draw the attention of the other guards and pick them off one by one. Once all of the guards are down, be sure to loot the area before you head into the building to the next destination point.
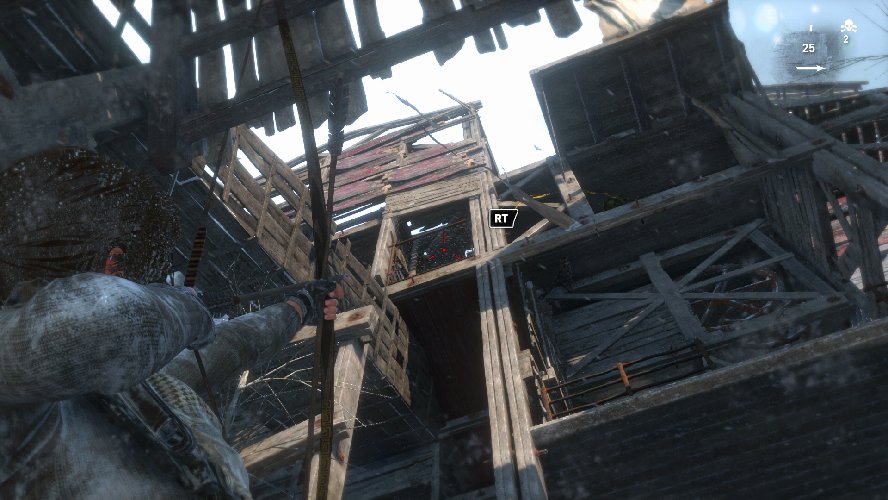
When you’re ready, head inside the building, examine the recorder on the table, then access the gate controls. At the next destination point, climb up next to the wooden pole and shoot the log wrapped in rope above. Take the new zip line to the top, then jump over to the window sill.
Jump over to the next window to the right, then jump up to the hand grip above and move around the corner to the right. Head into the window for another cut scene, then wade through the water until you can climb up at the end.
Get Out of Dodge
Examine the recorder on the table near the door and the map in the far right corner, then head through the door. Open the box on the far side of the next room to find a Patch, then use a rope arrow to create a tether and crank the wench to pull it tight. Cross through the water and try to open the door to obtain an Assault Rifle.
Immediately blast the guards blocking your path. Several more soldiers will approach, but move through the house and continue through the area as you blast more enemies. When you make it through the next building you’ll watch another cut scene, then you need to make a shrapnel grenade and toss it at the enemies standing in front of the building ahead.
Make your way through the building and collect the recorder in the far left corner. Head down the hole in the floor and move through the water, then the deep snow. Stop at the camp fire before continuing on through the gate ahead.
Engage the bevy of soldiers that attack in the next area. Utilize the cover available here and move away when bombs are thrown in your direction. Clear away the enemies then move forward for a quick cut scene followed by more heavily armored soldiers attacking. You need to shoot these soldiers in the legs to open them up a bit as head shots will not be as effective.
Once you removed the immediate threat look in the far right corner to find some loot hidden in the snow, then continue through the doorway in the far left corner. When you enter the next building with the dead soldiers, examine the recorder on the table, then head down the stairs. Open the container at the bottom of the stairs to find a Medal, then examine the mural on the other side of the broken wall. Head into the train yard and look to the left to find more hidden loot in the snow.
Fugitives
Move in the opposite direction and climb up into the train car for another cut scene. Quick jump up into the next car and run through until you get another cut scene, then swim as fast as you can through the metal bars and up to the hole at the surface to watch another cut scene. After the cut scene you need to run and jump without stopping to avoid fire from the helicopter. Every time you jump to another platform you need to initiate the run again to stay ahead of the helicopter.
Alone Again
After the cut scene, leave the cave and open the box on the left near the exit to find more crafting resources. Slide down the zip line, then speak to the main near the fence if you wish to accept the Dangerous Territory side mission. Completing the mission rewards you with a Pistol Sight, which increases the zoom factor of your pistols.
Dangerous Territory (Optional)
Reward: Pistol Sight
If you wish to complete the side mission, climb up onto the snow to the left of the quest giver, then move left across the froze river bed. Move into the cave ahead and kill the wolves that attack. The assault rifle or poison arrows are your best bet against the wolves at the bottom of the cave. Clear them out, then loot the ore and mushrooms and head back to the quest giver to receive your Pistol Sight.
Alone Again (cont.)
Head out of the fenced area and make your way south to find another cabin (you’ve been here before). If you speak to the man inside you can accept The Unlucky Ones side mission, which rewards you with an Infiltrator Outfit, which reduces the delay before health regenerates if you’ve been injured. Accept the mission as it isn’t too far out of your way.
Continue moving south toward the main objective. When you reach pass the truck and reach the cliff side, instead of climbing up the nearby tree to the top of the cliff side and moving toward the main objective, head right across the broken wooden bridge where a truck lays in the ditch. This is the way toward the side mission.
The Unlucky Ones (Optional)
Reward: Infiltrator Outfit
Head down toward the fallen truck and jump up onto the wooden platform above. Continue across the log and use the zip line to reach the lower area to the right. Climb up the rock wall and to the top of the rock pillar, then jump over to the adjacent rock wall and climb up again. Collect the loot in the basket at the top, then move left and use your bow and rope to create a zip line to the next rocky ledge.
Drop down, then move to the end of the ledge and climb up the rock wall to the right. You need to jump to the right and latch on to the next rock wall in order to make it up to the top. When you reach the top, climb the tree to the right and jump over to the ledge.
Use your arrows to kill the guard to the right, then look left to see a second guard need the structure. Kill him as well, then look to the left of the second guard to find a dead man with a satchel. Examine the satchel to find a new map, then head into the small opening near the second guard.
Collect the loot from the item basket to the left, then head down the stairs. To the right are two more guards. Use a poison arrow to take them both down at once, then head through the next doorway. It will look like a third guard is hunched over by the window, but he’s alive and well. Take him out before he can hit you with a surprise attack, then unlock the cell (using your lock pick tools) and free the two prisoners inside (untie them from the back of their chairs).
At this point you can head back the way you came and report to the quest giver to receive the Infiltrator Outfit. You can speak with the quest giver again to receive the next optional mission, Misguided Intelligence. Complete the mission to obtain a Shotgun Spreader Choke.
Misguided Intelligence (Optional)
Reward: Shotgun Spreader Choke
This is a fairly easy side mission. All you need to do is head east toward the location marked on your map. You’re looking for the bird, which is easily spotted if you activate Survival Instinct once you reach the designated location. Find the bird and then shoot it down with an arrow. Don’t get too close or it will fly away and you’ll have to chase it down again. Once you’ve shot down the bird, simply head back to the quest giver to receive the Shotgun Spreader Choke. You don’t even need to examine the bird after it’s been shot.
Alone Again (cont.)
When you reach the destination point on the map, several Soviet soldiers are dead around the compound. To the right of the main gate, one of the dead soldiers holds an ammo clip if you need to replenish your ammunition.
Once you’re inside the main gate, examine the monolith to the left and the mural on the wall just beyond it. Head to the far right corner and use your bow and rope to clear away the wood blocking your path. There are some salvage supplies in the bed of the truck directly ahead, and more Russian notes in the building behind the truck, but to the left you’ll see another rope area. Use your bow and rope to remove the boards and gain access to the area below the building.
Collect the salvage box and coin cache below the building, then look between the train cars to find another salvage box. Climb the ladder on the other side of the train car (closest to the truck), then jump over to the adjacent rooftop as you make your way toward the ladder ahead.
Before you reach the ladder, look to the left to see another area where you can use your rope and bow. Remove the boards and head into the structure to find a salvage basket, locker and herbs. Head back out and climb up the ladder, then move right and remove the boards so you can continue.
Pick up the salvage in the room ahead, then look to the left to find another recorder on the table. Climb up the ladder for a short cut scene, then hold RB to make a Molotov Cocktail and throw it at the enemies in the next room. If you miss or need a second one, there’s another bottle on the ground behind you.
Move into the next room and loot the locker and other items on the ground, then head up the stairs in the far left corner. There’s more loot in the cells here, but you can’t access them from this room. Pick up one of the bottles and create a Molotov Cocktail to throw at the boards and cloth blocking your path.
Once you’ve removed the blockade you’ll see that the floor near the entry glows when you use Survival Instinct. Make note of this, then head into the next room and circle around the dead soldiers to find an item box on the table to the left. Examine the box to find a Hero of the Soviet Union Medal relic, the keep moving until you see another point where you can use your rope and bow to clear away some boards on the right. There’s also a locker in the corner of this room and a mural on the wall.
Go down the newly revealed path and open the chest to the left to find a Submachine Gun part. Drop down and leave the building, circle around to the left. There’s an entrance here but you need explosives to remove the blockade. Unfortunately, Molotov Cocktails don’t work here. However, if you look high above you’ll see another spot where you can use rope to clear away some boards. This is the same area you made note of before where the floor boards glowed.
Head back up to the new removed floor boards and drop down to find some loot, including an item box that holds the Order of the Red Banner Medal relic. Once you’ve looted the area, go back up to where you were dropped down and move to the edge of the building where the ground is marked in red (to the right is the area where you removed the boards and slid down to the hidden area).
Aim your bow at the hanging rope coils ahead to swing across to the far side. Collect the salvage on the other side, then remove the rope and boards holding up the mine cars ahead. Jump across to the cleared area and move along the narrow beam. When the beam starts to collapse, jump over and latch on to the rock wall ahead.
Climb to the left, then scramble up to the top when you reach the wooden plank on the wall. You need to climb up the ladder connected to the large steel cylinder here, but first collect the salvage behind the cylinder. When you reach the top, wait for the guard’s head to appear in the structure directly ahead and take it out with an arrow or bullet.
Instead of jumping over to the structure where you just killed the guard, look left to see a bird’s nest on a pole. Jump over to the pole, then go left to climb up the wall. Cross the narrow beam, then use the zip line on the far side to reach the platform below. Collect the Compound Bow part from the chest to the left and use the rope and bow to create a zip line on the other side of the platform.
There are several enemy soldiers in the next area. Use the cover here to take them down with the help of a few Molotov Cocktails (using the bottles on the ground). Once all of the enemies are down jump over to where they were attacking from, loot the area, then climb up the wooden plank on the wall to reach the area above.
Head up the stairs to the left and loot the locker at the top, then move around the corner and climb up where the wood is painted white. Climb up the ladder at the top, and examine the recorder on the table to the left. Stand above the ladder and look to the left to see a snow-covered pole sticking out from the side of the building. Jump over to it to reach the platform below and find a box on the table that holds a Pillbox relic.
Grab a bottle in the corner to make a Molotov and clear the debris blocking the doorway, then head up the stairs to get back to where you just were. Move over to the red metal area on the ground and use your bow and rope to swing to the adjacent platform.
Head down the stairs and into the room below. Open the chest to unlock the Bow, then climb up the steel siding in the far left corner. Move left and through the small opening to find three men in the fenced room ahead. Sneak around to the right to find a can on the ground that you can craft into a grenade, then toss it right in the middle of the three guards to take them out in one blow.
Loot the room, then pick up a bottle in the far right corner and toss a Molotov toward the cloth debris in the corner. The next area is littered with enemy soldiers. You need to work your way into the next room and up the stairs as you face off against soldiers at every turn. There are plenty of bottles and cans around that you can craft into Molotov Cocktails and grenades, and you have your guns and bow as well. Just stay behind cover and take your time as you go so you don’t have to engage too many enemies at once.
Once you’ve cleared the main group of enemies, several more enter with riot shields. In this room there are bottles in the far right corner by the railing, and in the far left corner (from your starting position after the cut scene). Don’t worry about cover because the riot shield enemies only throw grenades from a distance and use their batons at close range. Simply run around grabbing the bottles, crafting them into Molotov Cocktails and then throwing them at the enemies.
Continue on to the Abandoned Mines or head back to our Rise of the Tomb Raider game hub for more tips and tricks to get through the game.


