Valiant Hearts: The Great War Free Walkthrough
Chapter two begins with players in control of Anna, the kind lady who saved Emile, Freddie and Walt earlier in their travels.
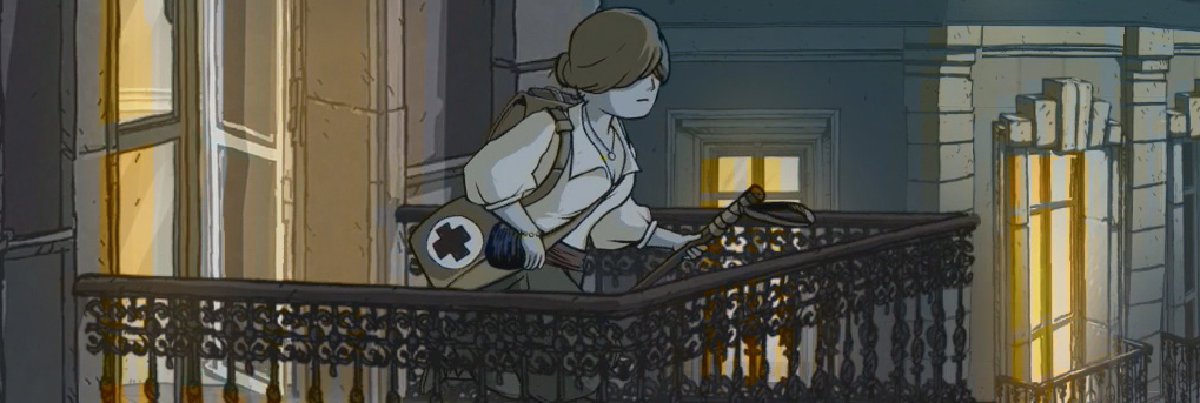
As soon as you have control, grab a lump of coal from the fire and use it to knock the key out of the bird’s grasp on the balcony. Gather up your reward, then use the key to unlock the door and head downstairs to the street.
Your first order of business involves grabbing the wrench with the shape of a triangle on it. In fact, it sort of looks like a star, but it’s clearly the only one that will fit the water pump a short distance to your right. Once the water is flowing, it’s time to move on to your next task.
Head to the far right where you’ll find the wheel of a car laying on the ground. Pick it up, backtrack just a bit and then place it on the vehicle. Next, use the square wrench to lower the jack and put all four tires on the ground.
Before the car can go anywhere, you need to get some water to stop it from overheating. Head back into the original building you came out of, then approach and help the little girl with her medical issue. Once the healing mini-game begins, press the buttons indicated on-screen. If you’re successful, the woman will put an empty jar on the desk. Retrieve the jar, head outside and fill it up at the water pump, then use it to get the vehicle in working order.
This little driving adventure is exactly like the last one, only instead of bombs, you just have horrible drivers and random barrels. Just imagine you’re in L.A. or New York. Avoid the other vehicles and enjoy the best music in the game thus far.
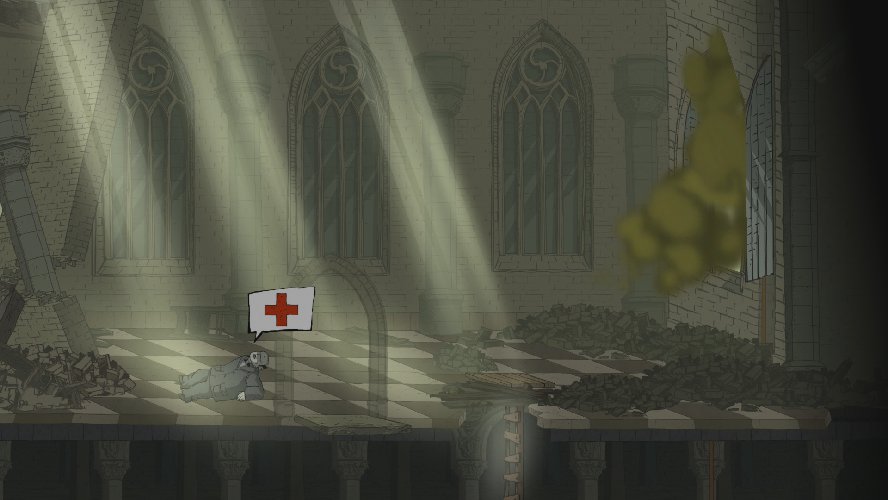
Now that you’re back in control of Anna and ready to help the wounded soldiers on the Battlefield, go forward and drag the soldier out from underneath the fallen horse. Lean down and give him a little bit of first aid, pressing the buttons indicated on-screen to sooth his pain.

Following a short cut scene, you’ll have four soldiers to help. Run forward and into the first tent. Go right and grab the saw out of the locker, then approach the soldier on the left side of the room. Interact with him in order to start the first aid mini-game. Once he’s healed up, that’s one down and three more to go.
Exit the tent, then run all the way to the right and pick up the wooden cross on the ground. Drag it back to the solider burying his comrades and give it to him. This will free up the shovel. Grab the shovel and go all the way back to guy sitting to the left of the tent entrance. Give it to him to heal him up.
Run back to the right and pick up the empty jar next to the soldier on the ground. Take the jar back into the tent, go to the far left side and place it on the ground. Head back out, turning left and going through the gap in the wall. Pull the chain to fill the jar with water, then retrieve it from the first tent. Deliver this to the solider sitting on the ground to the right of the tent entrance.
For the final soldier, go retrieve the saw you were using to assist the first wounded man. Head back into the area where you pulled the chain to fill the bottle. Use the saw to cut down the tree to the left, then take the scarf and deliver it to the final war casualty all the way to the right.
Now that you’ve helped all four of the wounded combatants, a fifth one, this time German, is in need of some help. Head back to the bridge and climb down the ladder to pull the enemy soldier to safety. Give the man a little bit of medical attention to finish off this part of the chapter.

Run forward to find a little girl who can’t locate her mother. Head into the building, then turn left and go outside into the yard. Climb up the tree, across the branch and smash out the window to reach her. Apply a little bit of first aid to reunite her with her daughter, then head back to the street where you began this portion of your journey.
Move to your right until you find a man on the ground with a set of keys attached to his waist. Grab the keys, being very careful not to touch the gas, then backtrack and open the door to the building. Head inside, snag gear from one of the two cabinets on the first floor, then head upstairs.
When you reach the next level, climb the ladder and slap the gear onto one of the empty notches. Go to your right, pick up a larger gear, then do the same with it as you did the first. Climb up one more ladder and start whacking the bell with your walking stick. This will cause another gear to fall from the roof. head back down the ladder, retrieve it and place it in another vacant slot. Set the larger gears on the far right and left, with the two smaller ones in the middle. Once this is done, ring the bell to send it crashing through the floor.
Make your way back down to the ground level where you’ll see several people escape the basement. Climb down the bell and approach the lever on the bottom level. Pull it to open a window and release the gas from the room above. Climb up the ladder and apply some first aid to a sick man laying on the ground. You’re turning into quite the good samaritan.
Use the door and head back outside, placing yourself on the right side of the gas cloud that blocked your path earlier. Run past the control that’s missing a lever and the rope dangling into a well. Head into the doorway of the building and make your way to the third floor. Run into the room on the right and hit the painting on the wall with your walking stick.
The painting will fall to the ground, revealing a key. Grab the key and head back to the first floor, pushing a dresser to the far right before heading outside where you’ll find the fallen picture. Note that it has a Roman numeral and number on it. Keep this in mind for later. Head to the right, taking note of the Roman numeral and number on a second painting after you unlock the gate. Climb down the ladder, recording the Roman numeral and digits on the final painting.
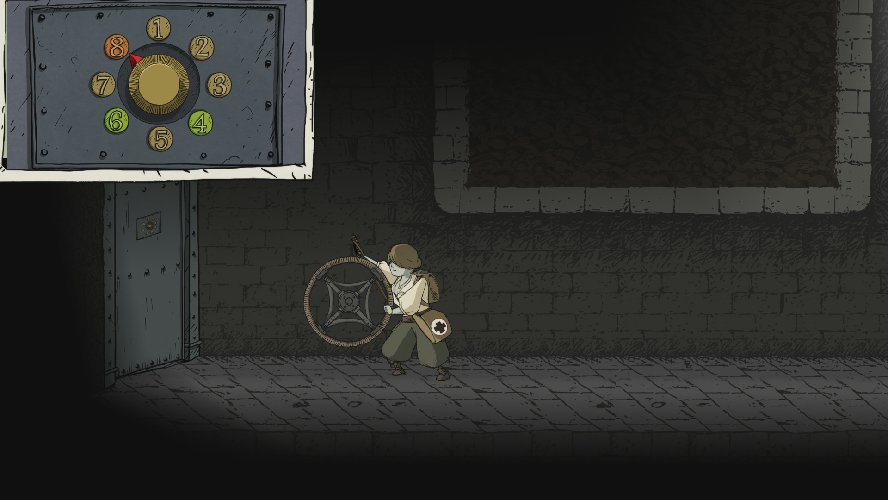
To your left you should notice a safe. The Roman numerals you’ve been collecting indicate the order that the combination requires. The numbers are the combination itself. Still, here it is in case that’s why you’re reading this article.
- 4 – 6 – 8
When the gate opens, head inside to find a lever and a few out of reach hand grenades. Head all the way back to the ground level, into the house and then out the front door. Go to your left where you see a device missing a lever. Fancy that! Use the lever to activate the lift and bring the grenades up to where you can access them. Snag a grenade, run back into the house and outside to the right. Toss your handheld explosive up to the rubble on the second floor (but not onto the victim) to clear the debris. Head back inside, then through the now clear doorway to provide some much-needed first aid.

Move forward using the bush for cover. When the guard turns his back, sneak to the next bush or use Walt to distract him. Continue using this method until you find an injured soldier in a bush. Give him some medicine and then continue on your way.
Mosey along until you reach a fallen piece of debris with a lever on the far right side. Stand on the left side of the debris, then send your canine companion to snag the handle. Head back to the left and use the lever to open the door.
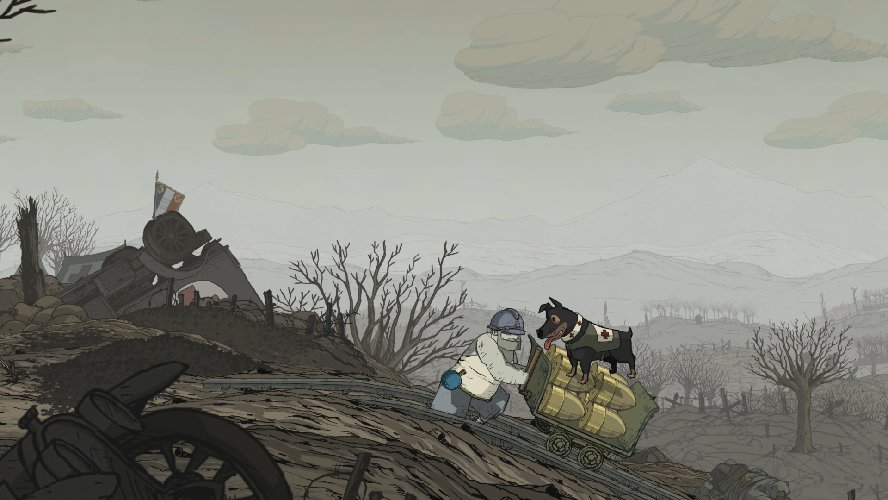
Once you reach Karl, it’s time to help him out from under the wreckage of Baron Von Dorf’s blimp. Go as far to the left as you can, passing the ladder and continuing on until you find a tube. Tell Walt to crawl through and get the can on the other side. Backtrack to your right, heading up two different ladders until you see an artillery shell hanging from a rope. Throw the can at the shell, knocking it down and causing a decent sized explosion.
Descend only one of the ladders, then pull the rope to lift the debris off of Karl. As you’re holding the debris up, have Walt drag him to safety, then meet him on the ground to administer first aid. This will cause A Glimmer of Hope to unlock, a trophy and achievement for saving Karl’s life.
Start booking it to your right until Emile and Freddie are separated by some flaming debris. They will now be on opposite sides of the fence from one another, but you’ll have to use them and Walt as a team to complete the next portion of the game.
When Emile reaches a body of water he can’t cross, send Walt to Freddie’s side, allowing you to play as the big American brute. Instruct your canine pal to pull his lever at the exact same time you do, closing the makeshift dam and allowing Emile to pass.
Continue moving along until Freddie runs into some debris. Knock the debris down with your raw power, then send Walt back over to hang out with Emile. Now that you’re using Emile again, wait for the guard to turn his back and hit him in the head with your giant ladle. Snag a stick of dynamite from the box and give it to Walt, continuing your custody battle for the dog by sending him back to Freddie.
When playing as Freddie, go to your right and throw the explosive in the flaming debris. This will move it out of your path and allow Walt to dig up a knife buried in the dirt. Let your pup keep the knife, sending him back over to Emile, then moving to your far right and placing it in the control box to act as a lever.

This next part likely took just a bit longer than it should have. It would seem there is a partially functional propeller blocking you from meeting up with Anna and Karl. Before you do anything, have Walt grab a stick of dynamite from the box on the right. Take the explosive, then crank the wheel and move the flag to the left, catching it on fire. Then, crank the wheel to move the flaming flag over top of the propeller. Lastly, throw the stick of dynamite through the flaming flag, landing it on top of the engine. If you do this, you’ll be able to pass safely through to the next part. The catch, however, is that the flame on the flag will eventually go out, causing you to start the process over again from scratch.
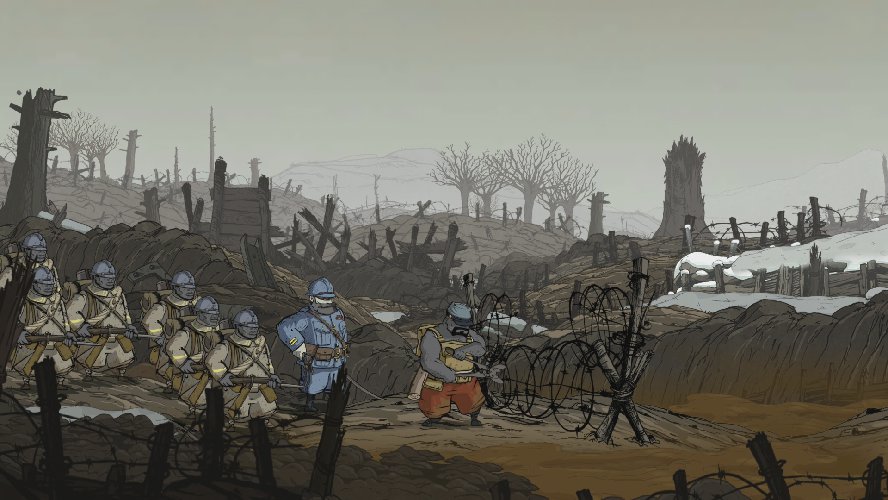
There are several tasks that need to be completed in this part of the chapter. You’ll work with Emile and Walt, so head to your left, up the ladder and grab the dirty sock off the barbed wire fence. Go back down the ladder and continue on your right, stopping at the large pot of water two soldiers are washing dishes in. When neither one of them are looking, toss the sock into the pot to get it clean. When one of the soldiers pulls the sock out, snag it from him and head back to your left, drying it off on the wood stove as you enter the tent. Grab the sock again, trading it with the man at the far left of the tent for the ink bottle.
Next, head back to the right, picking up a piece of bread from the soldier feeding the troops. Continue going right, dropping it into the dish sitting on the table near the bird. Once the bird drops a feather, pick it up to progress the story just a little bit further.
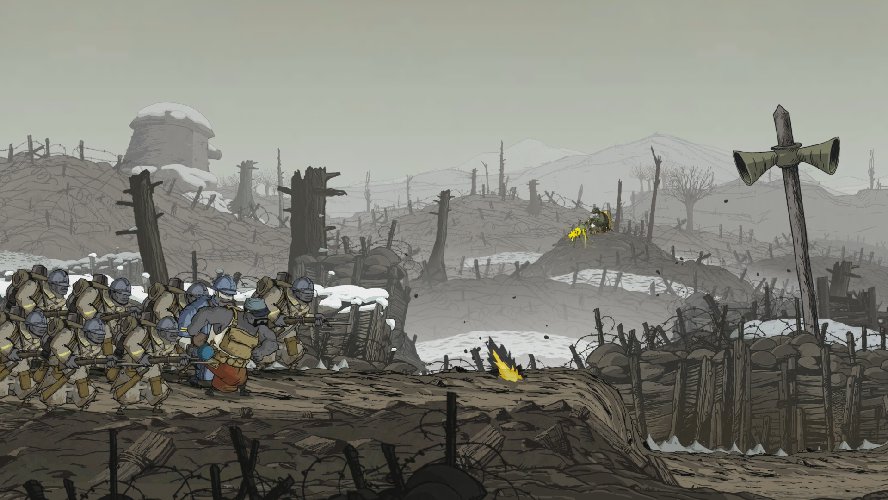
You’re now back in control of Freddie, and things aren’t looking good. Immediately head to your left, making sure to dodge the incoming bombs. Even when you get to cover, continue to dodge the incoming ordnance until the soldier on your left allows you to proceed. When you come to the base of a large dirt pile, wait for the bombs to blast a hole in the ground, then go through it to the far left. Stand on the platform, then crank the wheel to raise yourself back up to ground level. Keep moving left, since the bombing doesn’t stop until you’re huddled in a bunker with some of your comrades.
Head back outside and all the way to the right where your buddies are blocked off. Among them you will find a wooden chest. Drag it to the left and step on top so you can snip a rope holding a pile of wood in some debris above you. Snag a stick of wood from the ground, then throw it over the dirt pile blocking your friends, detonating the unexploded bombs and clearing a path.
Move to your right until the ground gives and you fall down. Go left and smash through some debris to discover what resembles a coin. Pick it up, then go back to your right and cut through the barbed wire fence. When you find a cart full of artillery shells, attach the wheel, then drag the cart up the hill. Once you reach the top of the incline, let go of the cart to blast the debris that blocks your way forward.
A short distance later you’ll come across some sticks on the ground. Pick one up, then use it to knock the box of grenades from the speaker system above. It will take several explosives, but keep tossing them on top of the dirt pile until they blast through to the buried shells and again clear the way for your advance.
As you continue the journey, you’ll soon come to a machine gun nest. Wait for a break in the firing, then hop in the trench. Use a grenade to blow up the shells in the loose dirt in front of you, then carefully move into the next foxhole when it’s safe to do so. When you come to a tree with a cart in it, throw sticks into the cart until it crashes to the ground. Once it does, hide behind it, picking up another stick, then using it to explode the shell stuck in the tree just ahead of you. From here, simply cut the barbed wire fence blocking your way and head inside to (relative) safety.
It’s time to get back to work with Emile and Walt. Run forward, then command your canine to fetch you a grenade, then double back until you see a wheel stuck in a tree. Use the grenade to get the wheel down, then attach it to the makeshift crane that sits behind the artillery. Continue left and up the hill, then push the cart full of shells all the way to the bottom.
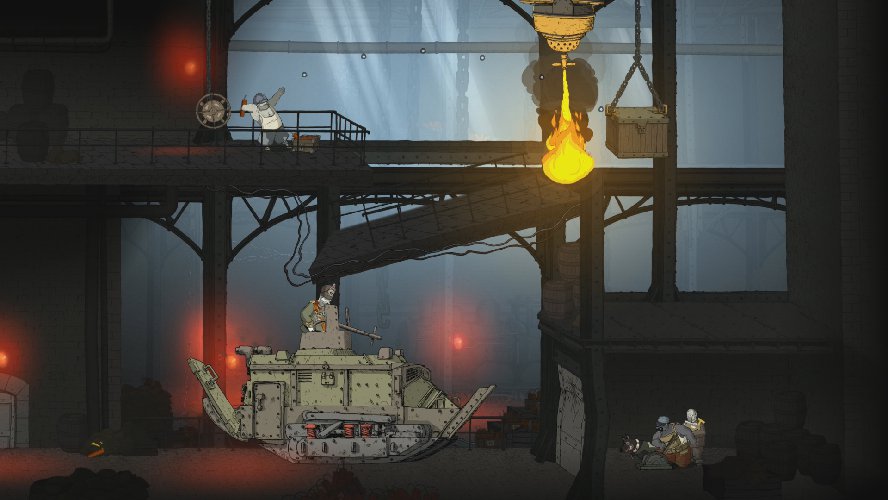
Next, use the crane to pick up one of the shells off the cart and load it into the artillery gun. Head all the way back to the left, into a tent where you will dig through some loose dirt to reveal a locker. Open the locker and pull out a set of keys. Use these to open the locker that is below the gun. Grab the gear from the locker, then place it into the vacant spot to get the weapon fully functional again.

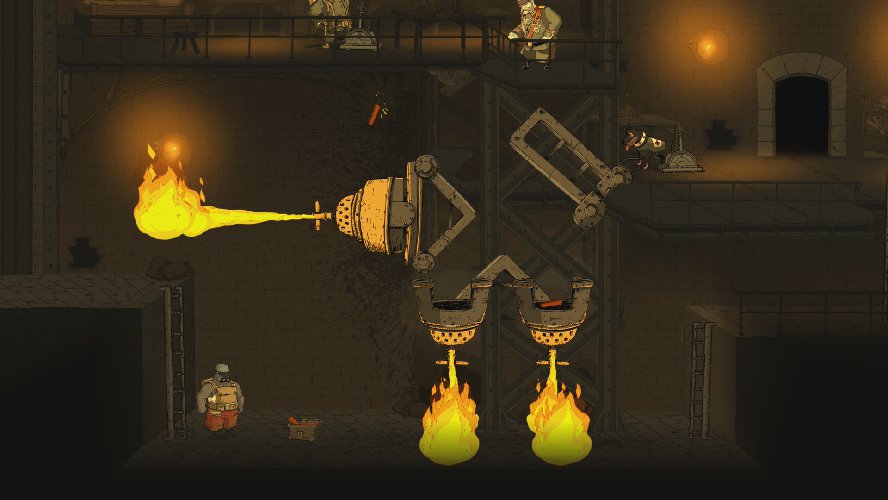
This next part, by far, took us the most time of any puzzle or situation in the game. We likely fired a few dozen rounds before we figured out what we were doing. For that reason, the image above will show you exactly where you need to aim to save Freddie and his comrades. Once you make the shot, the lads will be reunited and back on the trail of Baron Von Dorf.
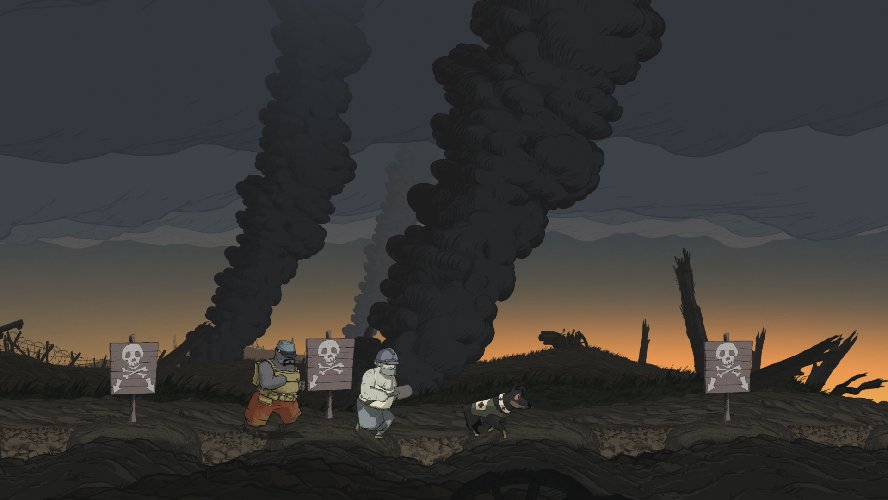
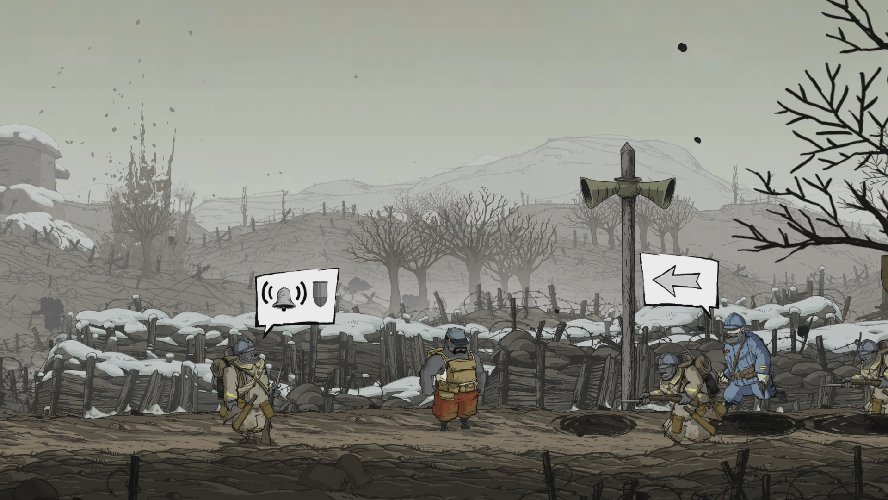
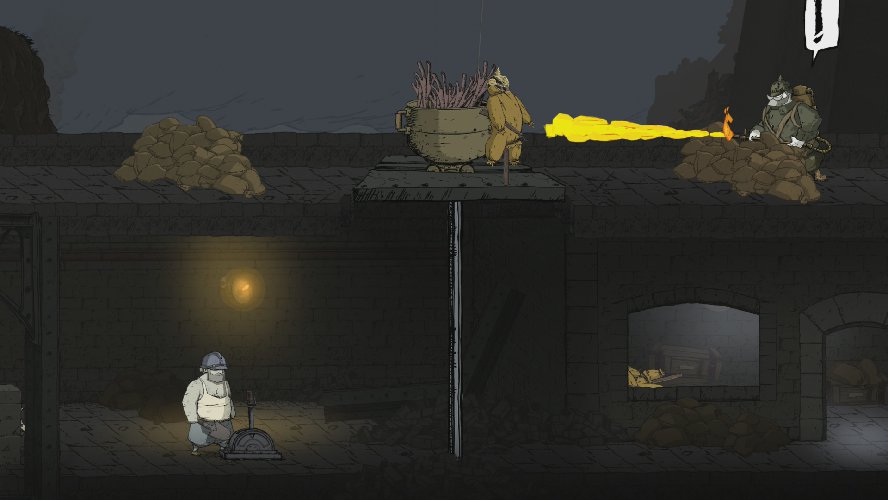
With that artillery nonsense out of the way, it’s time to take back Fort Douaumont. Start running forward until you come across signs near loose dirt. You’re looking for the sign that doesn’t show a skull and crossbones. If you’re not sure, look at the image above and dig there. Just be careful to wait for the smoke to subside, then pass through to the very bottom level.
Continue burrowing until you find yourself blocked by a never-ending blast of smoke caused by a German soldier feeding a fire. To put a stop to this, command Walt to distract him, then tunnel under and into the room below the Nazi guard. If Walt doesn’t have the guard’s back to the ladder, adjust until he does, then sneak into the room and smack him in the skull with your ladle. Well done.
Climb the ladder near the wood stove and pull the lever to switch the pipes around. Go back down the ladder, then move to your right and pull another lever to drop a platform down. Push the pot of wooden sticks onto the lift, then go right and into the room with all the dummies. Grab a dummy, putting it on the lift, just to the right side of the pot. Pull the lever again to raise the lift, causing the German soldier to bust out his flamethrower and set the wooden sticks ablaze. Bring the platform back down to you, then push the flaming sticks all the way to the left and in front of the wood stove. This will cause smoke to rise up and neutralize the machine gunner pinning Freddie down.
With that out of the way, use the lift to transport Walt to ground level, then have Freddie smash through the debris on the left side. Command your canine companion to snag you a stick of dynamite, then toss it at the dude with the flamethrower (it must pass through a flame to light the fuse) to clear a path forward.
Continue traveling to the right, then down a ladder where you’ll take cover behind some bricks. Wait for the guard to turn his back, then give him your best body-check to take him out of the equation. Move along until you reach a window with a second Nazi soldier. When his back is to the door, sneak in and give him your best stealth takedown.
When you reach the end of the hallway, go through the dark door, then climb down the ladder and snag a stick of dynamite from the box. Head back up the ladder, then toss the explosive through the flame and to the base of the door. This will blast the door open. Now use the ladders to circumvent the flames and pass through into the next room.
Passing through into the next room will put Freddie and Walt face to face with Baron Von Dorf again. Of course, just to be a jerk, he starts shooting nasty flames of death at you. It’s fairly easy to avoid though, so wait for a break and then sprint to your right and get yourself a stick of dynamite. Staying to the right of the flame, toss your explosive through and to the left as it’s active, landing at the steel door. This will blast it open and allow you to command Walt to activate a second flame. Don’t do this yet.
This next part is tricky, but we have a helpful picture above that should give you a clear idea of what you need to do. For this, timing is everything. As the original downward facing flame is headed from right to left, command Walt to press the lever that activates the diagonal flame. Then throw a stick of dynamite through the diagonal flame, landing it inside the bucket that sits atop the other one. Voila!
Your expert dynamite tossing skills will cause Baron Von Dorf to retreat. Of course, follow him to the right until you reach another collection of flaming contraptions that you need to disable. Head down the ladder and grab a stick of dynamite from the box, tossing it through the flame and into bucket on top of the furthest barricade of fire.
With one more to go, command Walt through the tunnel and to the lever on the other side. Have him activate the lever in order to get a clear shot at the first contraption. As soon as the horizontal fire is active, toss another explosive through it and into the one remaining bucket. This will free you up to pass through and climb the ladder at the right side of the room.
The coward continues to run. Run into the room and pull the lever to close the door and slow Baron Von Dorf’s advances. As soon as you switch back to Emile, run forward, going down a ladder and taking your first door. Climb another ladder and then burrow your way through the loose dirt on the right side of the room. Continue to run right, tunneling under a pillbox and going through another door. This will lead you to the area where Baron Von Dorf is trying to kill your friends, and you don’t have much time to stop him.
Your first order of business is to turn the wheel, repairing the broken pipe and directing the flame to shoot downward. Lower the box so it’s just a bit above the bottom of the flame. Lastly, start grabbing dynamite and whipping it against the box, causing it to trickle down the slanted floor and onto Baron Von Dorf’s tank. You’re aiming for the back, but just toss them as fast as you can, and eventually you’ll take the big Dorf down, ending the chapter and unlocking Cease-Fire, a trophy and achievement for finishing the Douaumont Fort mission.
Valiant Hearts: The Great War Free Walkthrough


